Firstly, I’d like to give thanks to Claude Schwarz and the whole team involved in the PiStorm project. Without their hard work, dedication and devotion to the project there would be no PiStorm32. We, I, salute you all. You can follow Claude on Twitter https://twitter.com/Claude1079
Secondly, the reason for this guide. Unlike many other “plug and play” accelerators the PiStorm is a different beast. Yes, it offers untold performance and features usually reserved for machines way beyond that of a humble 1200, but it also assumes a certain amount of knowledge to get it working.
This guide is designed to help overcome that barrier and help those that might need a little help in the right direction. I know there is a beautiful EMU68 image that’s provided by most suppliers but I didn’t get the PiStorm32 to play around with CaffineOS. I wanted a fully featured Workbench with all the extra features, something to feel like “traditional” hardware but with the speed and extras that are often beyond most people’s budgets. If you’ve come here for a CaffineOS guide then you’re going to be disappointed. My series of guides, like my previous PiStorm 500 guide, will be dedicated to the “classic” PiStorm setup “Musashi”.
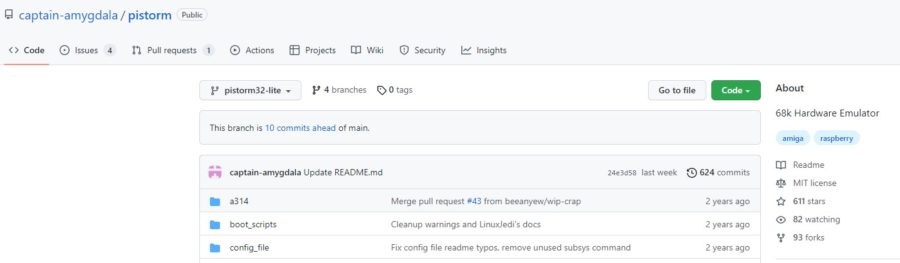
Note – my steps below are taken from https://github.com/captain-amygdala/pistorm/tree/pistorm32-lite – In no way am I trying to take you away from that guide, I’m just trying to help with a guide that might help those of us that might need a helping hand. As always, please feel free to leave feedback in the comments or reach out on our socials.
For clarity. This guide was produced on 28/2/2023. The Raspberry version is Bullyeye which was released on 2023-02-21. The git is currently shown as below
I’d also like to acknowledge Lemaru over on the official discord. This article is assumed only as working at the time it was created. Things go out of date and I will do my best to keep on top of it. Please let me know if there are any issues with this guide and I’ll update it as needed. You most definitely need to check out the discord using the link https://discord.com/invite/j6rPtzxaNW
With that out of the way, let’s go!
SD Card setup
Which SD card?
I’d recommend an SD card of at least 32GB in case you want to add multiple hard file files going forward from a known reliable brand – such as
- Grab your microSD card and pop it into your computer
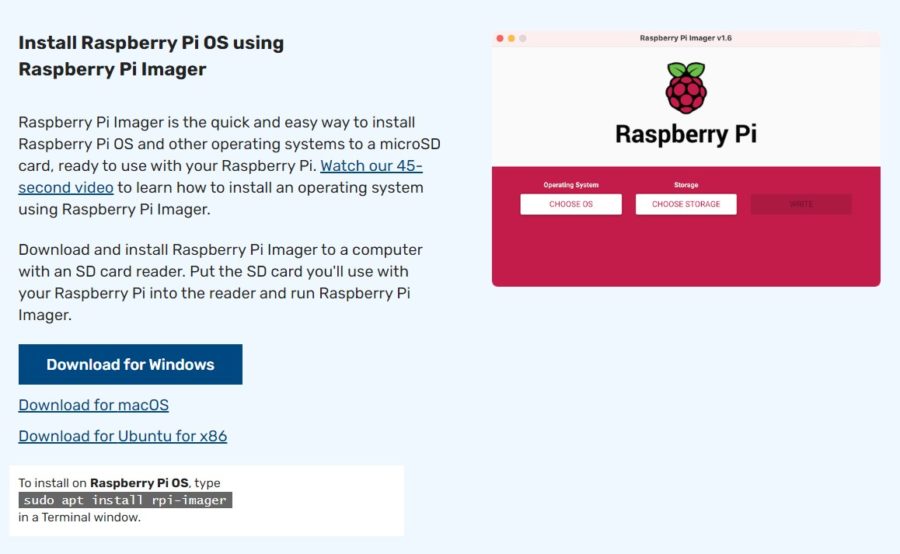
- Download the Raspberry Pi Imager software from here https://www.raspberrypi.com/software/
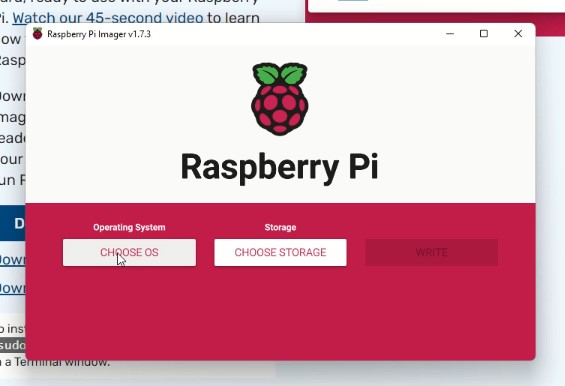
- Once downloaded, run the setup. For windows, this was named imager_1.7.3.exe
- Click through the setup wizard and be sure that “Run Raspberry Pi imager” is selected at the end of the setup. You can click finish at that point.
- Raspberry Pi Imager will now open. Click Choose OS > Raspberry Pi OS (Other) > Raspberry Pi OS Lite (32-Bit)
- Click Storage > Select your SD card. Please be careful and make sure you select the right drive. Looking at the storage space might help you with that (i.e. 15.9GB)
- Click Write and Yes
Choose OS
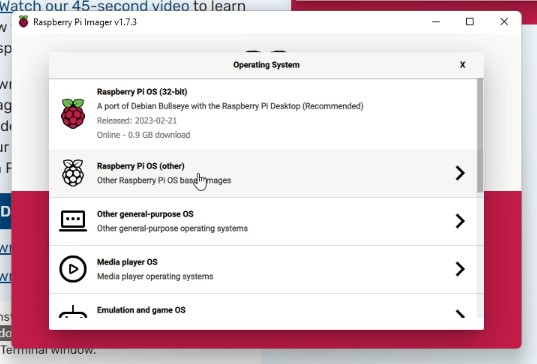
Rasperry Pi OS (other)
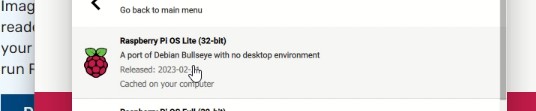
OS Lite (32-bit)
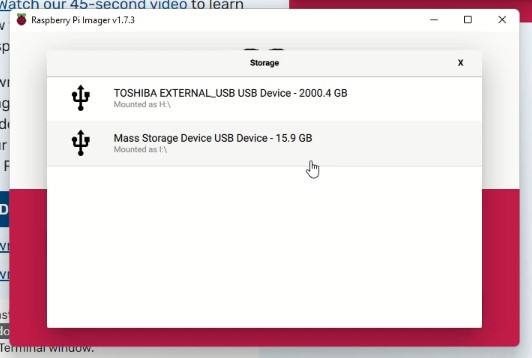
Storage – Select your SD card
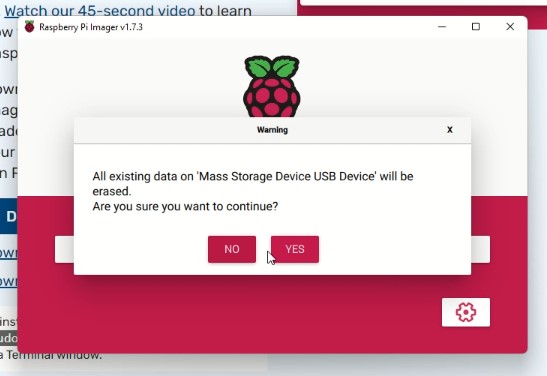
Write – Click Yes
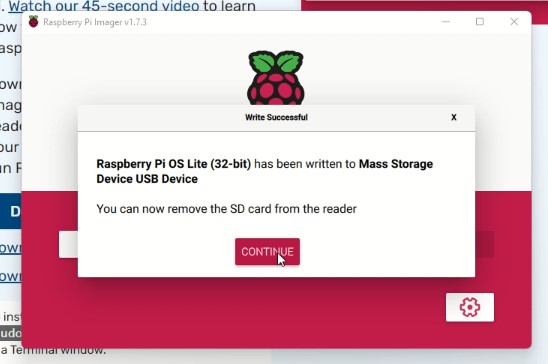
- The Imager will now install Raspberry Pi OS Lite (32-Bit) onto your SD card. Depending on the speed of your internet and computer, it might take a while. Go grab yourself a cuppa.
- Once complete and verified you’ll see this message
Raspberry Pi OS Setup
Now let’s get to setting up the Pi so you can connect it to the internet and have remote access to the file system.
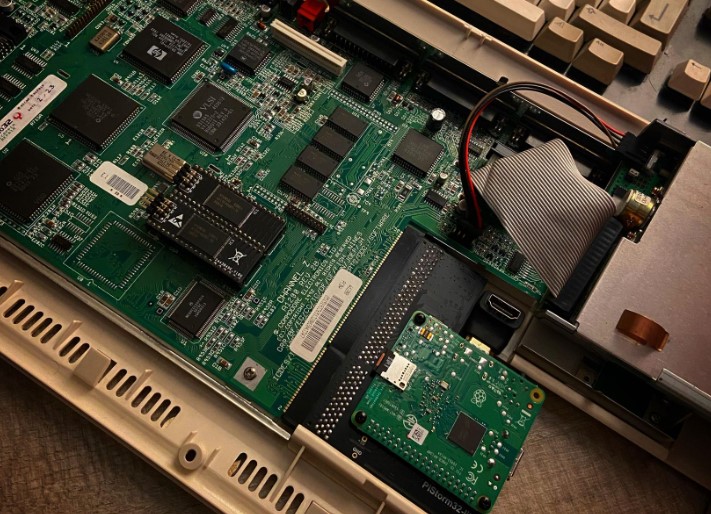
- Pop your newly written SD card into your Pi, connect a HDMI cable to a monitor and connect a keyboard to the USB port of the Rasberry Pi
- Turn on the Amiga and you’ll see the screen come to life
If you’re having an issue connecting an HDMI lead you can use a ribbon adapter or right-angle adapter. These are just some ideas, make sure you get the right cable, These links can and do change (thanks Amazon)

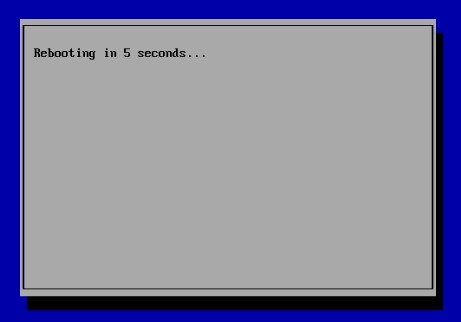
- You’ll see the OS do some initial configuration and reboot. This is normal
- You’ll now be the option to select your Keyboard Layout. Pretty straight forward
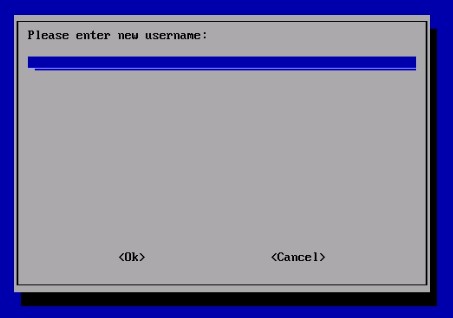
- Now you’ll be prompted for a username and password. This will be the username and password created on the pi. Please make sure you keep a record of this as you will need it. We used what used to be the default – pi / raspberry
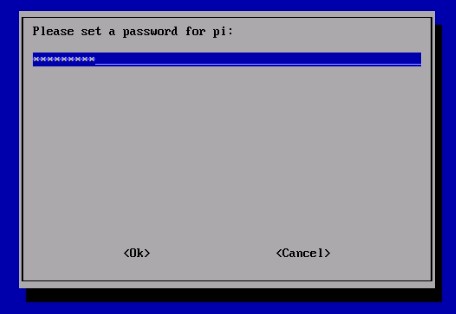
You’ll be asked to confirm your password
- Now you’ll be kicked to a login prompt. Use the credentials you created above and enter your username and password.
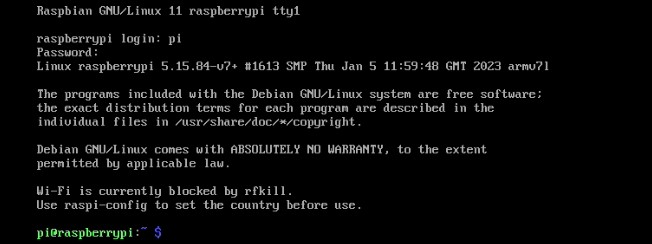
- Let’s get the Wifi setup and SSH enabled
- Type sudo raspi-config – press enter
sudo raspi-config
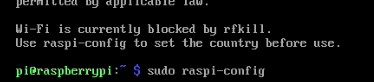
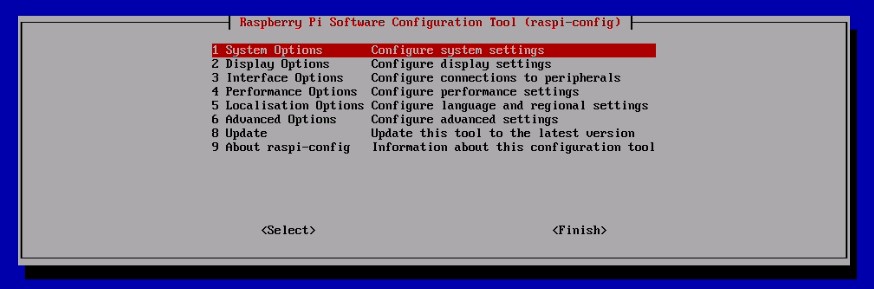
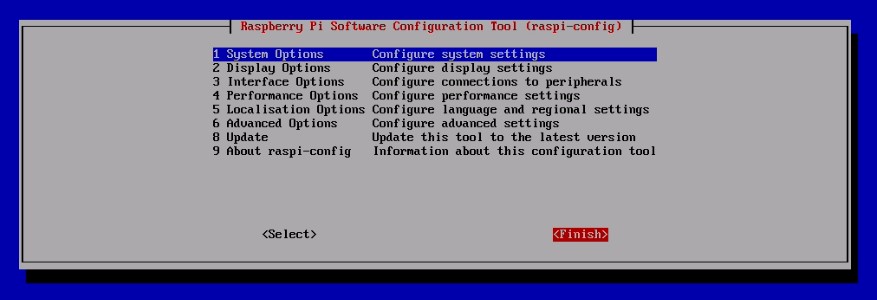
- You’ll now be prompted with the Raspberry Pi Software Configuration Tool
- Select 1 – System Options

- Select S1 – Wireless LAN
- Select your country i.e. GB
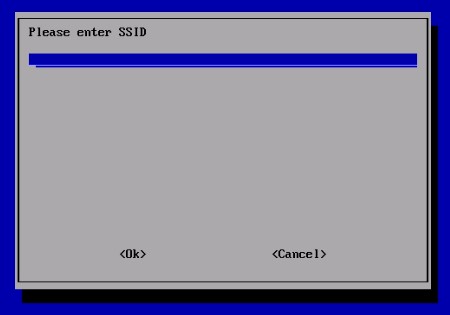
- You’ll now be prompted for your SSID. This is your wireless network name
- Then for your passphrase (wireless password)

- Once complete you’ll be back at the main menu
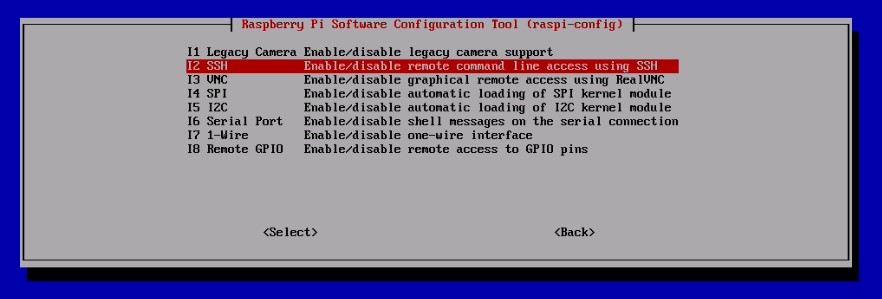
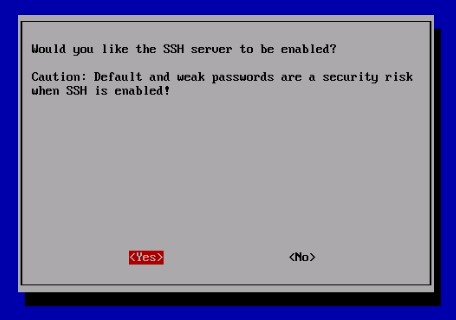
- Select 3 – Interface Options > I2 – SSH > Click Yes to enable SSH Server
- Now select finish. Let’s see if you got your wireless details correct
- You’ll now be back at the command line – type ifconfig – this will display your IP address. Depending on your network setup it should be something like 192.168.X.X
ifconifg
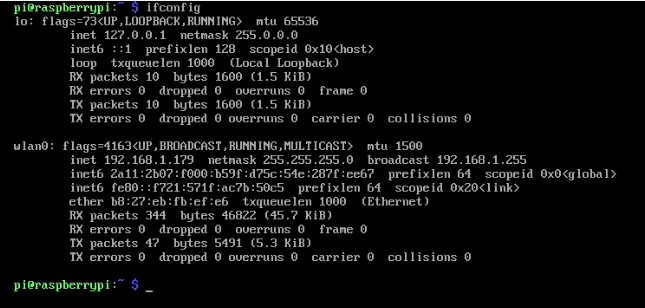
- Make a note of the wlan0 address
- As above mine is 192.168.1.179 – be aware that usually these addresses are issued by your router using something called DHCP. The address could change, the easiest way to make sure it doesn’t is to bind it in your router config. I can’t help you with that but for the minute don’t worry, its not likely to change before we finish this setup.
- You should now have remote access to the Pi in your PiStorm, time to install the PiStorm password
Musashi Setup
These next steps are where it gets a little tougher. You’ll need to get a couple of programs
- An SSH Client – for example Putty
- WinSCP – an easy-to-use file manager that supports SSH – note that PuTTY is installed with WinSCP but sometimes it’s useful just to use PuTTY for quick SSH access. Grab them both anyway
Get them installed and come back here for the rest!
- Open WinSCP
- Click New Session and Select New Site
- In the Hostname field enter the IP address we recorded as above – it might be something like 192.168.1.179
- Enter the username name and password as you configured
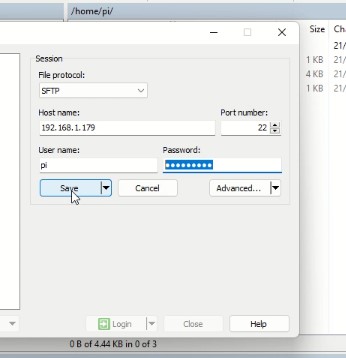
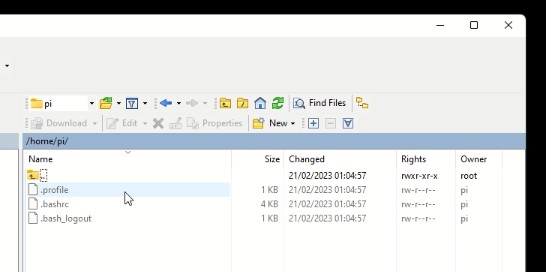
- Click login and you’ll be connected to the Pi file system. You will need this to copy your desired kick ROM across. Even if you don’t want to change the ROM, having the knowledge on how to access the file system will help A LOT when trying to use the more advanced features – like copying across an Amiga HDF.
- You’ll see something like this when connected, it’s the “home” of your user
- Now let’s open PuTTY. Click the Open Session in PuTTY button as shown below
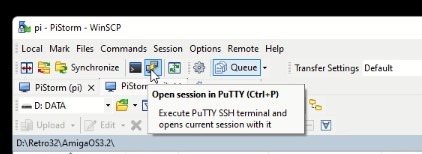
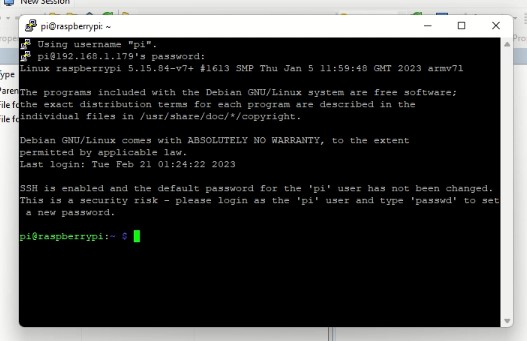
- PuTTY will open and you’ll see something familiar. It looks like it did when you were connected directly to the Pi. You now have a remote SSH session direct to the pi.
- When connecting you may see some warning – select Allow / Accept – don’t be freaked out
- You might be prompted for your password as set up earlier in this guide – enter it
- Now we’re connected it’s time to jump to GitHub so you can copy-paste some commands. These are subject to change so you’re best getting them from there
https://github.com/captain-amygdala/pistorm/tree/pistorm32-lite - I’ll list the commands below but please double-check check the commands I’m using are correct. I’ll also add an extra step (upgrade).
- Copy the following then right-click in the PuTTY window. It will paste it in there for you to prevent any typing mistakes
sudo apt-get updatesudo apt-get upgradesudo apt-get install git libdrm-dev libegl1-mesa-dev libgles2-mesa-dev libgbm-devgit clone https://github.com/captain-amygdala/pistorm.git --branch pistorm32-litecd pistormmake
- Steps 1 and 2 should work as expected however I have seen setup 3 fail for a number of items. I would suggest running it twice just to make sure. Some of the setups may take a while. Especially the last step, be patient. If prompted at any point for a Y / N response – type Y
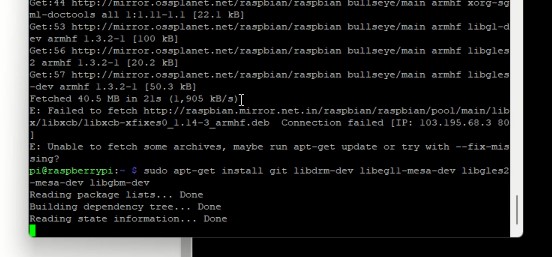
An error is shown with setup 3. Run the command again
- With all the commands complete you’re done with the setup
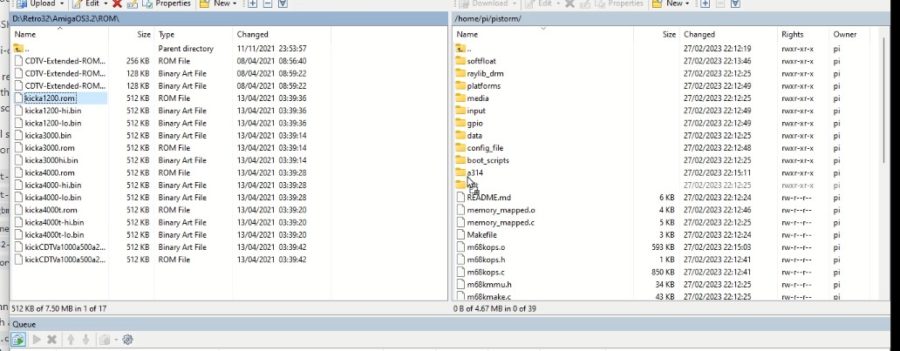
- Let’s go back to WinSCP and click in the right-hand file window. Right-click and select refresh. This will display the PiStorm folder created in the process above. Double-click the folder to open it. You’ll see lots of files as per the image below.
- We’re now going to copy a kick start ROM onto the Pi to help us show it working. In this case, I will take the 3.2 kick ROM file. In the left-hand window, navigate to your folder containing a ROM. * This looks a bit like dopus don’t you think? 😉
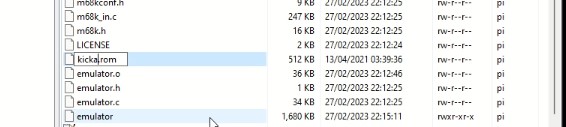
- Drag the ROM across to the right window. We’ll need to rename the ROM to kick.rom
- Right-click the ROM file copied and select rename. Rename to kick.rom
- Time to get your Amiga 1200 connected to using its RBG or composite source. You should have two displays ready, one from the Pi and one for the Amigas RGB output.
- Let’s just back to PuTTY and start this bitch
- Type
sudo ./emulator

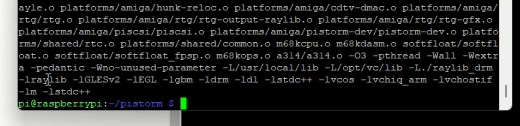
- If we did it right. You’ll see the terminal start the “emulator”
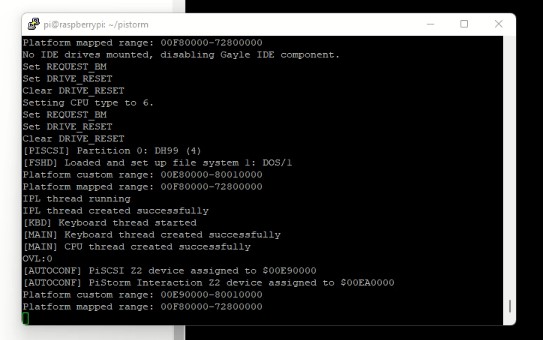
- You’ll now see that if you used a different ROM load to that on your Amiga 1200, the screen went black and as if by magic a new rom was loaded. Note that the video signal from the Amiga will not be sent via the Pi. It will, trust me. We’ll cover that in future parts.
Excuse the crusty Gif conversion 🙂 You get it though. It works.
You win. Time for another Cuppa
Whats next?
To make this actually useful there are a few things we need to do.
- Pi auto login
- Auto-start the emulator
- Add a Workbench HDF (hard disk file)
- Test the speed
Let’s hear from you
Are you struggling with any part of this guide? Is there something I could make more clear? Once I have it at the state that it’s auto logging in and starting the emulator I’ll release it as an SD card image to give you something to work from. Note that the kick files won’t be included but I’m sure you already have them.
Hi Karl, excellent guide that a novice like myself could follow. Would appreciate advice on sd card image.
Presmably you are going to the Nottingham show, am going Saturday
I’m wait for a second part of tutorial!, great work!
it just does not work
it doesn’t want to
it doesn’t start
just green screen and reset and reset and…
Set REQUEST_BM
Set DRIVE_RESET
Clear DRIVE_RESET
Platform custom range: 00E80000-00E90000
Platform mapped range: 00400000-01000000
OVL:0
again and again
i’ve the same problem, have anybody a solutions?
I ahve the same problem on Amiga 2000
For the network and ssh settings and else you can use the gear on the imaging dialog of the pi imager. Then you dont need it set it up by raspi-config.
Hi Peter
That’s a good shout there. Although it is important for people to know how to change it after the image burn in case they need to change it or add additional networks into the config.
Thanks for the comment
Cheers Karl
wowzers!!! I did this entire tutorial with Ubuntu and…. it worked right away: WB with custom ROM 40.069 on my RGB screen 😉
Github will not allow cloning the git files from capt amygdala without using a ‘fine grain personal access token’ that you have to generate on your account online- except this long hash of characters needs to be input into the password line after user name (after you enter the long ‘git clone …’ command).
I’m sure there’s a way to copy paste this token- just haven’t figured out how! This is new since I created my 1st pistorm installs 2 years ago.
Hey Karl,
Can you possibly help with my problem? The listing below is what I get running the emulator cmd. No Amiga screen, whatsoever.
Thanks,
/Sal
pi@raspberrypi:~/pistorm $ sudo ./emulator –config amiga.cfg
[CFG] Set CPU type to 68020.
[CFG] ROM identified: Kickstart 3.1 (40.68) 512KB
[MUSASHI] Mapped read range 1: 00F80000-01000000 (0x7588a008)
[CFG] [MAP 0] Added rom mapping for range 00F80000-00FFFFFF ID: kickstart
[CFG] Allocating 134217728 bytes for RAM mapping (128 MB)…
[CFG] [MAP 1] Added ram mapping for range 08000000-0FFFFFFF ID: cpu_slot_ram
[CFG] Allocating 268435456 bytes for RAM mapping (256 MB)…
[CFG] [MAP 2] Added ram mapping for range 10000000-1FFFFFFF ID: z3_autoconf_fast
[CFG] [MAP 3] Added register mapping for range 00DC0000-00DCFFFF ID: None
[CFG] Set CPU loop cycles to 300.
[CFG] Setting platform to amiga
Creating platform config for amiga…
[CFG] Adding 41877504 byte (39 MB) RAM mapping rtg_mem…
[CFG] [MAP 4] Added ram_noalloc mapping for range 70010000-727FFFFF ID: rtg_mem
[AMIGA] RTG Enabled.
Platform custom range: 70000000-72810000
Platform mapped range: 00DC0000-72800000
[AMIGA] PISCSI Interface Enabled.
[PISCSI] Loaded Boot ROM.
Platform custom range: 00E80000-80010000
Platform mapped range: 00DC0000-72800000
[PISCSI] Map 0: [amiga.hdf] – 2113929216 bytes.
[PISCSI] CHS: 4096 16 63
Finding partitions.
Finding file systems.
Done.
[PISCSI] Map 6: [platforms/amiga/pistorm.hdf] – 2621440 bytes.
[PISCSI] CHS: 160 1 32
Finding partitions.
[PISCSI] Partition 0: DH99 (4)
Finding file systems.
[FSHD] Loaded and set up file system 1: DOS/1
Done.
Bind to localhost:7110 failed
[AMIGA] Failed to enable A314 emulation, error return code: -1.
[CFG] Enabled keyboard event forwarding, toggle key k.
[CFG] Set keyboard event source file to /dev/input/event3.
[CFG] Enabled mouse event forwarding from file /dev/input/mice, toggle key m.
Performing setup for Amiga platform.
No sub system specified.
No Z2 Fast RAM configured.
256MB of Z3 Fast RAM configured at $10000000
[MUSASHI] Mapped read range 2: 08000000-10000000 (0x6d889008)
[MUSASHI] Mapped write range 1: 08000000-10000000 (0x6d889008)
Platform custom range: 00E80000-80010000
Platform mapped range: 00DC0000-72800000
No IDE drives mounted, disabling Gayle IDE component.
Setting CPU type to 4.
[PISCSI] Partition 0: DH99 (4)
[FSHD] Loaded and set up file system 1: DOS/1
Platform custom range: 00E80000-80010000
Platform mapped range: 00DC0000-72800000
IPL thread running
IPL thread created successfully
[MAIN] Keyboard thread created successfully
[MAIN] CPU thread created successfully
[KBD] Keyboard thread started
Hi Sven , did you fix this?
i have same