This is a step by step guide to getting Amiga Game Selector AGS running on the MiSTer. It does assume some level of understanding WinUAE – if people really struggle, then we can add it into this guide.
If you already have a working SD card with the required cores (Minimig), you can jump to the Amiga Game Selector Fix. If you’re setting up a card from scratch, then carry on reading.
Prerequisites
- A MiSTer – We have a MiSTer Pi
- Amiga Game Selector RA (Retro Arch) – version 3.0 – you can download from here https://www.amigagameselector.co.uk/
- WinUAE – For fixing AGS RA https://www.winuae.net/download/
- A keyboard / mouse – we recommend the Logitech K400 – you can get them from Amazon – https://amzn.to/4aqMa2N
Image the SD card
We’ll be using Rufus to image the SD card – you’ll need to download it from here and install it from here – https://rufus.ie/en/
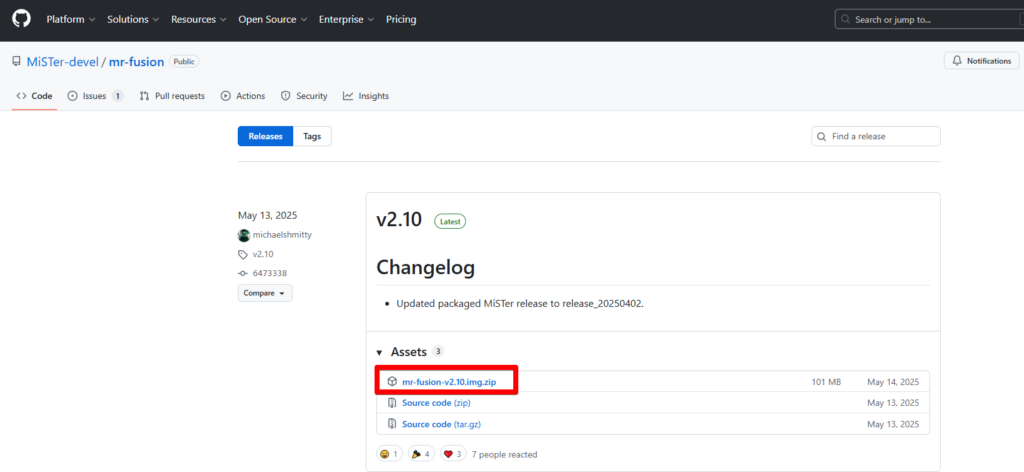
Now let’s download mr-fusion from https://github.com/MiSTer-devel/mr-fusion – grab the latest release
With that file downloaded, extract it to a folder and image the SD card with the .img file
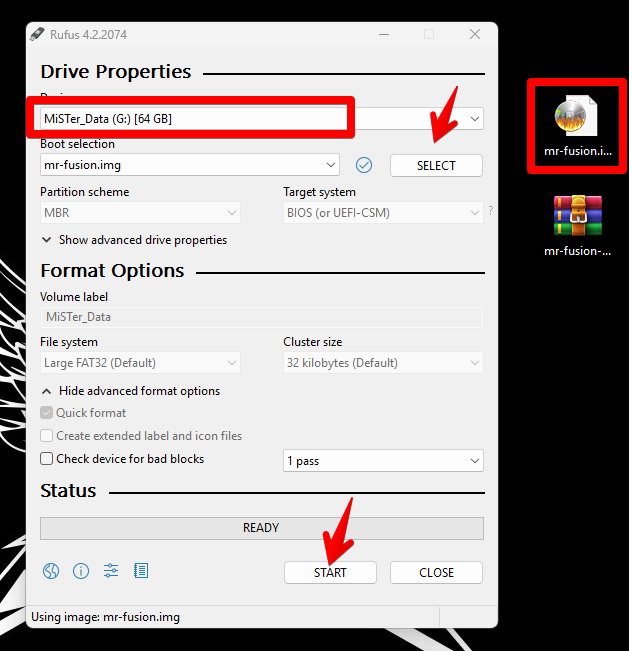
Make sure you select the correct SD card drive letter, press select and select the mr-fusion.img file. Then hit start. The imaging process won’t take long. If the card contains partitions, it may prompt you to confirm you’ll be wiping the contents.
Mister Update
For this step, you’ll need to grab yourself a network cable and plug in your MiSTer. This will allow you to update and download all the required cores. It is possible to do this using Wi-Fi, but you’ll need to work that out yourself.
With the MiSTer now connected, pop in your freshly imaged SD card and power it on.
You’ll be greeted by a screen showing Mr. Fusion is installing. Go grab a cuppa.

Once this is completed, you’ll be greeted by a MiSTer menu showing “No files”, let’s update!
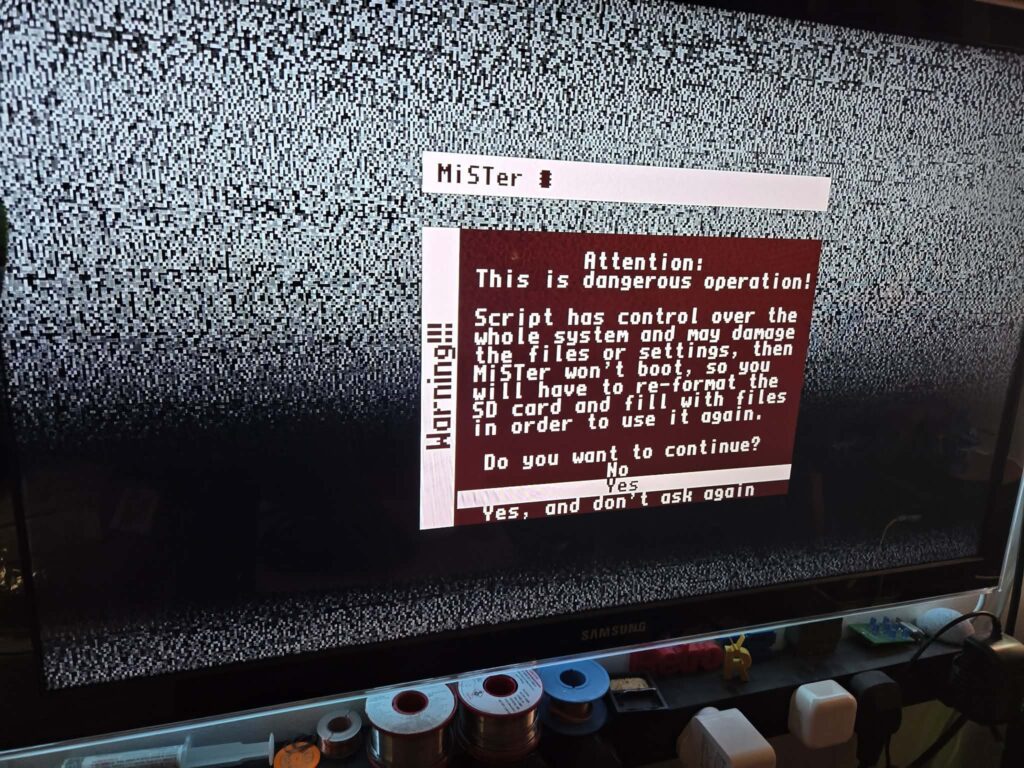
Press Escape – Select Scripts – You’ll need to confirm you’re happy to run scripts, then select Update.
This will update the MiSTer installation and add all the required cores – most importantly, Minimig. You will need internet access for this step.
This will take a little time, go grab yourself another cuppa.
Amiga Game Selector Fix
Unfortunately, as of the time of writing, the RA (Retro Arch) version of AGS needed for this process needs to be fixed/patched for it to work.
Note for this step, you’ll need to know what you’re doing with WinUAE. The key things are
- Set up as an Amiga 1200
- Make sure your 3.1 ROM is selected – if you don’t already have it, scroll down and download it.
- Give the Amiga 2MB Chip and 8MB of ram (Z2 Fast)
- Add the Amiga Game Selector RA HDF (hard disk file – Add hardfile)
If you’ve done this correctly, hit start, and you’ll boot AGS on your PC.
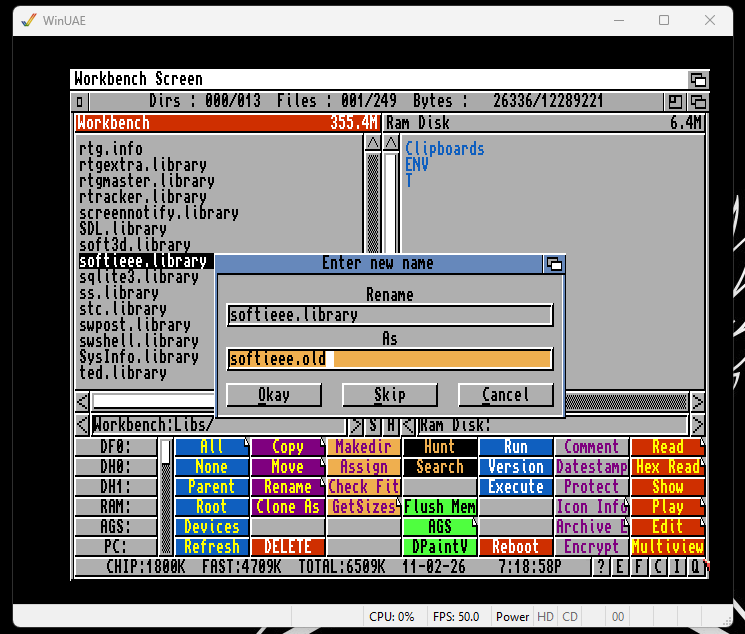
At the AGS, press escape – this will launch to Workbench. On the right-hand menu, open DOPUS.
Navigate to Workbench:Libs/ and rename softieee.library to softieee.old – you can now close WinUAE. The AGS HDF is now “patched”
Amiga Roms
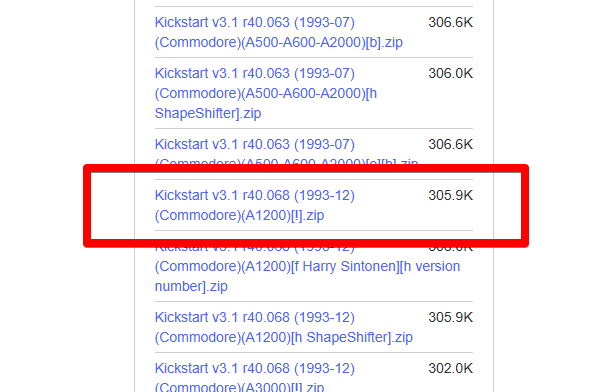
We can’t host the Amiga ROM files on our website, but they are publicly accessible. You can grab them from here.
Click show all and scroll down to Kickstart v3.1 r40.068 (1993-12)(Commodore)(A1200)[!].zip – click to download it.
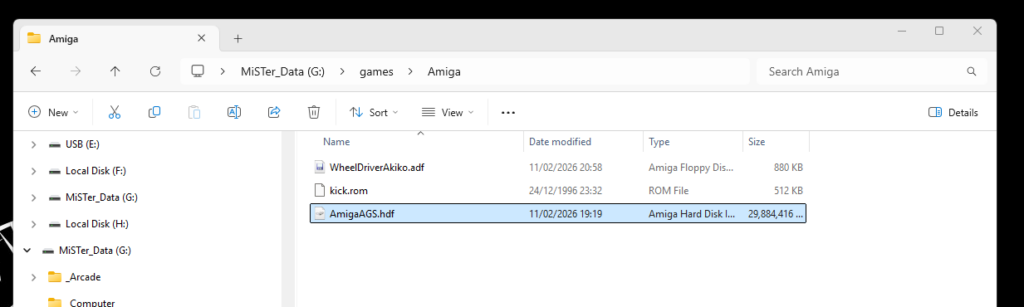
Open the zip file and extract the .rom file. Rename this to kick.rom and copy onto the Mister SD card /games/Amiga
With the rom copied to the SD card you should now copy the patched AGS 3.0 hdf file to the SD card, it’ll take a while. So grab another cuppa! You might also need the toilet with all these fluids.
You need to make sure the files are named as below, this is important as these are preset in the MiniMig config
- AmigaAGS.hdf
- kick.rom
MiniMig Config
Download and extract the Minimig.cfg from the file below. Copy it to the config folder on the SD card
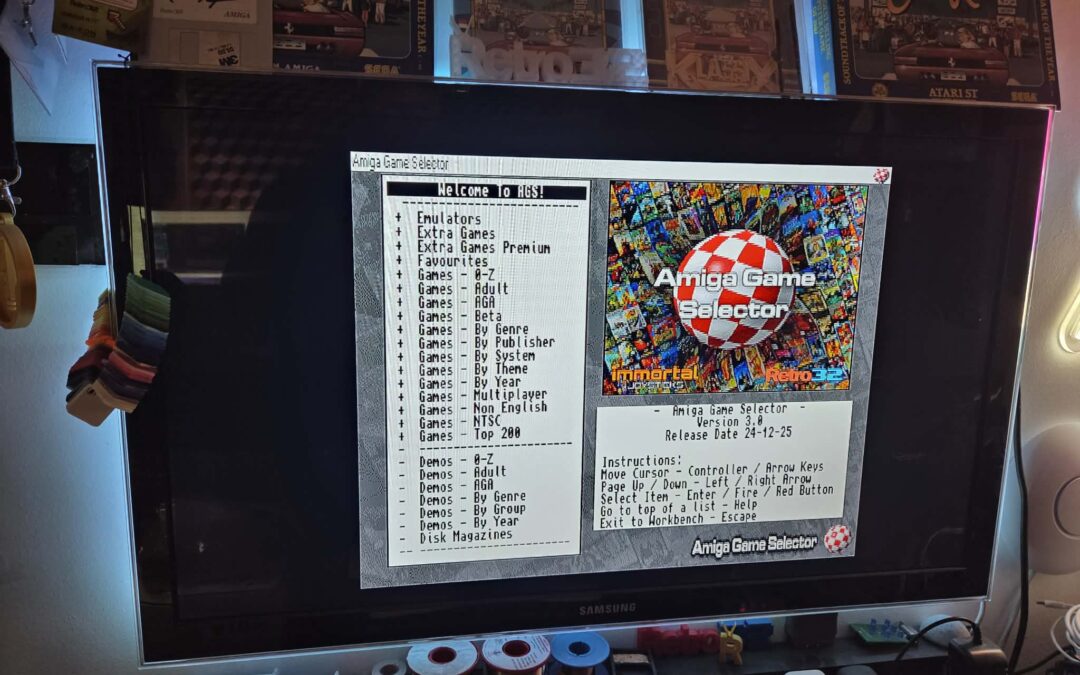
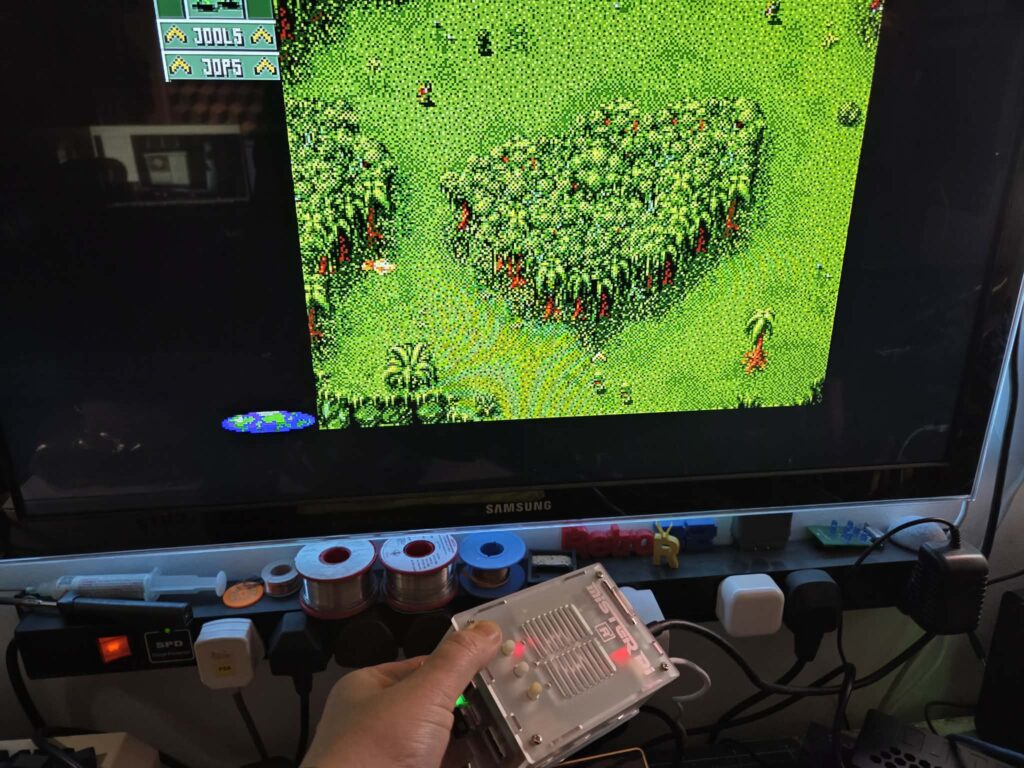
Start AGS on the Mister
Select Computer / Minimig from the menu!
You’re done! If you want to edit the config file, then press F12 on the keyboard. If you have any suggestions for further improvements, leave a comment below or email us.
Need more help?
We appreciate that not everyone is capable of setting this up “Amiga for Mortals”. We do offer pre-setup SD cards for sale. Click below