The Gotek is hands down the BEST upgrade for any Amiga. It’s a simple floppy drive emulator (that when coupled with the Flash Floppy firmware) can store and execute the entire Amiga library on a single 64GB USB flash drive. No more unreliable floppy disks and disk swapping as the mighty Gotek has a feature that allows multiple Amiga Disk Format (ADF) images to be assigned to the slots. For a basic Amiga 500, this is a must, in fact for any Amiga!
FlashFloppy is a godsend. For its creation, we thank the Amazing Keir Fraser.
Note that this guide is for a Gotek in its original 3.5″ housing. It will not fit inside the case and please DO NOT cut a hole in the side of your Amiga to fit it. Every time someone butchers an Amiga in this way, a kitten dies. You have been warned. Simply pop off the top cover and be a man. Real Amiga enthusiasts do not use screws and us real men don’t even use a top case. This guide assumes some basic level of computer skills. We’ve tried to make it as easy to follow as we can but we can only do so much. If you do struggle you can throw in the towel and buy one from our store. We won’t judge you – https://www.retro32.com/product/amiga-gotek-drive-oled-usb-stick
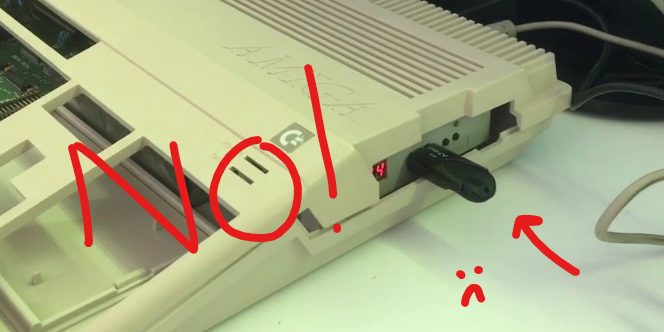
NO. NO. just NO.
We’ll cover how to install it into a 3D printed gotek mount in a later article and how to install an OLED screen. This will allow your gotek to fit snuggly inside your beloved Amiga with the case closed.
This a great fun little project that requires no tools, just some patience and a Windows computer. Don’t buy one from us or any of the other Amiga stores. Build (kind of), don’t buy!
What do you need?
- A Gotek drive – £15 + Tax (less for multiple units) – Ali Express
- USB A to USB A cable – Less than £3 for Amazon Prime Customers – Amazon
- A piece of cable – I am using a male-to-male DuPont (jump wire) – Amazon
- Sandisk USB Flash Drive – 64GB – Less than £10 – Amazon
- A Windows computer (if you don’t have one) – check the N100 Mini PC on Amazon – These make great all-purpose machines and are great for emulation
Don’t cheap out on generic USB sticks from eBay or other shady websites. Buy from Amazon and make sure it’s sold and dispatched by Amazon themselves. There are so many fakes out there so don’t waste your money.
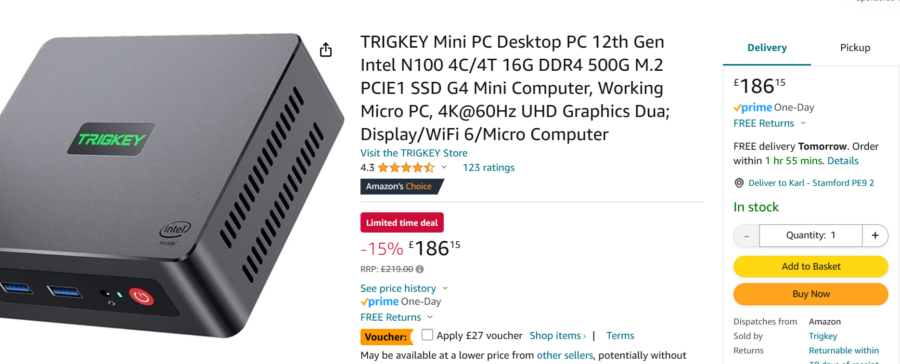
With the voucher and free shipping, these are a bargain!
Team Pandory has done a large number of videos covering these mini PCs and how epic they are for simple workloads and Retro Gaming Emulation! – Check them out here – https://www.youtube.com/channel/UCeKaed2KK7YXndS0eZVWrPA/videos
What’s next? I’ve got all the stuff!
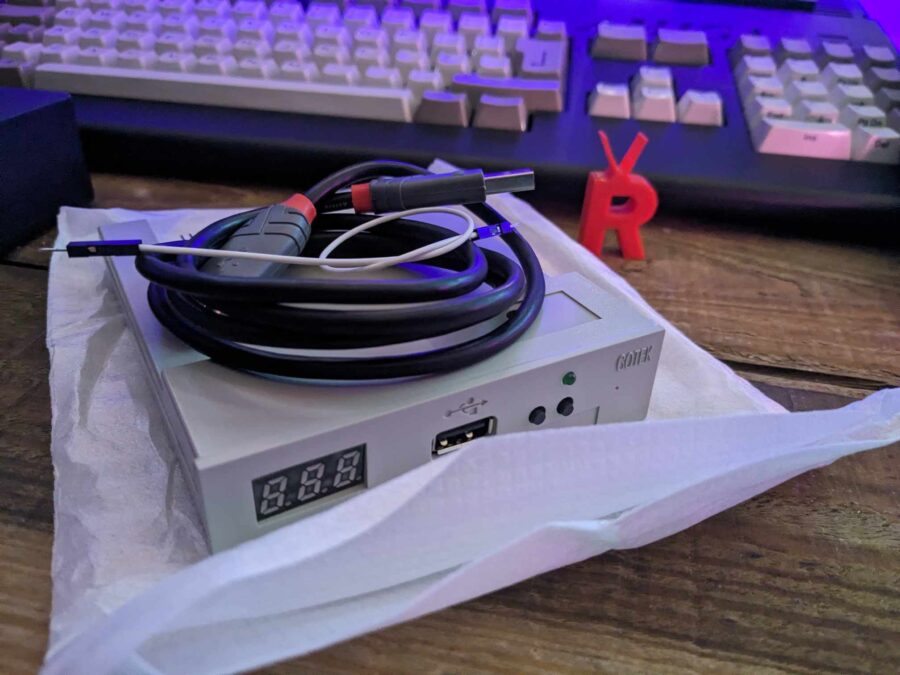
Gotek… Check! USB A to USB A Check! Dupont wire … Check! Links above all this! Now let’s go ahead and flash it.
Software Downloads
** Update** For those struggling to download the files/applications needed I have created a package with all the software you need. You can download it below. Note that you will still need to extract the files.
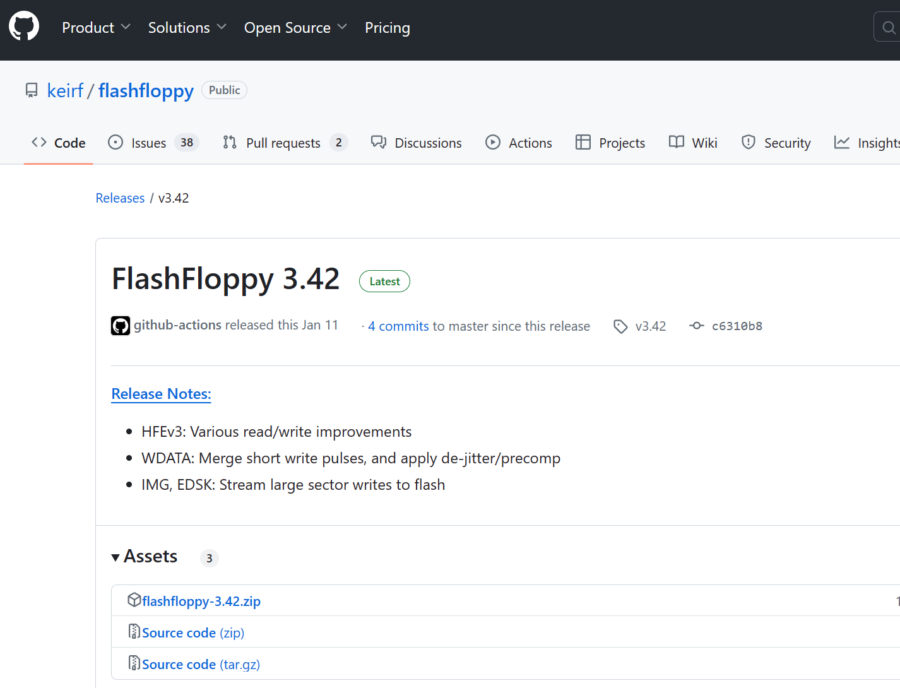
First, we’ll need the Flash Floppy software provided by the Amazing Keir Fraser. You should download the latest release from his Git – https://github.com/keirf/flashfloppy
Click Releases on the right-hand side of the page, under assets select the zip file. You should now extract this zip file to a location you can easily access such as your Desktop or My Documents

Now let’s download the Artery firmware flashing tools and DFU drivers.
Visit the website – https://www.arterychip.com/en/product/AT32F435.jsp#Resource and scroll down to Tool – ISP Programmer

Click the ISP download icon. This will download the tools required. You should extract them to your Desktop or My Documents as you did for the Flash Floppy files.
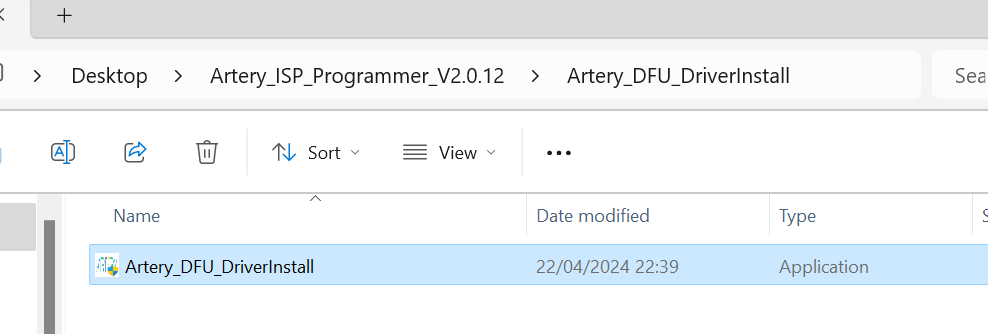
Now open the Artery ISP Programmer Folder > Artery DFU Driver install folder and double click the Artery_DFU_Driverinstall application.
Click Install driver – It will take a little while to install the DFU drivers
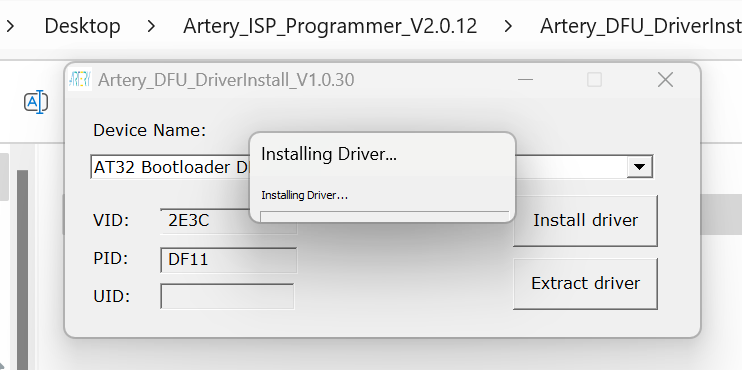
Once this is complete we can start the flashing! You will need to restart your PC.
Flashing the Flash Floppy firmware
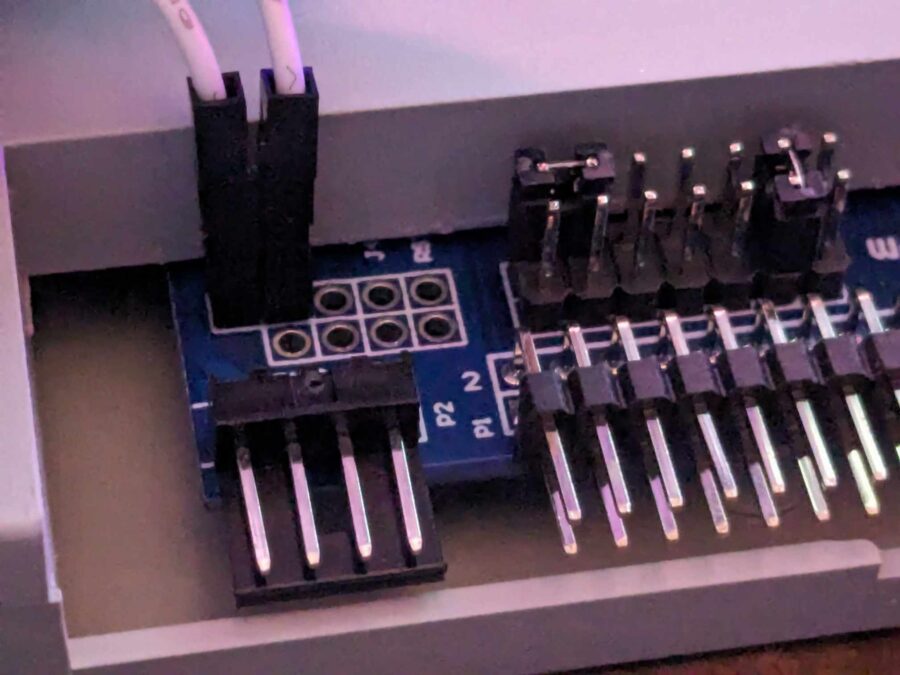
Let’s get the Gotek drive ready. Go ahead and move the jumpers into the position below (drive ID 0) so we don’t forget when we connect it up to the Amiga. You may have two jumpers on the right headers on the back of the drive. It should look EXACTLY like this
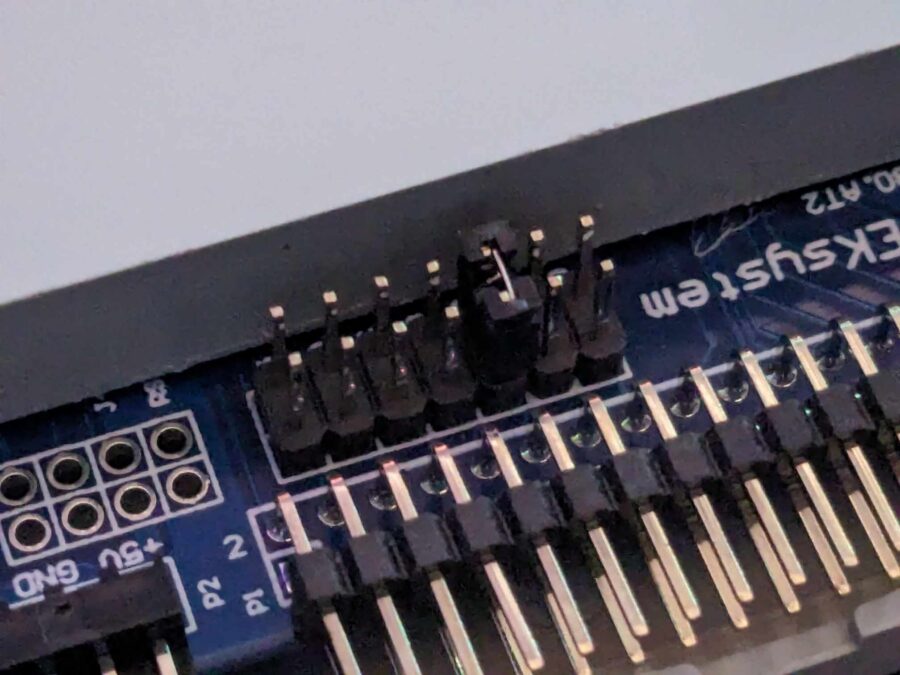
Now we can pop the jumper cable into the top left pads. This puts the device into programming mode.

Note when we get around to plugging in, we would recommend holding them at an angle so they make contact with the contacts around the pads. This will ensure it stays in programming mode. Please be careful not to slip or short any of the other pins by mistake, this could damage the gotek. You may wish to enlist your SO as I’m sure they will love holding the wires while you tinker / swear etc…
With the jumper wire in place and the pins making secure contact, you can now connect your USB A cable to your PC and finally plug it into the front of the Gotek drive. You must get the orientation of the USB cable wrong at least 3 times for it to count!
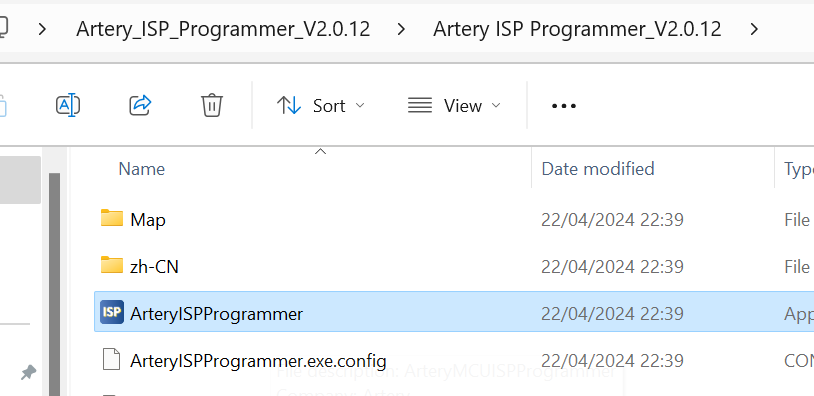
With our pins securely “bridged” we can now run the programmer. Let’s navigate to the Artery files we extracted, open the programmer directory and open the ArteryISPProgrammer application. If you get a warning about the file from the Windows smart screen click the option to open it anyway.
With the program open, the first thing to do is to change the language to English (unless you prefer Chinese). Now select USB DFU from the drop down and we should see our Gotek! If you don’t see an entry as below you have either not installed the DFU drivers correctly or your jumper cables have slipped.
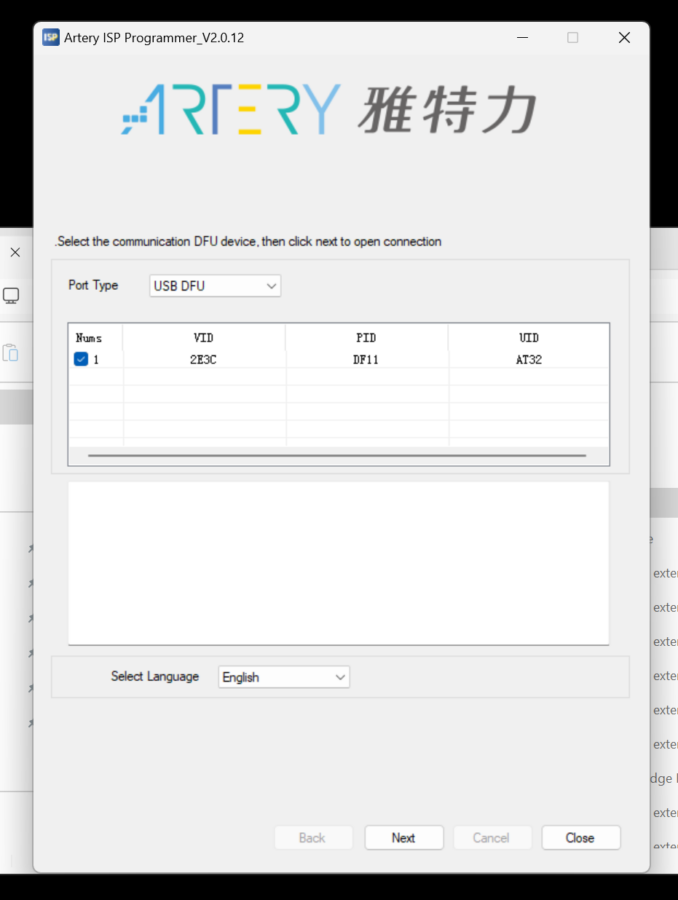
Click Next and Next Again
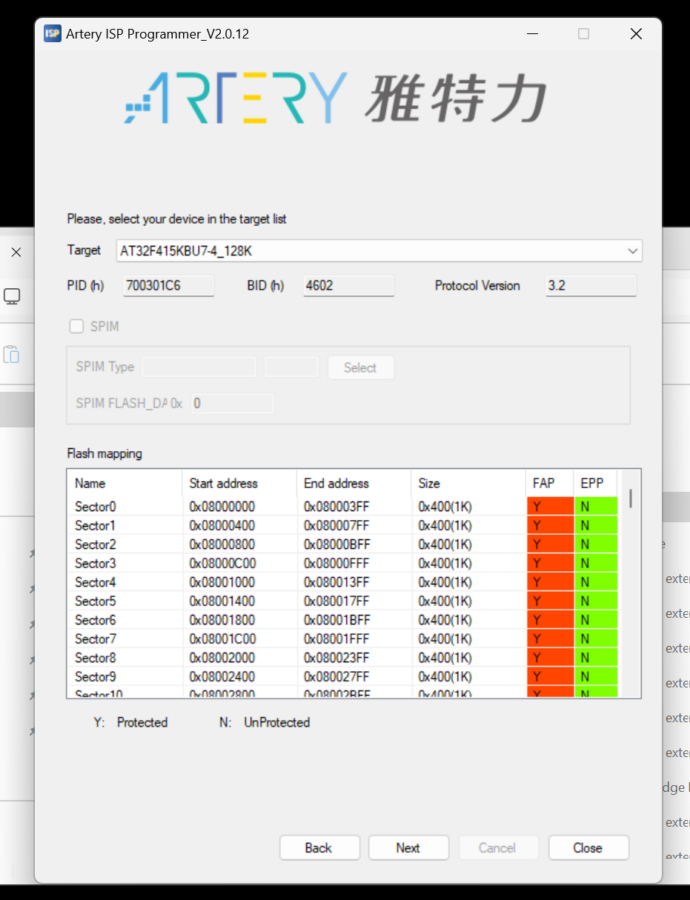
Now let’s remove the protection from the Gotek
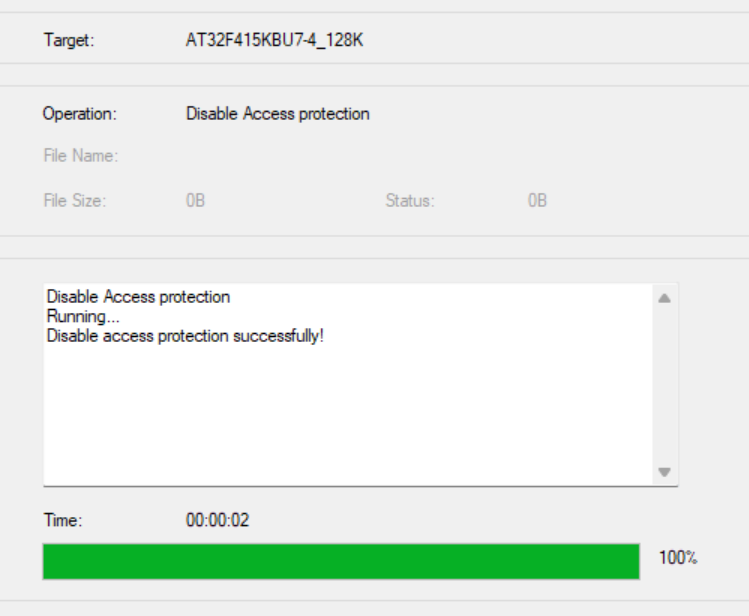
At the bottom select Protection and ensure this is set to DISABLE as below. Now click Next / Next and follow it through until the protection is disabled.
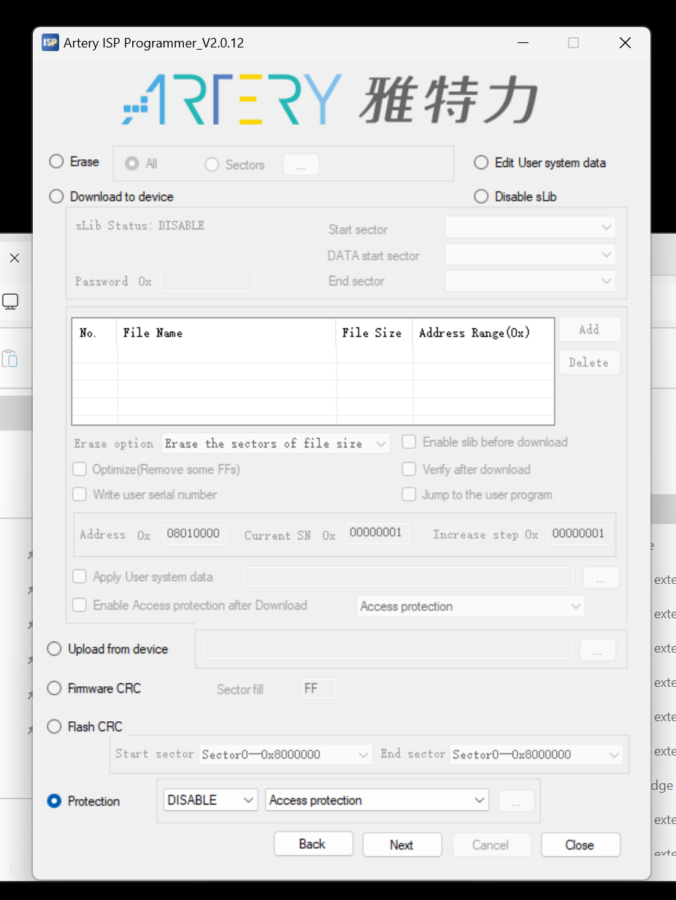
It’s done! You can click Back to see the Programming options again
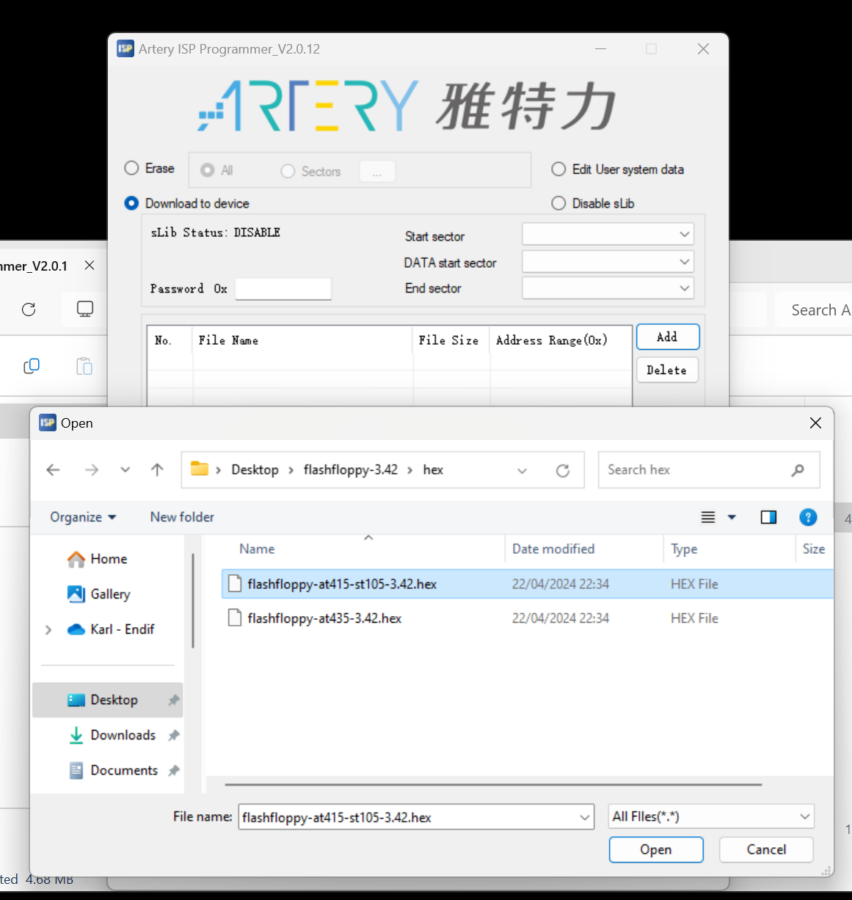
Now click the option to Download to device and click Add (we have already done this step in the screen shot below so the entry for Flashfloppy-… will not be there… yet.
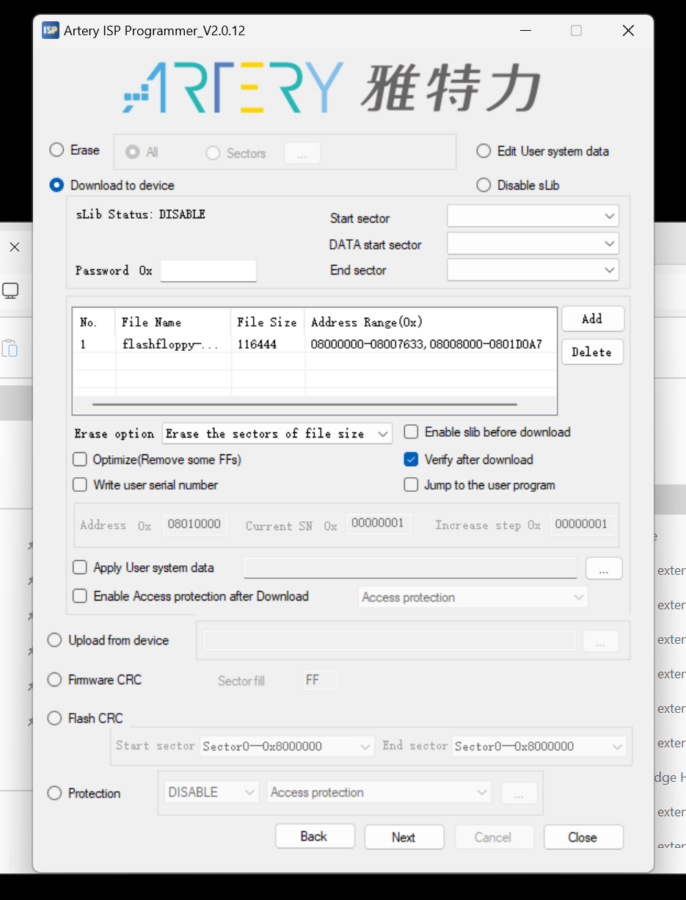
Navigate to our FlashFloppy folder we extracted and under hex select the flashfloppy-at415-st105-“versionNumber”.hex file – click Open.
It should look like this
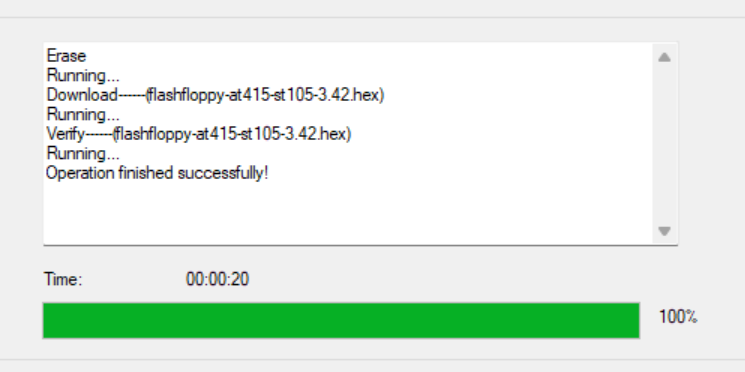
Ensure that Verify after download is checked and click Next at the bottom of the Program to start.
Look!! It’s working! We’re impressed. Well done!

The firmware is now downloaded and verified, your gotek is now flashed. You can disconnect the USB cable, remove your jumper wires and close the Artery app. It’s time to set up your USB drive.
Setting up your USB drive
Let’s get the USB drive set up! Simply plug in your USB (ensure it’s formatted to FAT32), and open the flashfloppy directory you extracted to your computer.
Under the HxC_Compat_Mode folder copy the HXCSDFE.CFG file and the AUTOBOOT.HFE files from the Amiga folder into the root of your USB stick.
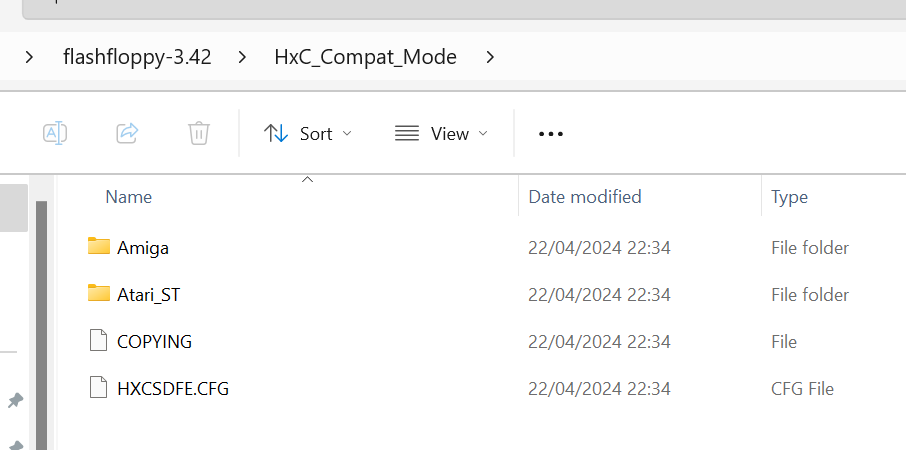
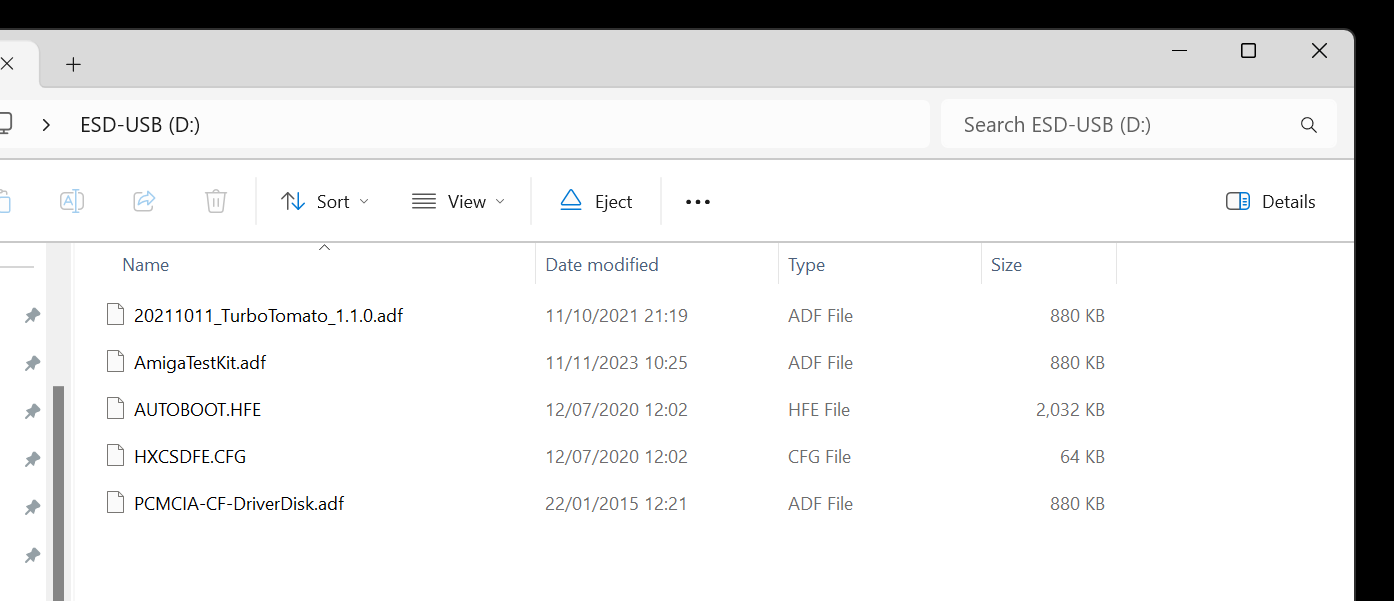
It should look a bit like this but without the ADF files.
If you would like an ADF file to test, we would suggest downloading it from Kiers Git – https://github.com/keirf/amiga-stuff/releases/tag/testkit-v1.21
Again, we thank Keir for his hard work!!
Extract the files grab the Amiga test kit ADF and pop it on your USB stick with the two other files you just copied in.
If you’re struggling we can supply USB stick set up and ready to go with EVERYTHING you’ll ever need
Let’s try out the Gotek!
Now, let’s connect the Gotek to the Amiga and test it out!
Pop open the case, remove the shielding if it’s still on (be careful not to cut yourself) and admire your Amiga in all its glory! Isn’t she beautiful?!
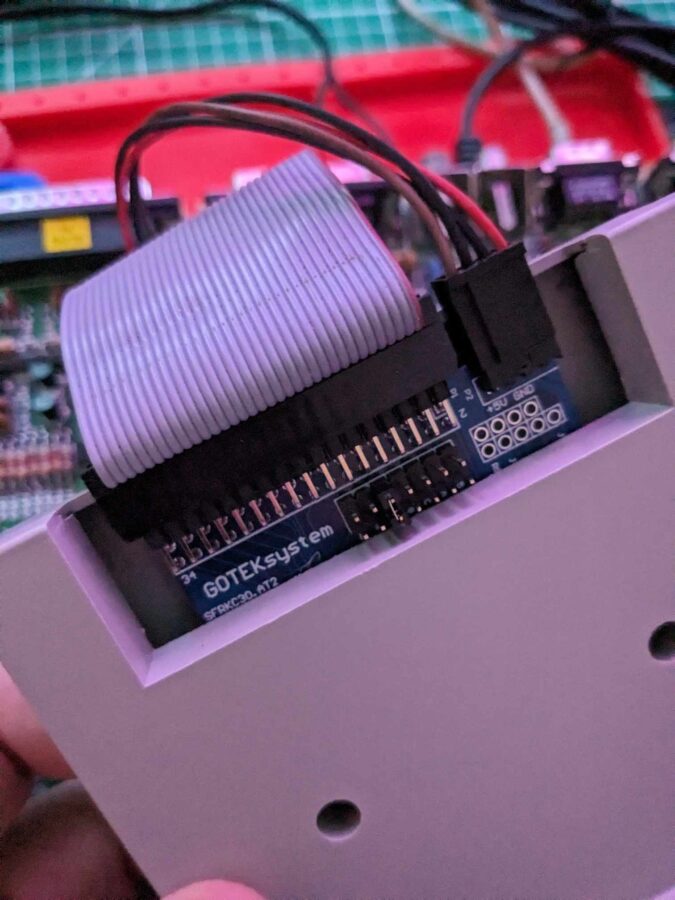
Remove the data and power cable from your floppy drive and connect the to the Gotek as below. Note that the Red (Pin 1) should be facing the power cable
Turn on the Amiga and the drive should spring into action. It will show F-F to show that Flashfloppy is on the drive

Turn off the Amiga and insert your USB stick. Flick on the power and the autoselector program will load. It will display the files stored on the USB stick.
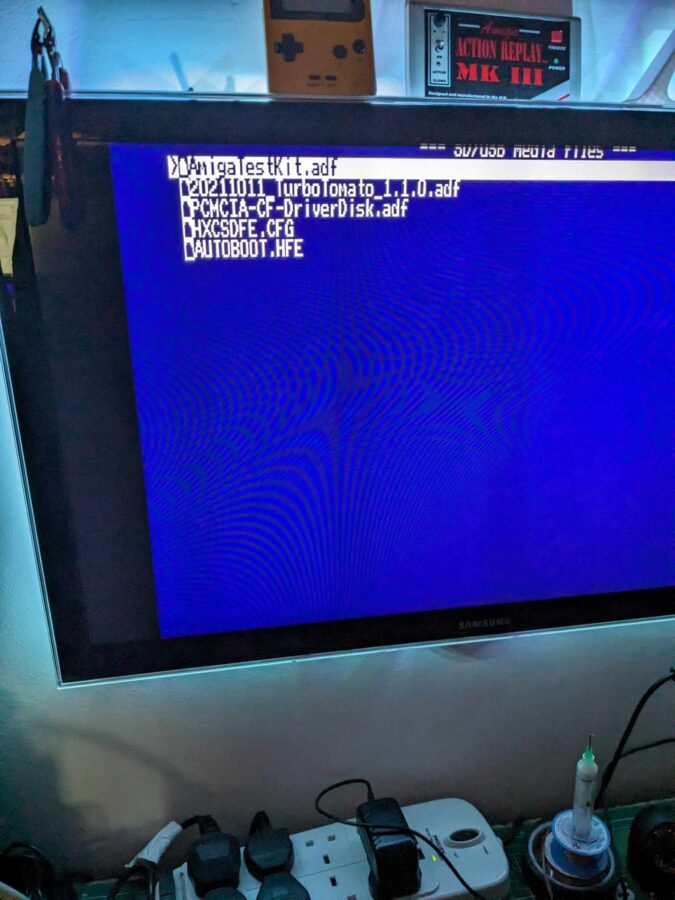
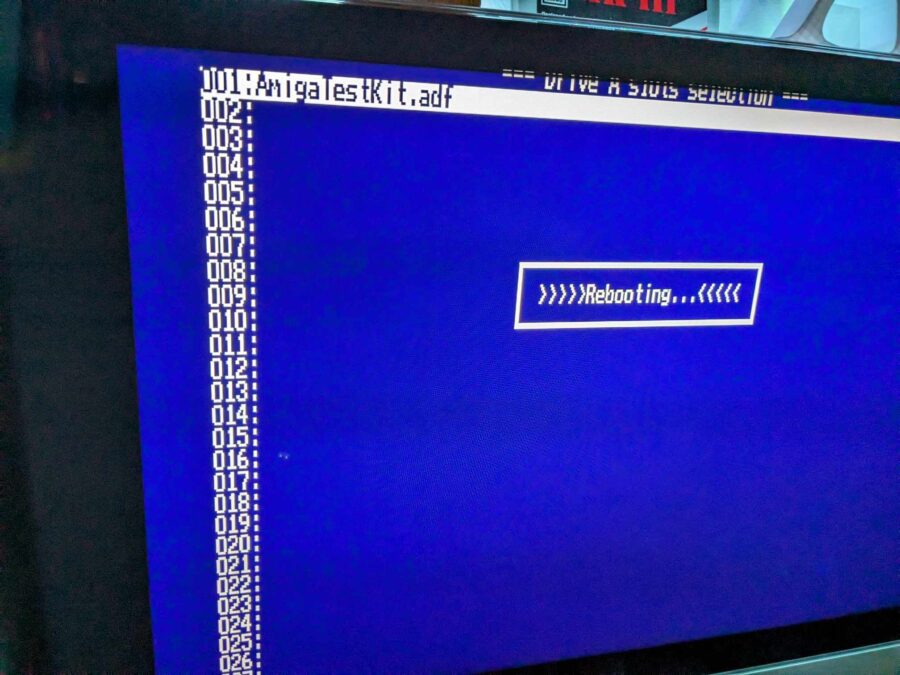
Using the keyboard select the AmigaTestKit.adf file, press enter and then select slot 001. Now press F10 on the keyboard!
The slot number in use can be selected using the two buttons on the front of the gotek. This allows you to load multi “disk” games into their corresponding slots and when prompted for another disk it can be selected using the buttons.
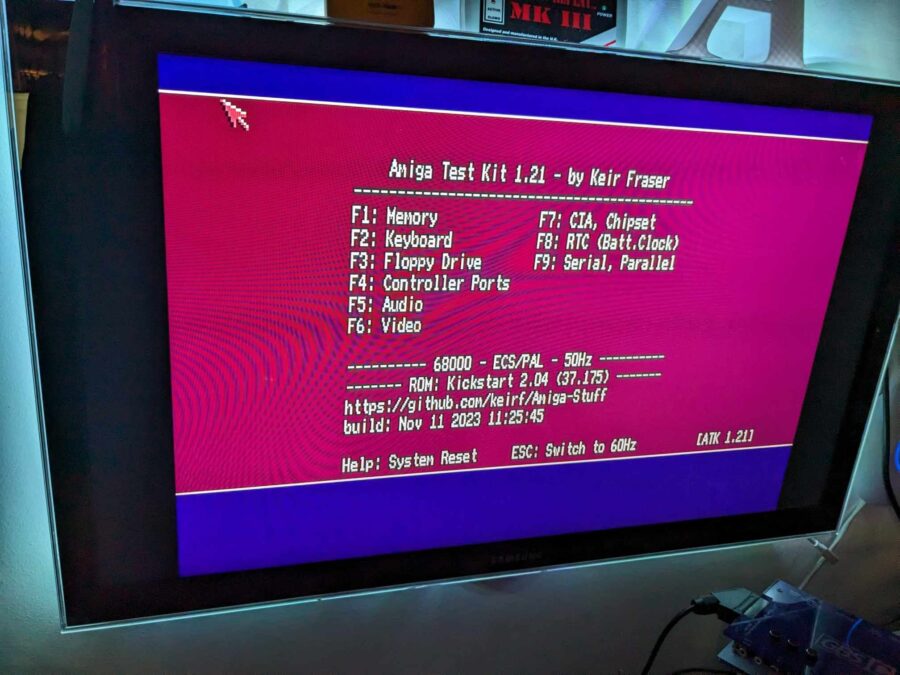
Finally! There you go!!!! Sit back, have a cup of Yorkshire Tea and admire your work.
Want to fit it into the Amiga, add an OLED screen?
We’ll cover that in the next instalment, it’s coming soon and when it’s live the link will be below
Let’s hear from you!
Did I explain it all OK for you? Can you spot anything that needs tweaking or improving? Let me know in the comments below