If there’s one thing you’ll know as an Amiga “enthusiast” is just how expensive our hobby is becoming. Many moons ago you could buy into Amiga ecosystem with a preloved Amiga 500 for less than £50 and enjoy the delights of the Amiga without breaking the bank. These days you’ll be lucky to get a decent A500 for anything less than £100, and don’t even think of trying to reach A4000 levels of performance without some serious cash and a very understanding partner.
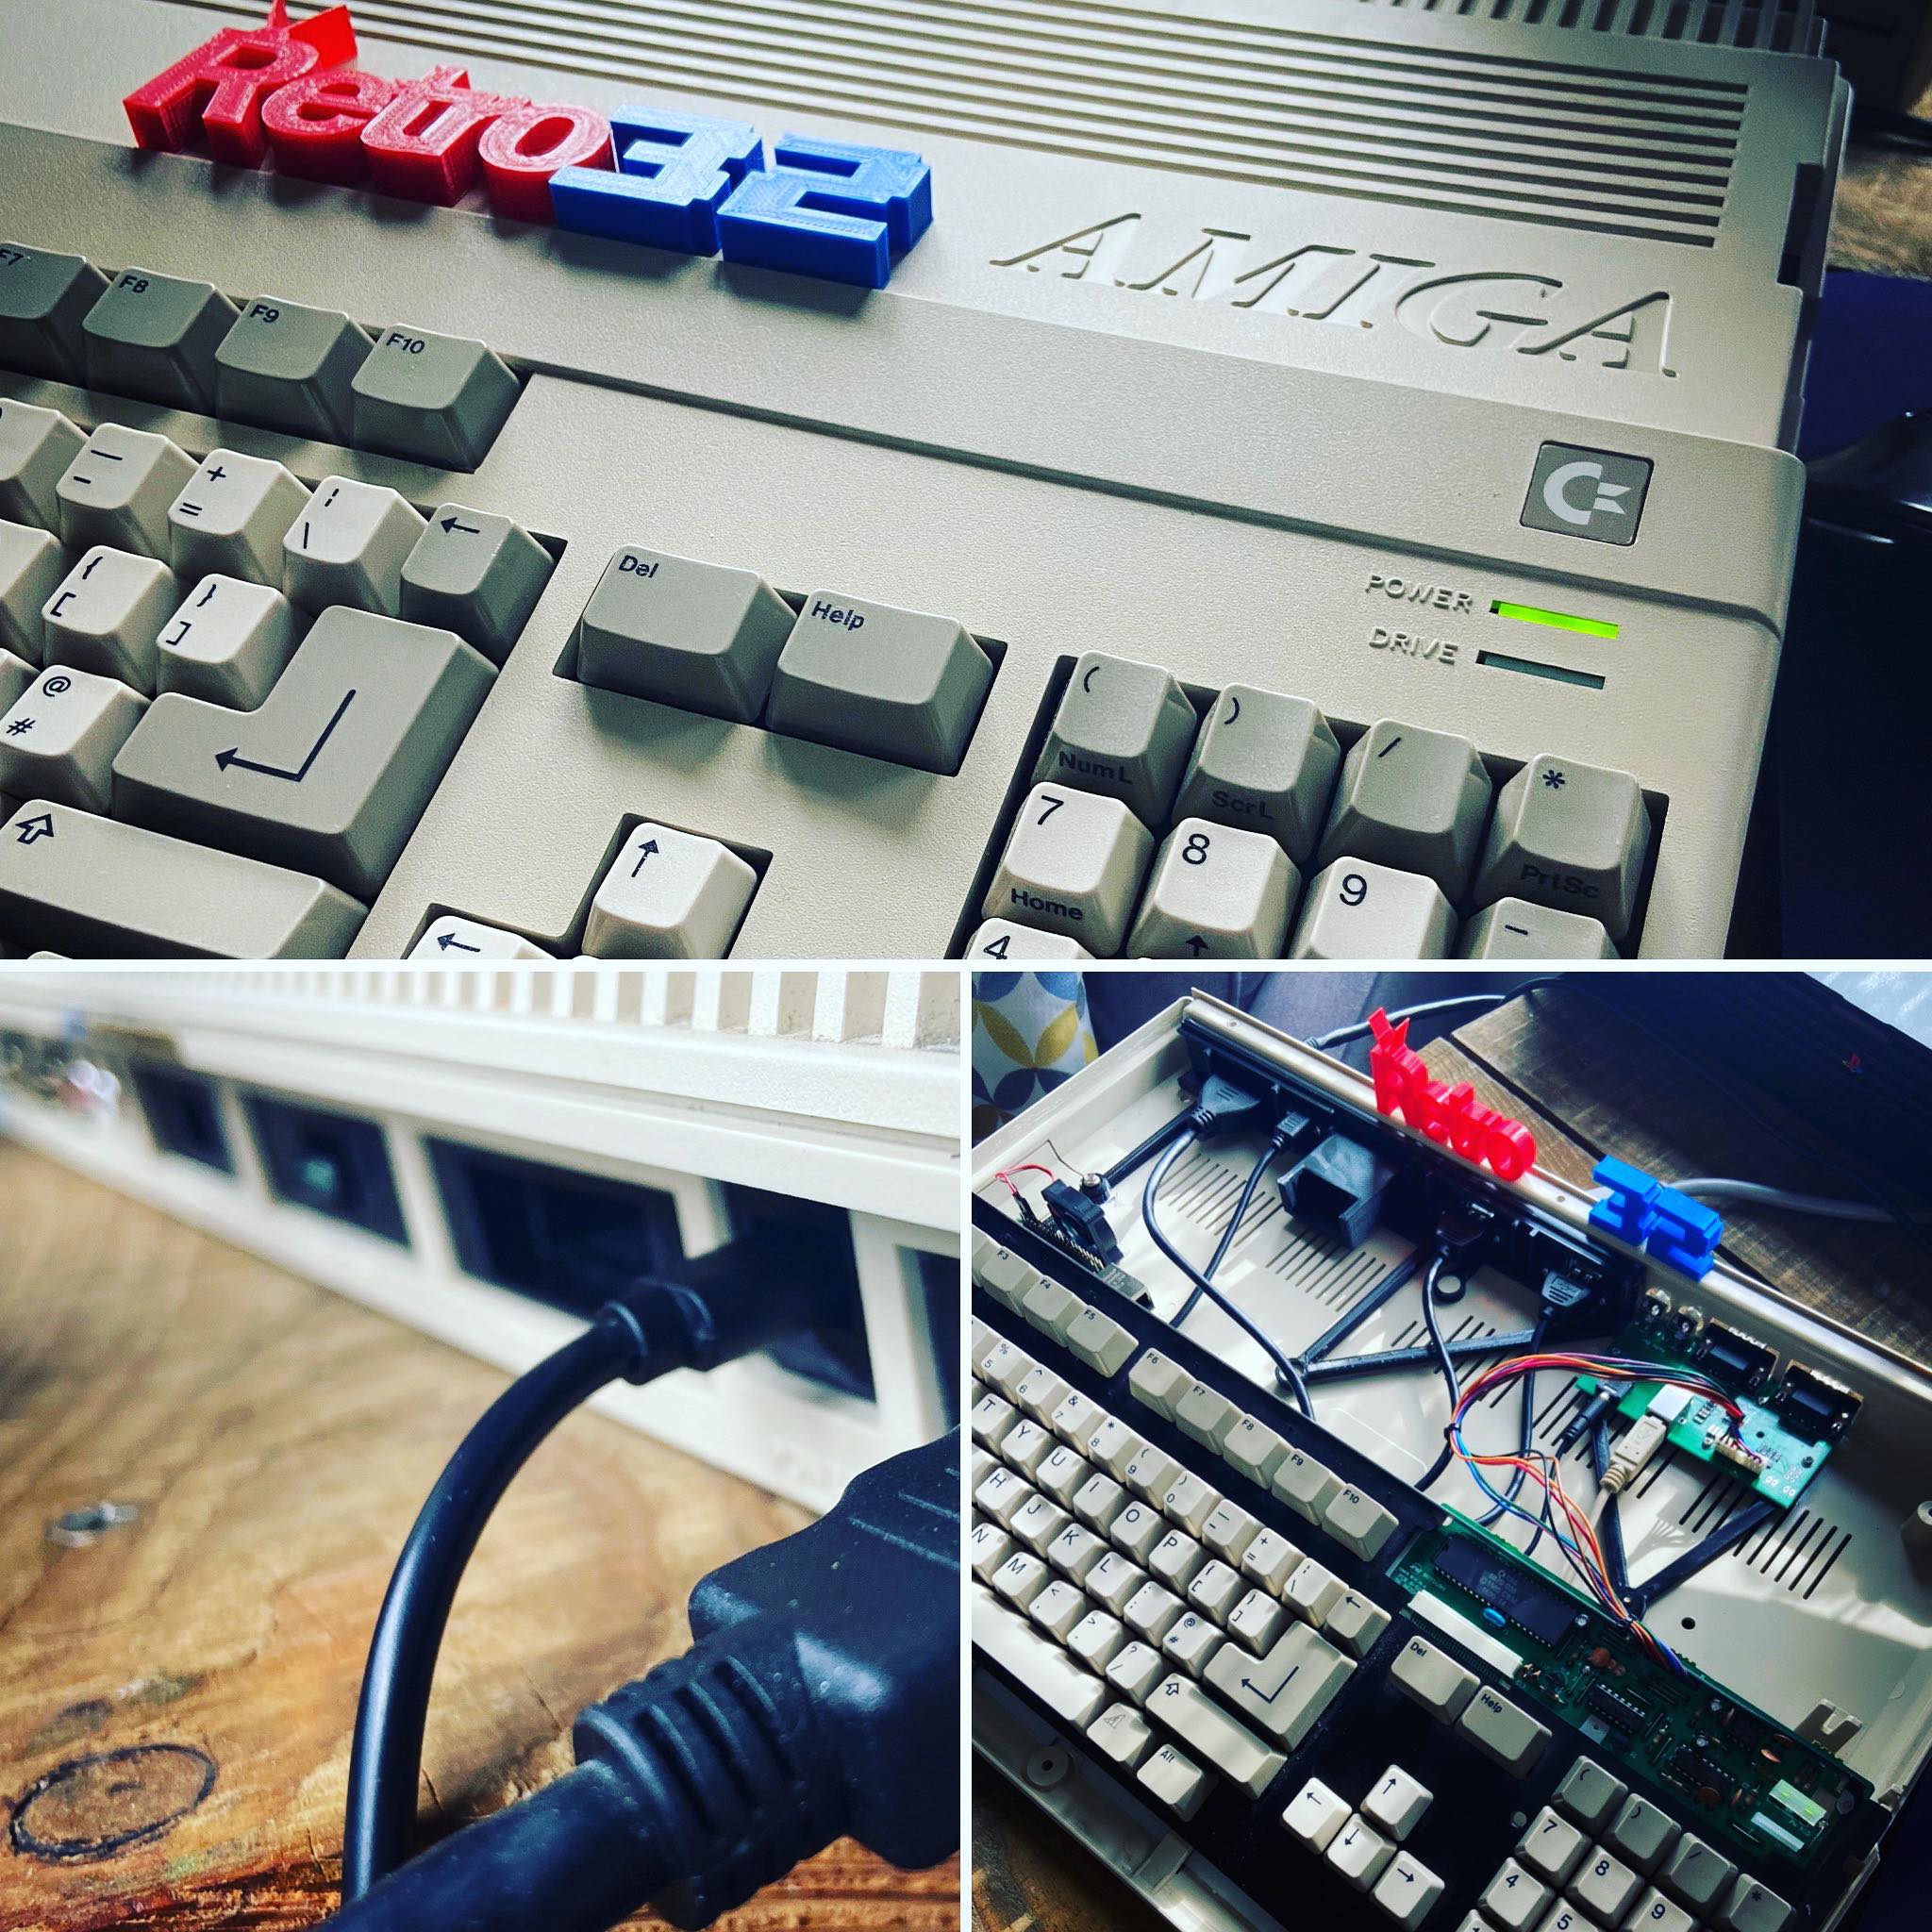
Despite my extensive Amiga collection (8 and counting) I’ve noticed a number of interesting projects involving the use of a Raspberry Pi and an Amiga 500 case, living in such harmony that you’d actually be hard pushed to even know it’s not a “real” Amiga. After some digging, I decided to take on such a project, and with the help of a fellow Amiga enthusiast, I’ve managed to put together an Amiga with blistering performance for less than you’d pay for a tatty Amiga 1200.
Disclaimer
Before all my fellow Amiga fanboys and girls get on their high horse, this project is completely non-destructive. No Amigas were harmed in the building of the Amibian / Amiberry machine. This type of project isn’t for everyone, the purists may well disapprove. Continue at your own risk and I’ll understand if it’s not for you.
The Parts
Firstly you’ll need an Amiga 500 case with a working keyboard. We’re going to cover the software installation in a separate build log so if you’re just happy to use a Pi without the full Amiga experience then move onto our Software article (coming very soon).
You’ll be needing the following items in your shopping basket
- 1 x Raspberry Pi 4 (4GB) – We’d advise a kit with SD card / Power supply and cooling accessories – https://amzn.to/30dQ4Ja
- 1 x Amiga 500 mounting kit (direct from Retro32.com – order here!)
- 1 x Tynemouth Amiga 500 Keyboard controller kit – https://www.thefuturewas8bit.com/tms-a500-key.html
- 1 x USB Type C Power cable adapter – https://shop.pimoroni.com/products/right-angle-panel-mount-extension-cables-25cm?variant=32013609664595
- 2 x USB Type A cable adapter – Ebay
- 1 x HDMI Mini adapter – Ebay
Total Cost: Approximately around £200 + an Amiga 500
That may sound like a lot but considering the performance and flexibility of the machine, it’s a small price to pay for what some consider the ultimate Amiga experience.
Note. You can use a Raspberry Pi 3 for this project but we’d highly recommend using a Pi 4 to get the very best performance from your machine. With this in mind, the shopping list above and article is only applicable to the Raspberry Pi4. It’s certainly worth spending a few more quid on the 4.
Tools
Depending on your mounting solution, you’ll only need very basic tools (screwdrivers etc). However the mounting of your HDMI header may require the use of a glue gun and also a soldering iron. These can be purchased from Amazon
The Build
The “doner” machine.
We started with a relatively clean and unyellowed Amiga 500 case whos motherboard is currently with RetroPassion for some love after experiencing heat-related stability. I’m expecting that board back in the very near future so I’ll be keeping my eye out for an empty case or unit with a totally failed motherboard so I can find a permanent home for the PiMiga project.
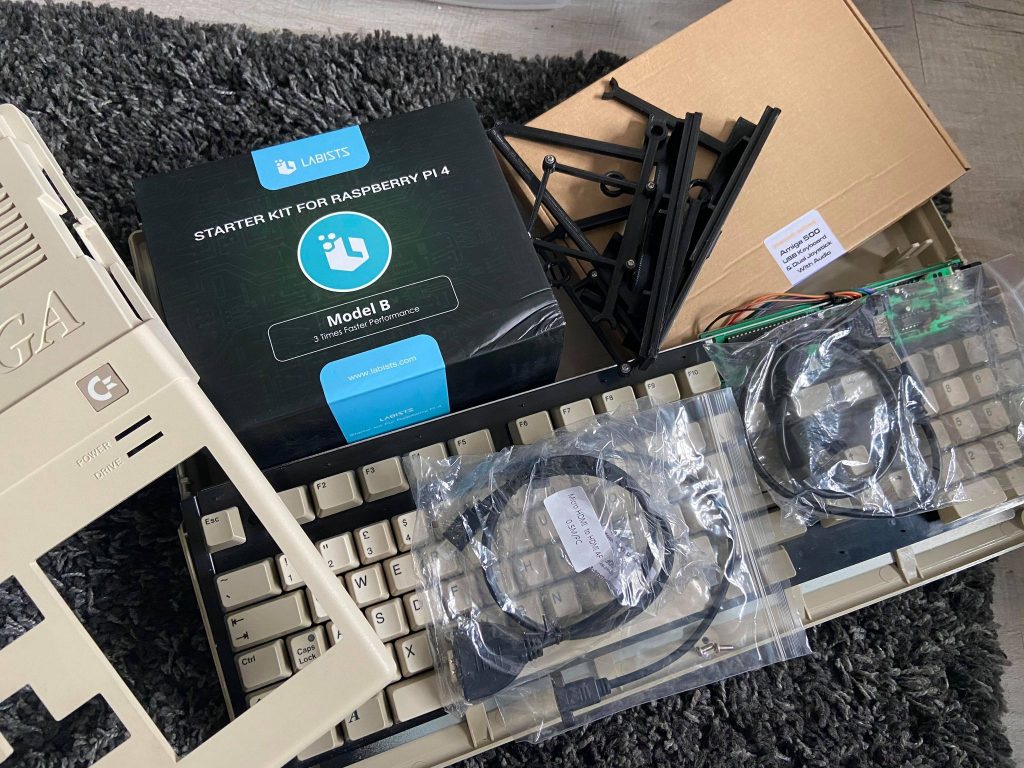
All the components for my PiMiga ready to assemble
Let’s open her up!
When removing the guts of any Amiga take the utmost care to prevent any damage to the case, it may be brittle so please be careful, she’s can be a fragile old bird.
After surgery, we’d recommend that you take the opportunity to thoroughly clean the case. I opted for a quick hoover with the handheld Dyson, then a clean with non-abrasive baby wipes followed with a microfiber cloth. PLEASE DO NOT use harsh chemicals on your beloved Amiga (unless you are retrobrighting it).
It’s time to install!
With the case cleaned, install the mounting kit as pictured- being careful not to over bend either the mounts or the Amiga case. It may take some nudging into place so please, please be careful. Depending on the mounts you may have to cut the audio blanking plates from the right side mount. The latest version of the mounting kit will be available without these blanks in place.
Next, install the holding tabs/washers. We used a combination of PC case screws from many years of building PCs. Be sure not to over tighten as this may damage the case. I opted to mount these in any way I could to preserve the case and not risk any damage to the Amiga itself.

Mounts fitted
Next, install the Pi4 and Tynemouth Amiga keyboard controller as pictured. Again, be careful not to overtighten the screws.
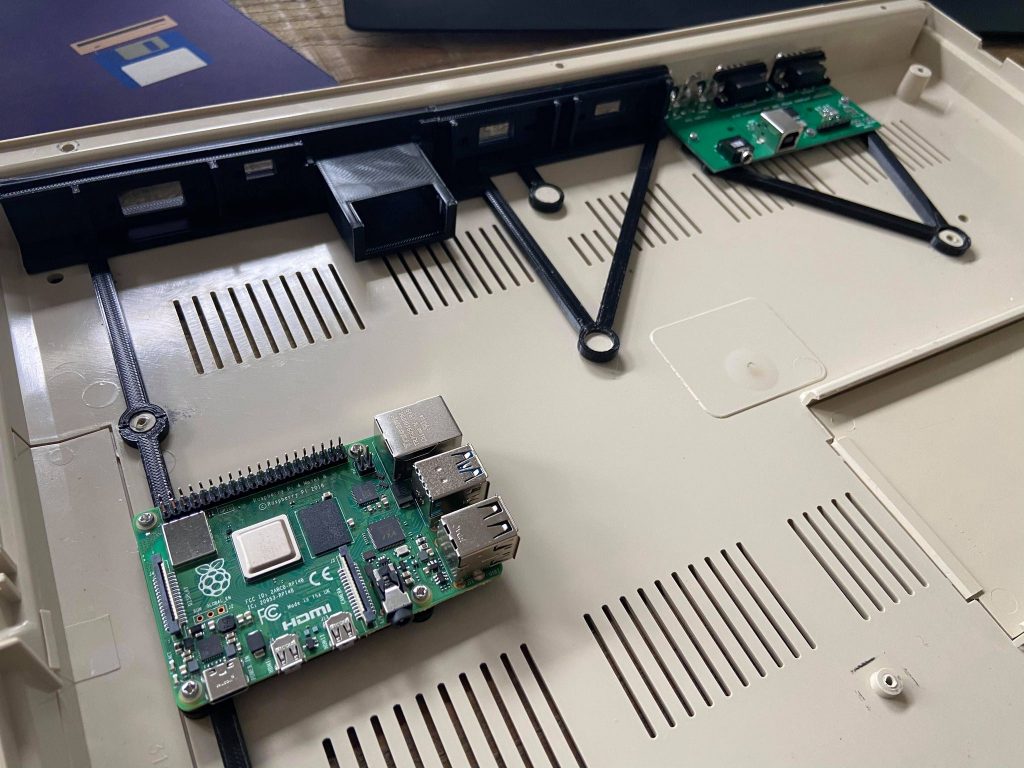
Raspberry Pi and Tynemouth fitted
Once the boards are in place it’s time to fit the cables. Install the USB / Power cables using the supplied screws. The mounting kit comes with the brackets for the USB cables and in our early revision of the mounts, we had to fit the brass fitting with a soldering iron to melt them into the premade holes. You may also need to “trim” the fixing bolts for the USB headers down with a saw or sharp cutters as they may be a little long.
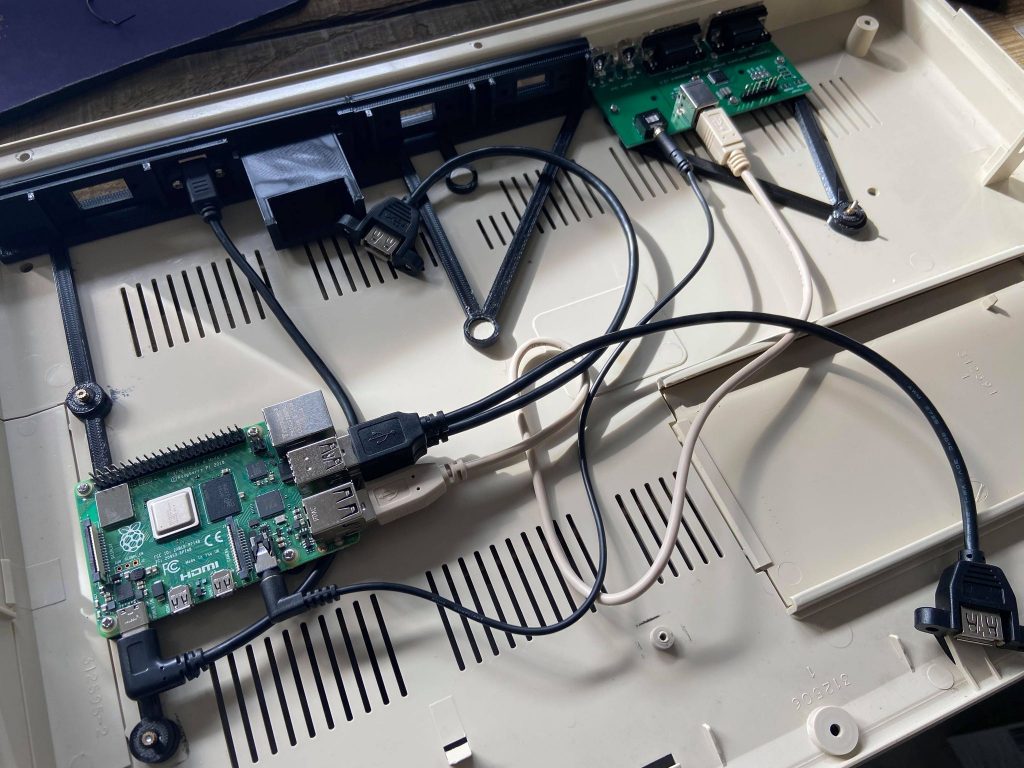
Starting work on the cabling
The HDMI header can be fitted by gluing the header with hot glue or you can slightly modify the black plate so the bolts line up. Gluing gives a better finish from the outside but I wanted a avoid this. I made it fit by moving the mounting holes slightly and countersinking it back from the rear. It’s an entirely personal preference and I’m not entirely happy with the finish – with that said I will look to either fit a 3D printed surround for this or replace it with another mount and look for another fixing solution.
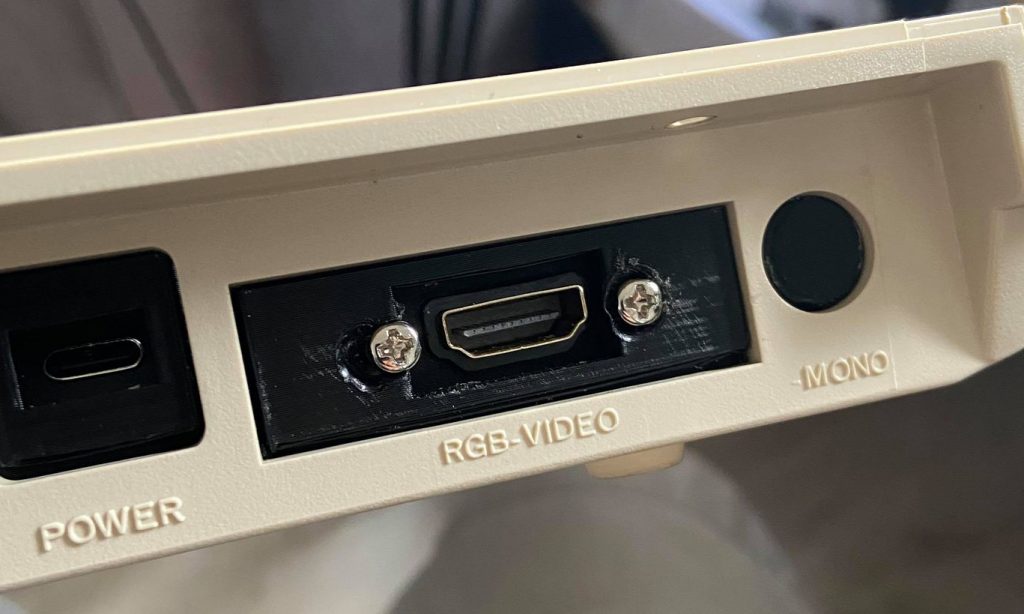
It’ll do – for now…
Be aware that the Raspberry Pi 4 has two mini HDMI ports. The lefthand port (HDMI0) carries both video and audio via HDMI whilst the right-hand port (HDMI1) if for video only. If you’re connecting it using the right-hand port you will need to use the audio out connectors on the Tynemouth controller board.
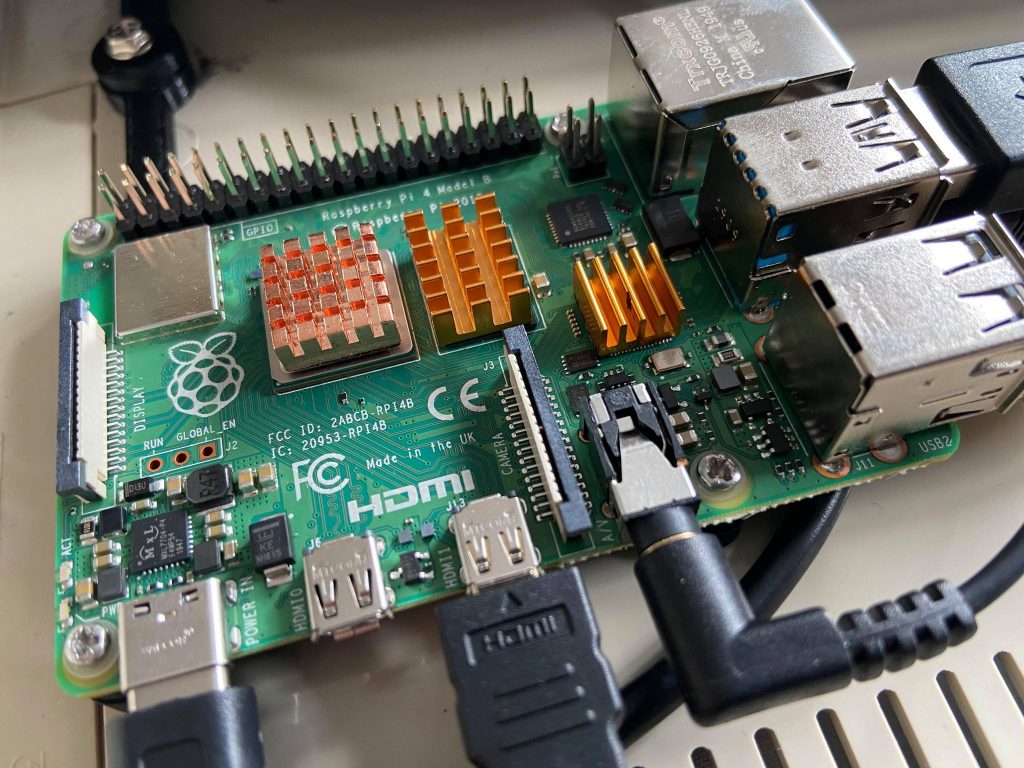
Heatsinks fitted
With all the cables fitted it’s time to turn our attention to the Pi. Our kit was supplied with self-adhesive heatsinks and a small fan. We’d advise connecting the fan as pictured using a small amount of double-sided tape, however, the mounting kit can be supplied with a fan bracket to allow it to be positioned directly above the chips. As per the Pi instruction book, you can connect the Pi using either the 3.3v or 5v GPIO headers, to minimize noise I opted for the 3.3v header to keep the fan barely audible.
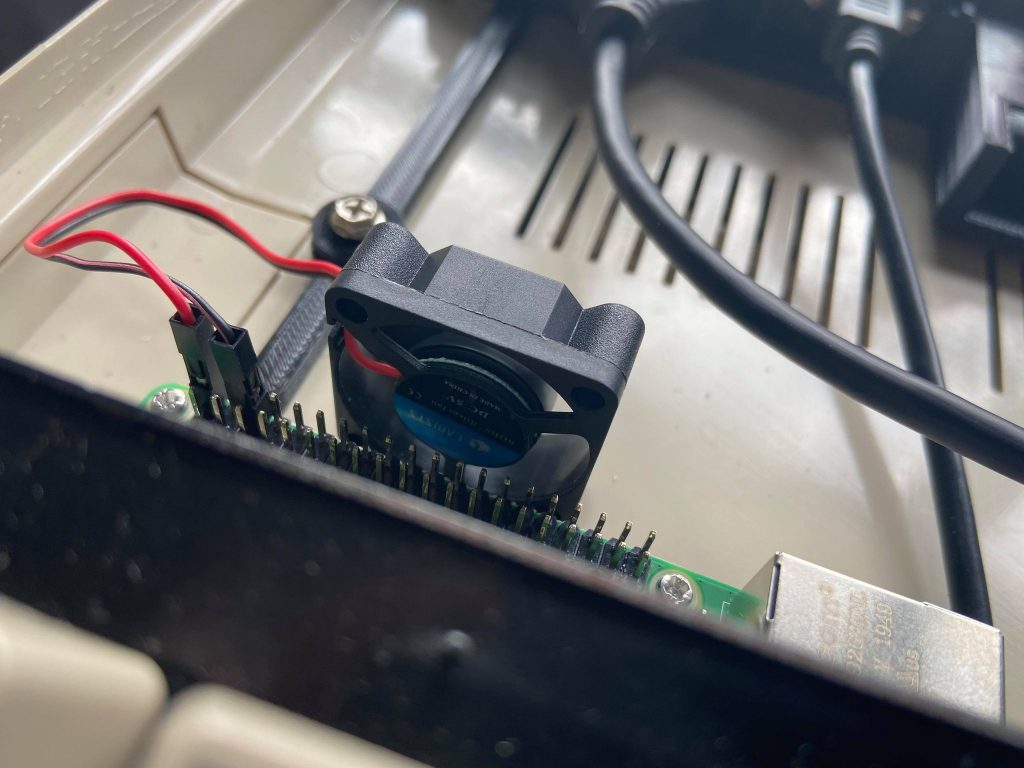
Fan connected to keep the old girl cool
Lastly, it’s time to connect the audio header and USB cable for the Tynemouth Amiga 500 keyboard controller. You can then connect the keyboard to the controller ensuring pin 1 (marked with a black arrow) is to the left.
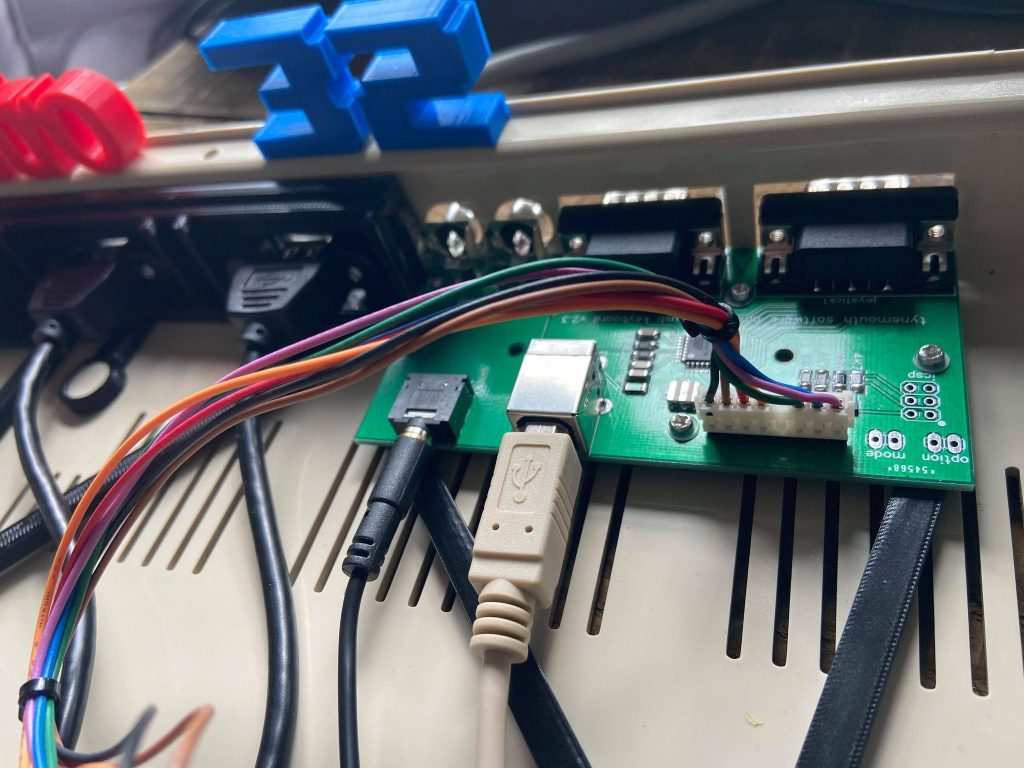
Keyboard Pin 1 indicated by the black marker
The Finished product!
With that, you’re done! If you insert the SD Card bundled with the Pi you’ll boot to the Raspbian OS where you can check all is working as expected. An Amiga 500 running Linux. Feels dirty doesn’t it!

It’s A L I V E !!
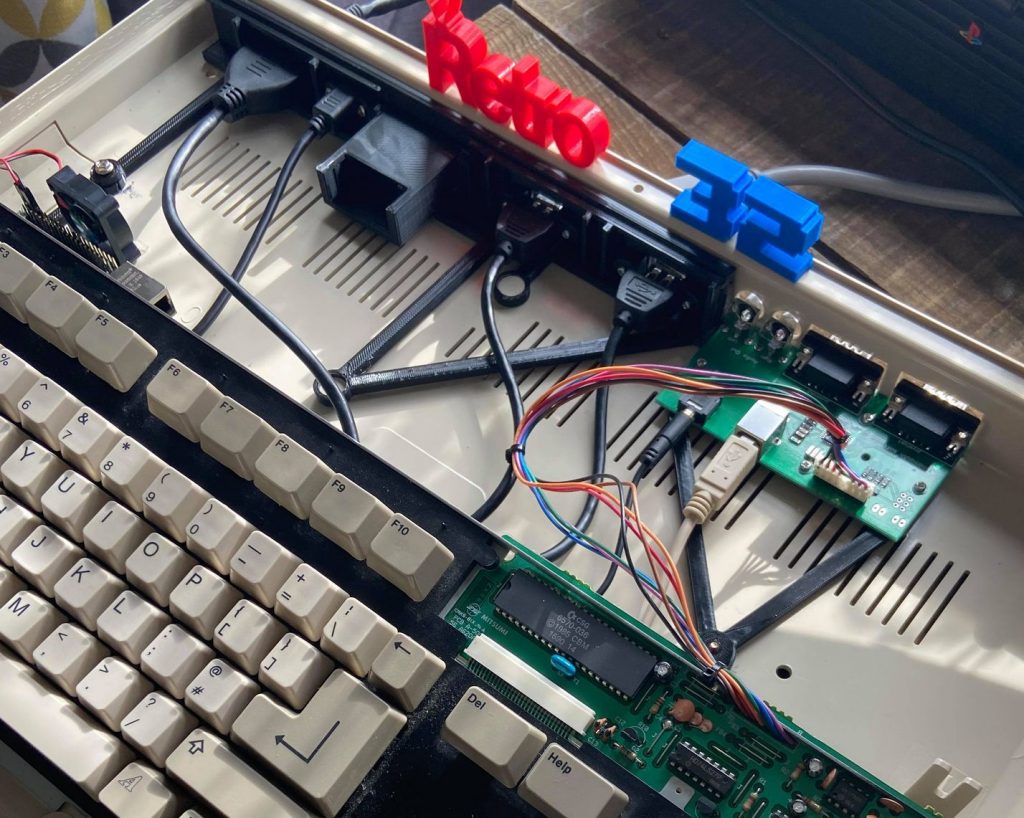
Cables tied and keyboard installed. Look at all that room for activities!
Amiga 500 mounting kit
The mounting kit is evolving quickly following feedback from its growing customer base. It’s great to see how the evolution of new and old is shaping our amiga experience using new technology and enthusiast produced hardware.
I’ve been working with the producer of the 3d printed mounting kit to not only help improve and develop the product but also with the view to offering them for sale on our website. Please do get in touch if you’d like to purchase a kit and if there’s the interest we’ll hold stock of them and make them available for purchase directly. It in touch via karl (at) retro32.com
** Update! **
I’m very happy to confirm you can secure your very own Amiga 500 Pi4 Mounting kit via our amazing website. They are available in black and white with more colours and even a full cable kit coming soon. Click here to order
At present they are only available for the Amiga 500 and 500+ (some minor differences from the A500) but versions for the Amiga 600 and 1200 are in development.
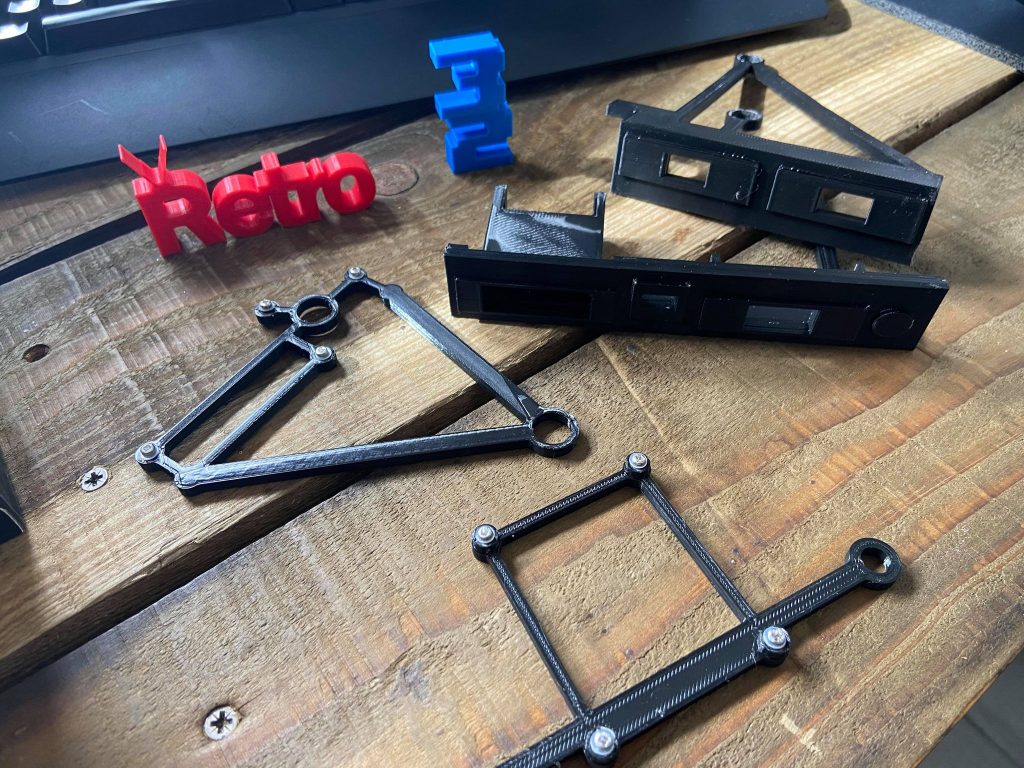
Precision 3D printing right there. A perfect fit!
Further improvements
Our PiMiga is all up and running but there are some other improvements I’ll be making in the near future. I’ll be adding a disk activity LED to complete the Amiga experience and I’m also considering what to do with the opening once occupied by the floppy disk drive. Like many of my other projects, I’ll be making incremental changes and updates to the machine so be sure to follow us on social media to track our progress.
Software
In our next article, we’ll cover the all-important Amibian software installation and setup. Building the PiMiga was the easy bit!!
Let’s hear from you!
We’re always looking to improve our articles so please let us know if you have any suggestions or additions. We’d also love to hear about your PiMiga projects and your experiences so please let us know in the comments below.
Composite phono is doable but it’s default disabled on a pi 4. To turn it on;-
enable_tvout=1
You will get a lower speed emulation but still faster than a Pi3B.
In our next article, we’ll cover the all-important Amibian software installation and setup. Building the PiMiga was the easy bit!!
Hello Retro fellow…just read about your wonderful project and was wondering if the second part for installing the software had been published.