Before we get into the juicy Pimiga goodness, let’s clear a few things up.
You SHOULD NOT pay for PiMiga 2.0 or any other version. Anyone “selling” PiMiga installation is NOT doing so lawfully. Pimiga is the brainchild of Chris Edwards (check out his YouTube Channel here) – who has the Trademark for the Pimiga wordname and logo. The recent “attacks” on him are both unjust and simply a disgrace. Pimiga was created for the benefit of the community, if you want to support anyone then please show your love for Chris. Without the dedication, expertise and generosity of Chris and others in the Amiga community, we would not have the abundance of software and hardware we now enjoy. Support these legends in any way you can.
If Mike Steele is reading this. Go f**k yourself. In the words of Monkey Island “Now I know what filth and stupidity really are.”
With that out the way, let’s get started.
Useful links
Whilst I hope this guide is useful, you can not beat the wise words of the folks over at the PiMiga Discord Group. I can’t stress how much I recommend joining them over there.
Downloading Pimiga 2.0
- Firstly, you’ll need a BitTorrent client, some options for this are rTorrent, QBittorrent… It’s up to you.
- You should now download the torrent. You can get this from the PiMiga discord group or use the link below.
Please make sure you seed for as long as possible. We seeded this with over 2.4TB of uploads – a worthy and noble cause!
![]()
Simply open the torrent file with your client and the download will begin. The file is over 22GB and unpacks to over 60GB. Make sure you have the space for the files. Depending on your connection speed and the number of seeds – this may take a while.
Whilst the Pimiga downloads – why not check out the readme file included using the link below.
Installation
What do you need
- WinRar or 7zip (we recommend Winrar)
- Win32DiskImager – download here
- A Raspberry Pi 4 / 400 (you can not use a Pi3). At this point we’d recommend the Pi 400 as Pi 4 boards are like rocking horse s**t.
- A 64GB SD card – Amazon is a great source for these – click here
- You will need an Amiga 1200 ROM file (v3.1 is suggested). Please make sure you obtain these legally.
Which Pi4?
There are a number of Pi models offering different amounts of RAM. Any variation will work however if you intend on having a memory hungry Workbench setup it’s recommended that you use a Pi4 with at least 4GB of ram.
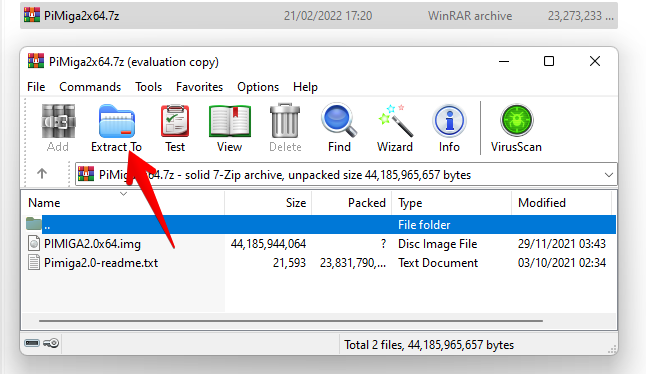
Unpacking Pimiga
Locate the file you have downloaded with your torrent client, you will need to extract the file contained within the PIMIGA2.0x64.7z file either using 7zip or Winrar. We love us some Winrar (as below). This .img file will unpack to over 40GB so make sure you have the room for it.
Write the Pimiga Image to the SD card
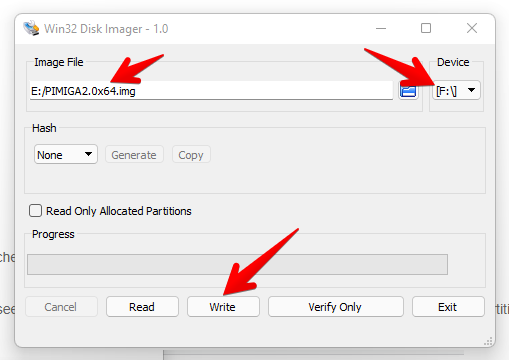
- Open Win32DiskImager
- Select the image file you extracted above, select the SD card as the “Device” and click “Write”
When prompted to “Confirm overwrite” click yes
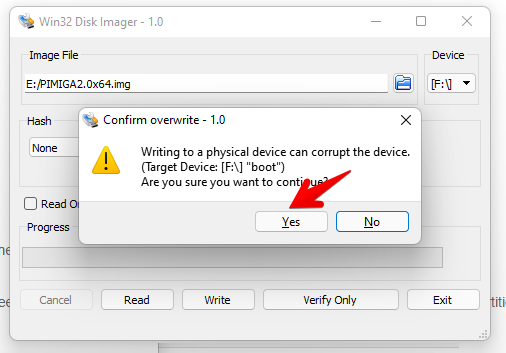
This process could take some time (40mins+), go get yourself a cup of Tea or Coffee and check out some of the videos on Chris Edwards YouTube Channel
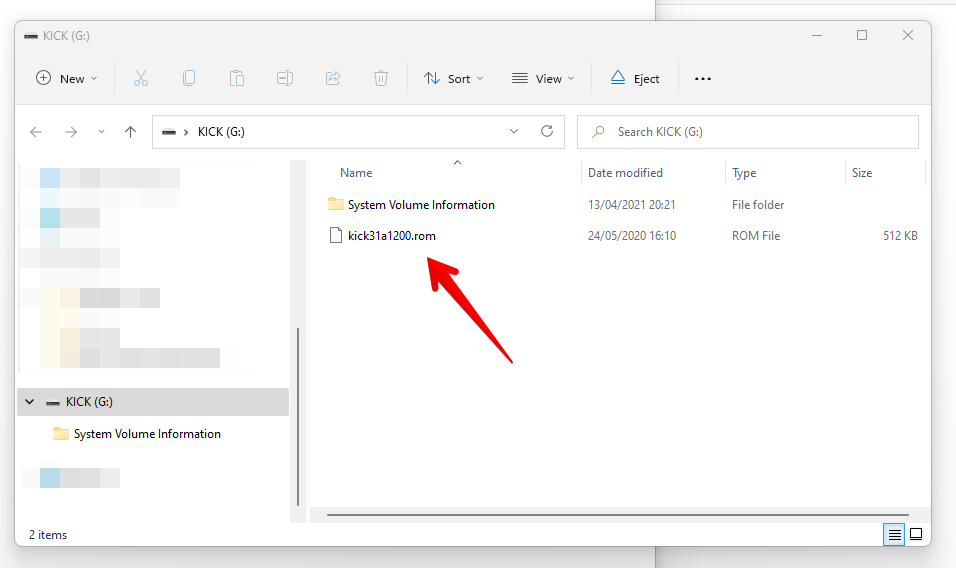
Once the writing process is complete and you are sufficiently hydrated you will see that there is a KICK partition on the SD card. Drop your ROM file into the partition and you’re away.
Now simply pop the drive into your Pi and you’re away!
When booting you will see this screen. No need for alarm. It’s just Linux doing its thing.

Be patient. You’ll soon see the promised land.
FAQ
The discord covers some of the more complicated setting that maybe required if you like to tinker but here are a couple common ones you might need.
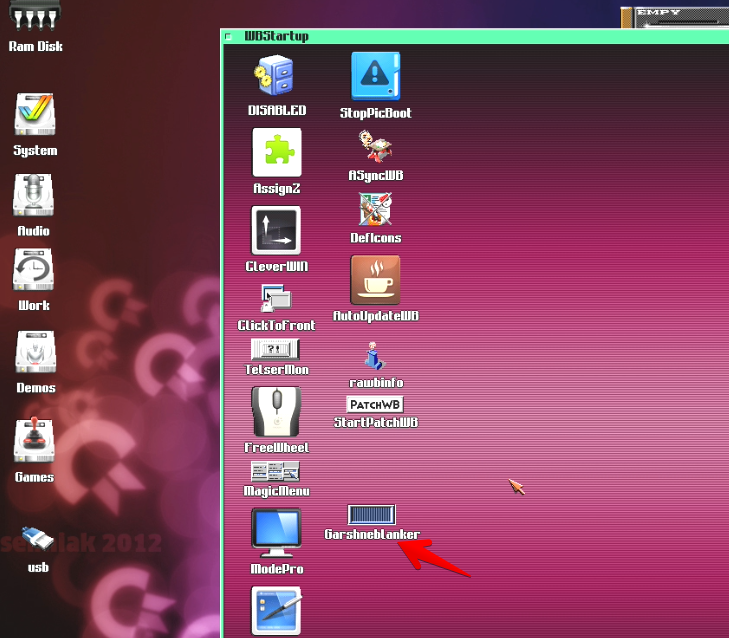
How do I turn off the Pimiga screen saver – “THE TOASTERS”
The screen saver is located in System > WBStartup – it’s called Garshneblanker. Simply move this to another folder
How to setup Wifi
So you want to get your Pimiga online using Wifi. Follow the steps below
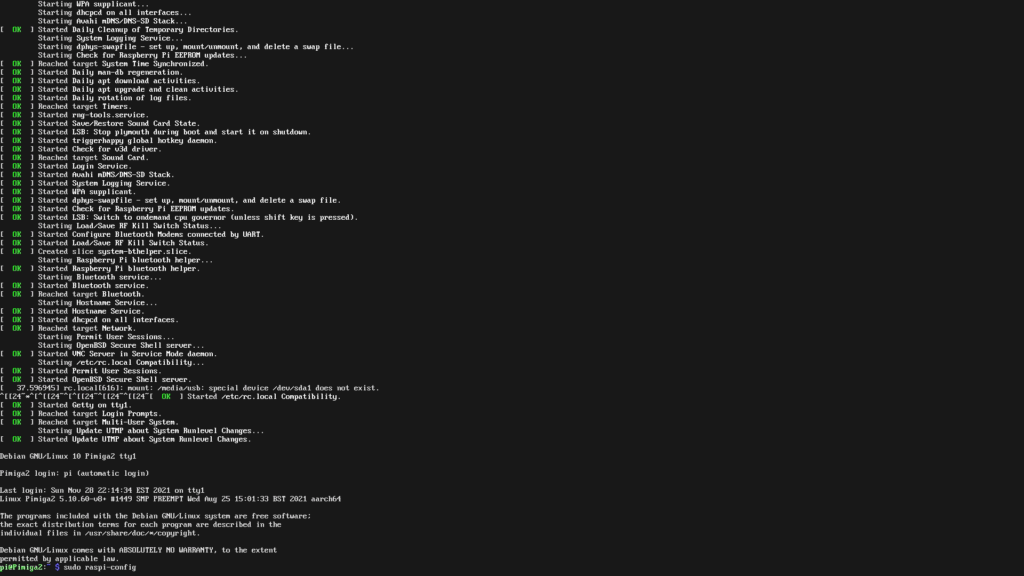
Press F12 – this show the Amiberry Menu – Press Quit at the Bottom Left
At the terminal type SUDO RASPI-CONFIG
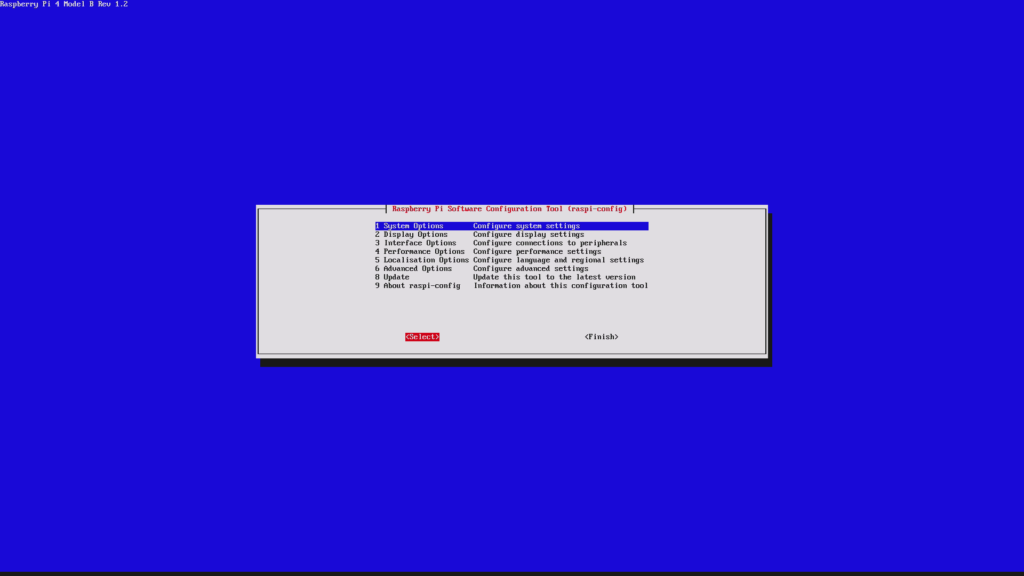
Using the keyboard select 1. System Options and Press Enter
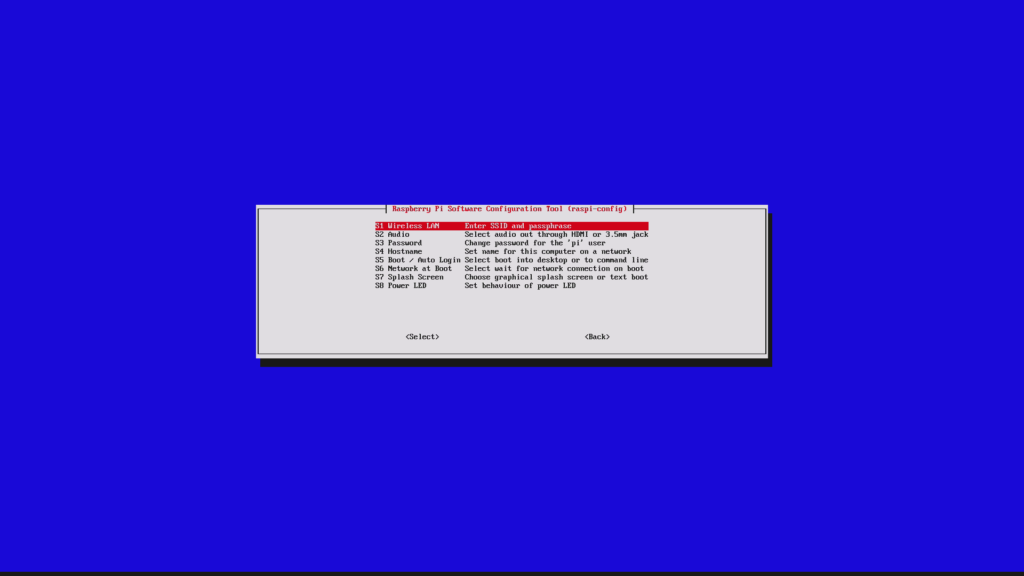
Select S1 Wireless LAN
Enter your WLAN SSID
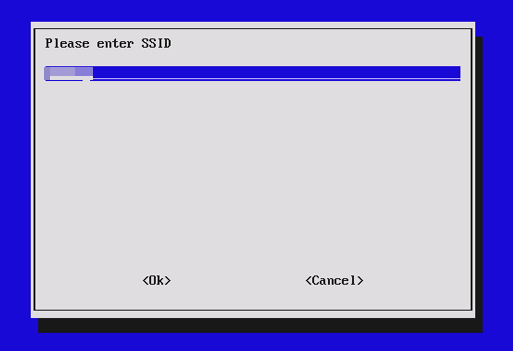
Then your wireless password (PSK)
Click OK – Then BACK and Finish. At the terminal type SUDO REBOOT
Like magic, your Pi will reboot 🙂
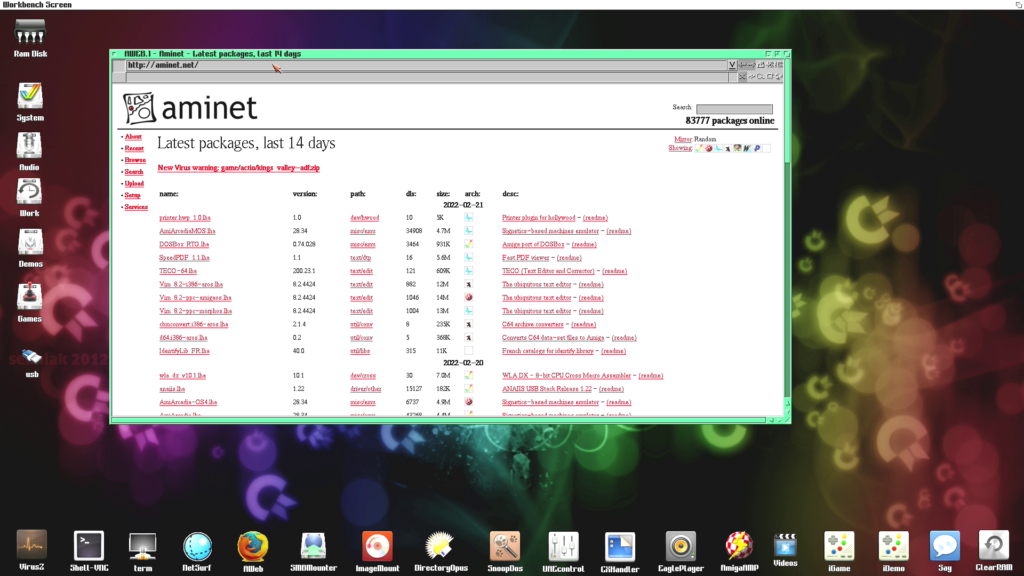
You now have your Pimiga online!!! Time to browse aminet!!!
Help!
I can not stress enough how helpful the folks are over in the office Pimiga Discord Community. Be sure to check it out and be sure to say hi!
There is an FAQ document pinned on the discord that answers any common questions/issues. There’s no point in me listing them here as things are liable to change.

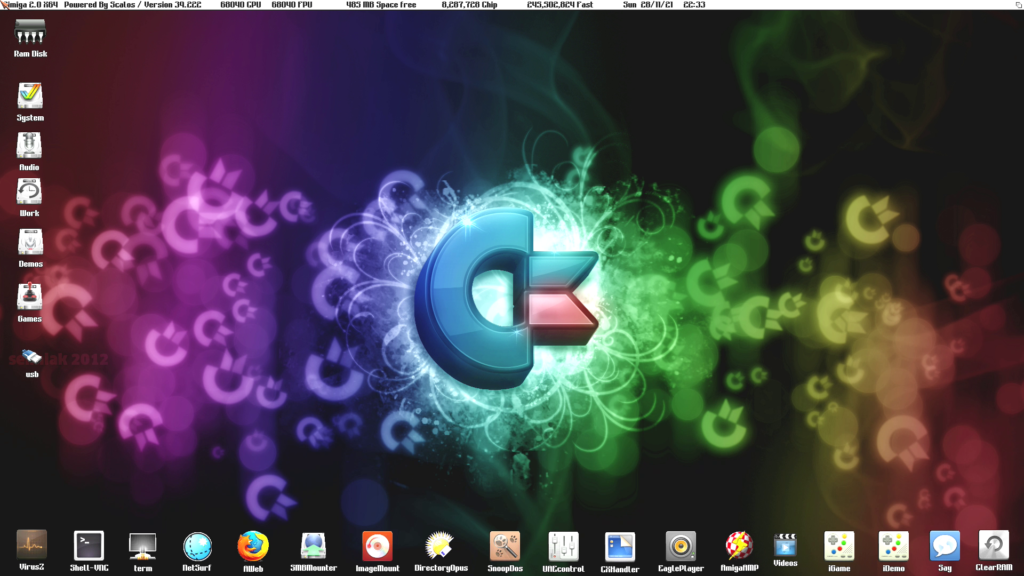
What to do with your Pimiga
As a right of passage, there are 2 things you must do first. Firstly run SysInfo to see how darn fast the Pimiga is. SysInfo is located in System > Programs > Benchmarks > SysInfo
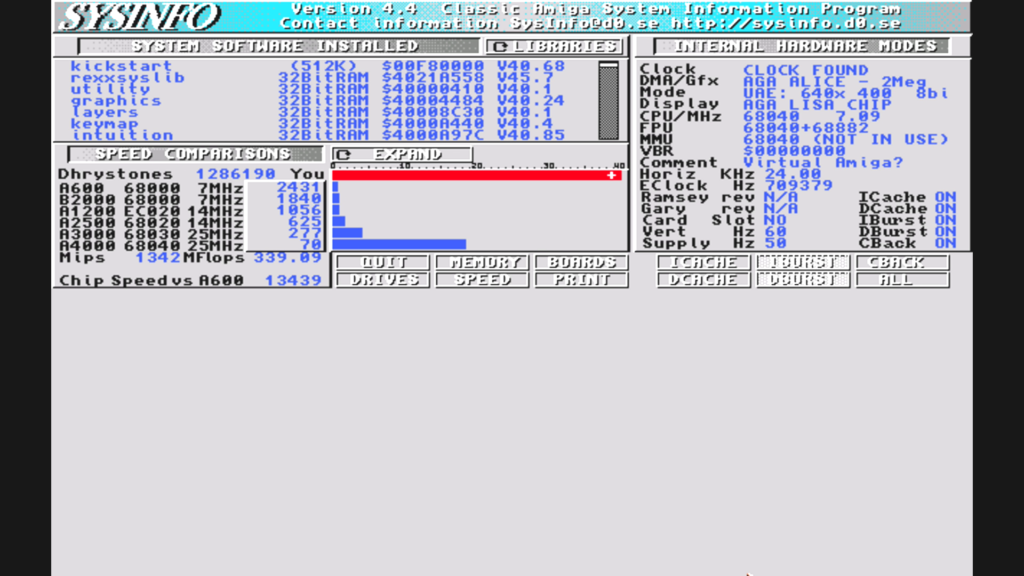
OOOOOooooooffffffffffffffffff
She’s fast. Very Fast.
Next, you must run the Frontier demo and compare smooth it runs compared to 1995 when it ran like a slideshow on your childhood Amiga 500. Run iGame using the icons at the bottom of the Workbench desktop. In the Filter bar type Frontier

Not only will you be amazed at Frontier – you’ll also have access to a total of 4841 games from iGame. That’ll keep you busy for a while.
What have we missed?
Have we missed something? Are you struggling with something or are we talking s**t at some point in this article? Let us know in the comments or email karl (at) retro32.com
Our PiMiga Setup
We’ve done things a little different with our PiMiga setup. We have used an Amiga 500 case and a non-destructive mounting kit for the Raspberry Pi.
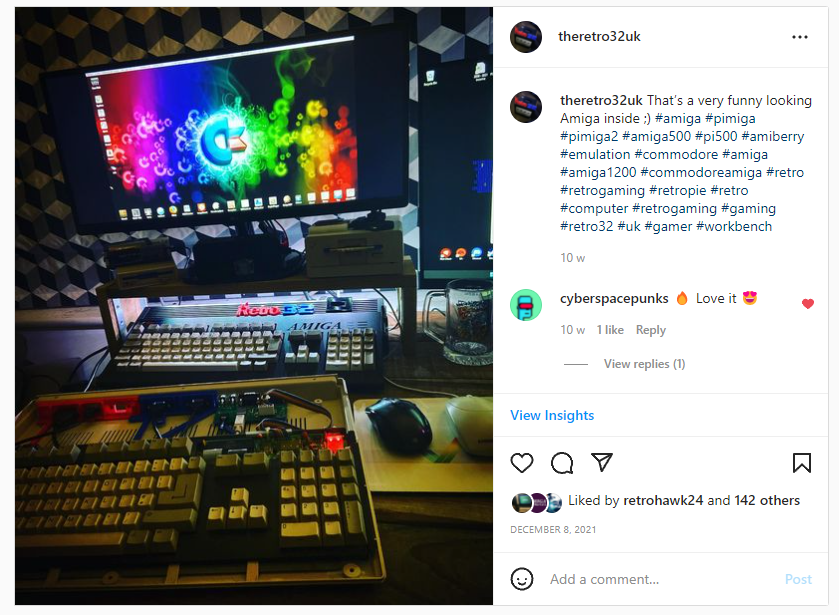
If you’re also looking to do this we do sell an Amiga 500 keyboard USB adapter that will let you connect your Amiga 500 keyboard to your Pi. We Did offer the 3D printed mounting kits and would consider doing a run of these if there is interest.
Let’s hear from you!
What are your experiences with Pimiga 2.0, have you got any tips you’d like to share? Let us know in the comments below
Informative set up and info guide, superb work man!
Looking forward to adding some filler to the next article
PiMigaaaaa…
Thanks. I will be setting mine up in the next week on a Raspberry Pi 400, so this is very helpful.
sound seems slow/choppy on my pi dunno why any ideas on how to fix?
Hi Cerys – here’s a little tip we got from Chris Edwards direct about any possible sound issues
“If your sound messes up f12 audio slide the buffers Down to zero and turn khz to 22050”
Let me know how you get on.
Cheers Karl
Hi there
I’m having the same audio issue after turning the buffer to 0 and the kHz to 22050
Any ideals cheers Brad
Have the same issue but I don’t think it’s emulator speed, it seems to be the pi when connected to 4k screens issue. Runs fine and get 165 FPS in the quake/quake demo on a 1080 tv. On a 4k TV, sound is choppy, lowering settings fixes nothing. And quake demo runs at 20fps. Even when the pi 400 is overclocked. I’m sure it’s an issue with the screen resolution and the hrtz rate but can’t figure it out. Workbench is 1080p and Amiga games are choppy even at Amiga resolutions. When I quit out of winuae, the Linux command line text is microscopic, leading me to believe this is a screen size issue/hdmi setting
Yes finally i did it, it runs on my 4k TV HDMI in 1080p mode at 60Hz, originally it runned on 4k with 30Hz, i updated the pi using sudo apt update and then upgrade, after that reboot and quit into the terminal where i entered raspi-config, only changing locals to Europe and timezone Berlin for me. After reboot it started in 1080p@60Hz and its running fine with clear sound.
How do I add games and programs and demo roms into pimiga please.
Any help is appreciated
Had the same symtoms on my 4k LED TV, i hooked the pi400 on my other LED TV with 1080p/50Hz and the sound is just perfect! Thx for Ste fish´s hint.
Very cool stuff!
Thank you so much for this kind of software, just drop my Pi 400 into the Basket and can’t wait for it! Your Amiga 500 case installation looks awesome, if time is ready I think I would order your Keyboard adapter and mounting kits, if they are still available. My amiga 1200 is gathering dust in the attic, too complicated to get it running. 🙁 I’m really looking forward to pimega! Brgs form Germany
i have problem. i create to SD card but i see only the partition Boot e no Kick
delete my post back.
i solved all ok. i read the file txt
is beautiful 🙂
Salut. Je tenais à vous dire Merci pour ce travail. Étant possesseur d’un Amiga 1200 et ayant un petit problème de clavier, j’ai acquis un raspberry pi 400 et c’est excellent. Un encore un grand Merci.
Hallo ich finde Piamiga super, ich möchte Piamiga 2.0 gerne mit
Filezilla verbinden mir fehlt leider das Password.
Login:pi das ist
Hello, I think Piamiga is great, I would like to take Piamiga 2.0 with me
Connect Filezilla unfortunately I don’t have the password.
Login:pi that is
love the project!
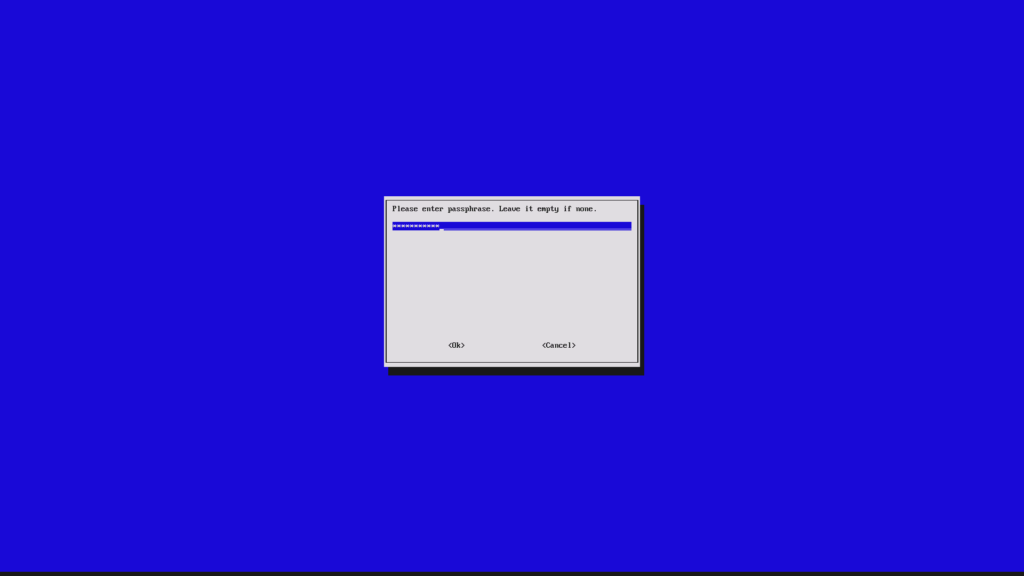
one thing, the readme does not mention you also have to copy the rom.key file to the KICK partition
I would like to know how to upgrade Amiberry etc. in Pimiga 2.0.
If you go to a shell, the Amiberry menu only covers Raspberry Pi 0 to 3.
Hiya. when i click f12 and quit its asking me to login. so i cant sudo. and thoughts?
Having a problem with overscan. the tv I’m using is 1080p but has 0 settings for overscan or underscan.
the linux side of pimiga plays nice as do most of the games (need to add lord of the rings and doctor who but not sure how)
but the desktop itself has the top bottom left and right sides missing. no linsux startup config file changes help. no system pref overscan settings make a blind bit of difference to the desktop (though they affect the games) doesn’t matter what i set the display to the amiga desktop is always 1080p and overscaned.
Great guide! The step-by-step installation process was super helpful, and the tips on optimizing performance really made a difference. Thanks for sharing all this valuable info on Pimiga 2.0!
Where is the Startup Program specified in linux that starts the Amiga Emulator ?