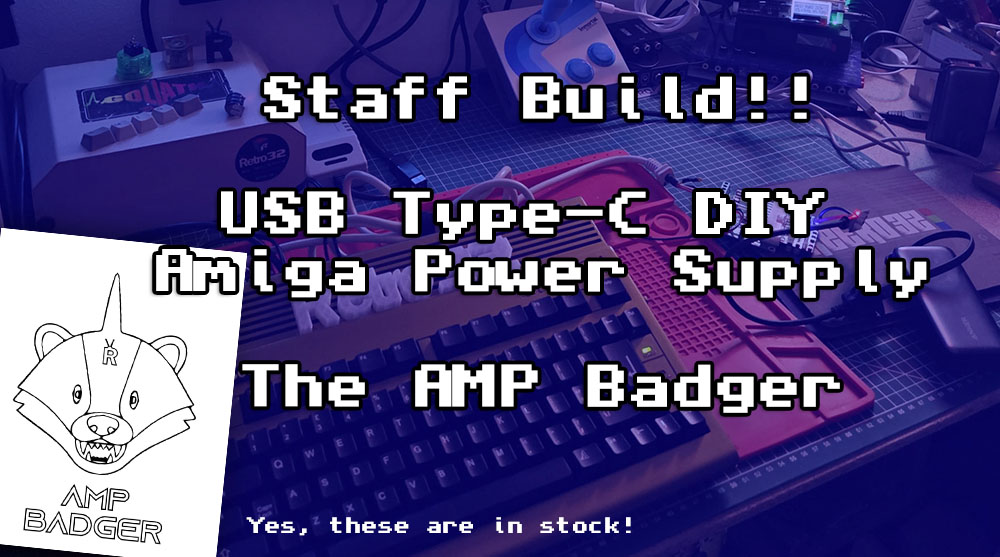
Following on from a recent video we watched about a USB Type-C Amiga PSU, we thought it only right to have a go at making one ourselves and put together a little guide for you.
Here’s the Video – https://www.youtube.com/watch?v=F9m6Bx3e9HM&t=453s – thanks to Hack Build Restore for the video guide!!
We’ve already created several guides on how to restomod original PSUs with a Meanwell, but using USB-C opens the machine up to being fully portable—especially if you’ve got an RGB-to-HDMI board and a USB-powered screen.
Here’s our latest Meanwell Project
Parts
Here are the parts we used for the project. We ordered from Amazon for convenience—yes, you pay a little more, but returns are easy and delivery is next day (with Prime!)
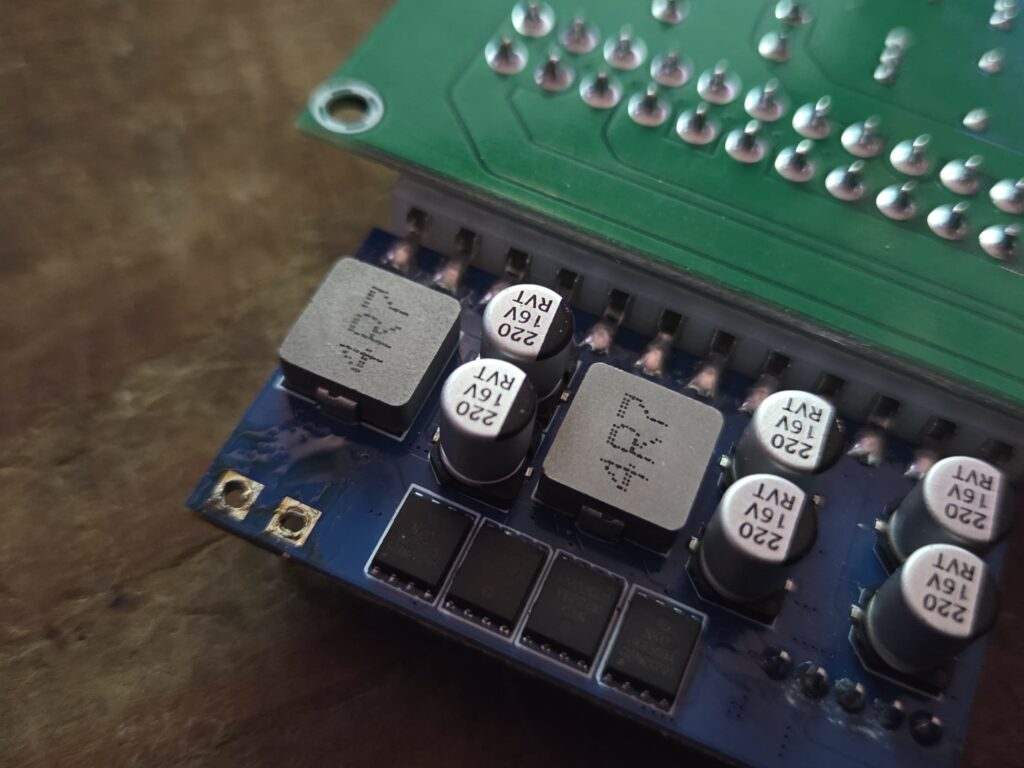
- 160W Pico ATX PSU (12v) – https://amzn.to/48aQEtn
- USB Type-C Decoy Trigger board – https://amzn.to/4raucJz
- ATX Breakout board – https://amzn.to/3K5nOm3
- Button (Self-Latching) – https://amzn.to/4i5H8My
- USB Type-C Panel Mount – https://amzn.to/4icEJQz
The 160W Pico PSU should be more than capable of powering the Amiga—if anything, it’s a little overkill. These are often used in ITX PC builds that don’t require huge power overheads, allowing the machine to be powered from a 12V power brick. Note that the USB Power source will be the limiting factor, most PD USB Type-C power banks supply over 30W.
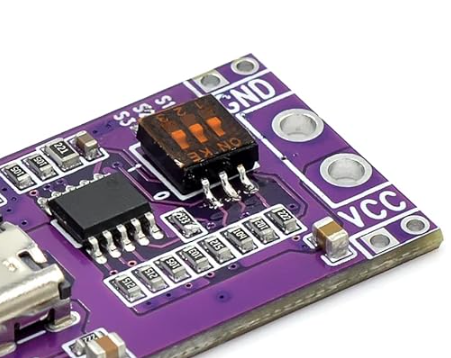
The key to this project is the USB-C Decoy Board. This small circuit module “tricks” a USB-C power supply into delivering a chosen fixed voltage (5V, 9V, 12V, 15V, or 20V). It’s essentially a negotiation tool: instead of waiting for a device to request power, the board pretends to be that device and forces the charger to output the voltage you select. This allows us to use a USB-C PD power bank to deliver 12V.
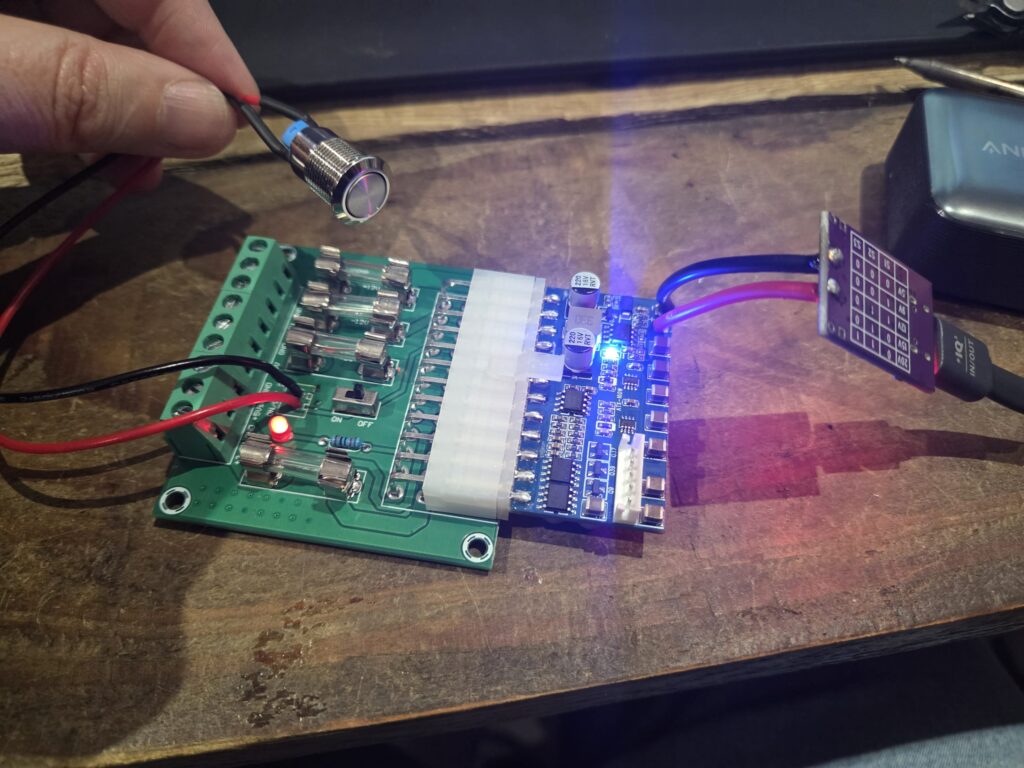
Just the Pico PSU and the decoy board are enough to run the Amiga; however, to keep this as DIY-friendly as possible, we opted to use an ATX breakout board. This makes wiring simple with clear labelling, fuses the voltage lines, and means you don’t need to desolder the Pico power connector. It also makes attaching a power switch easy.
The only other part you’ll need is an original Amiga PSU. We don’t trust these and don’t use a single original PSU on any of our machines. All you’ll need from it is the Amiga side of the power cable—the rest can be donated to another enthusiast or recycled.
The Build
The first step is hooking up the decoy board. We originally tried soldering the board directly to the PSU pins on the Pico board, which is why we removed the cables. This isn’t really necessary—the VCC and Ground wires can simply be cut, stripped, and soldered directly to the decoy. The red wire from the PSU goes to VCC, and the black goes to Ground.
You don’t need to do this!
VCC and GND Connections.
The dip swicthes control the voltage out of the board, please make sure you have the right voltage as this can push more than the 12v required. Ours did not require us to change it but please do check!
Once that’s done, plug in the breakout board and give it a test. Make sure the power switch is set to ON, or the breakout board won’t fire up the Pico PSU.
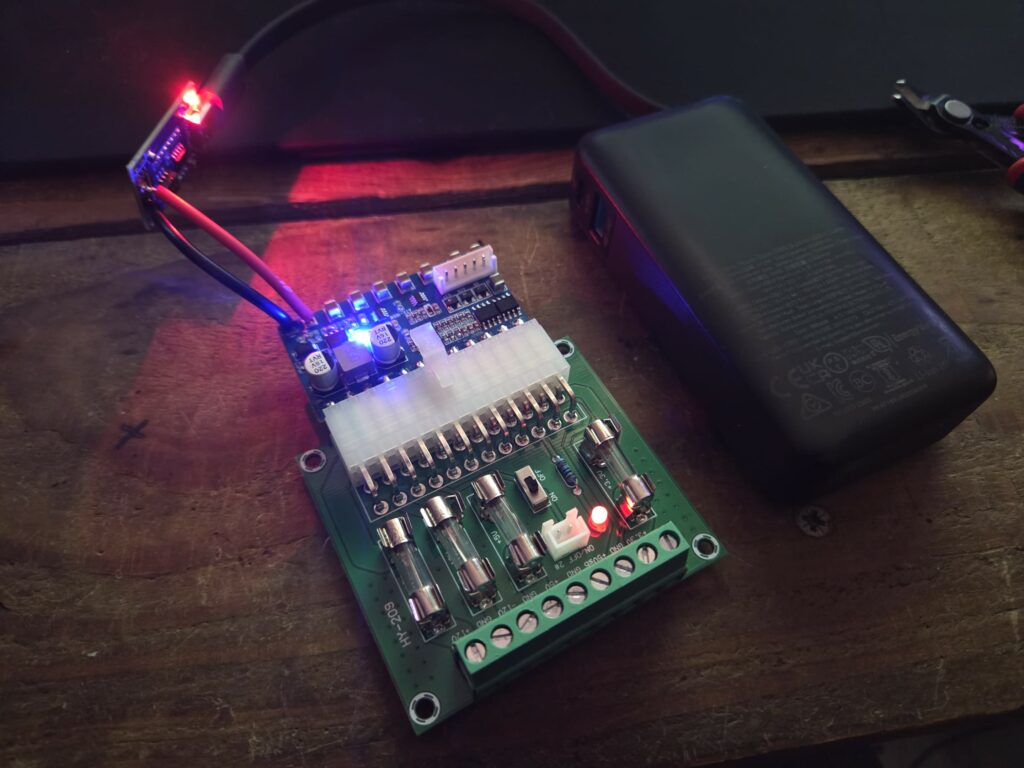
It’s alive!!
Next, connect the button and desolder the connector below the power switch.
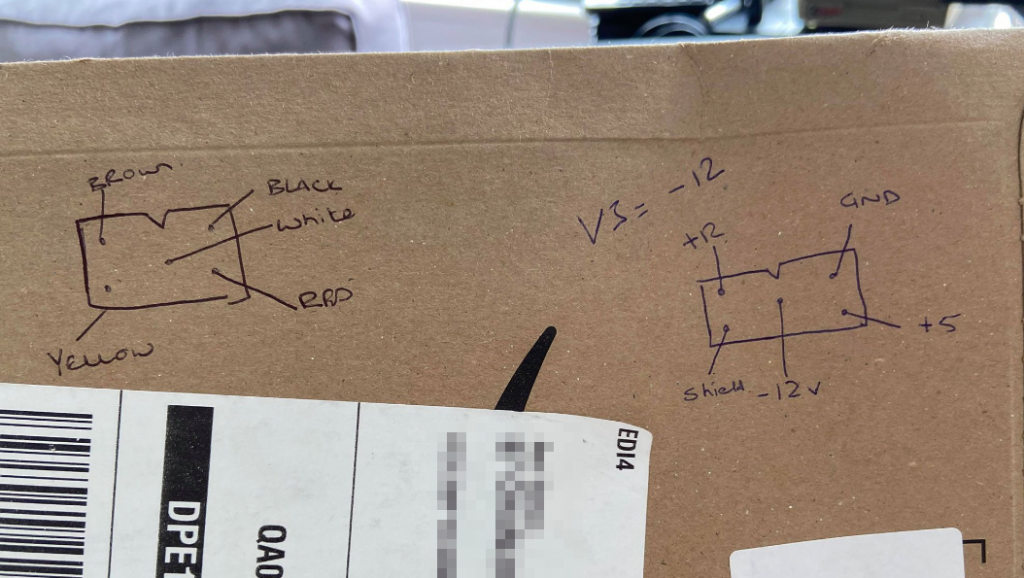
Then, using our trusty PSU wiring diagram, cut the power connector out of the PSU.
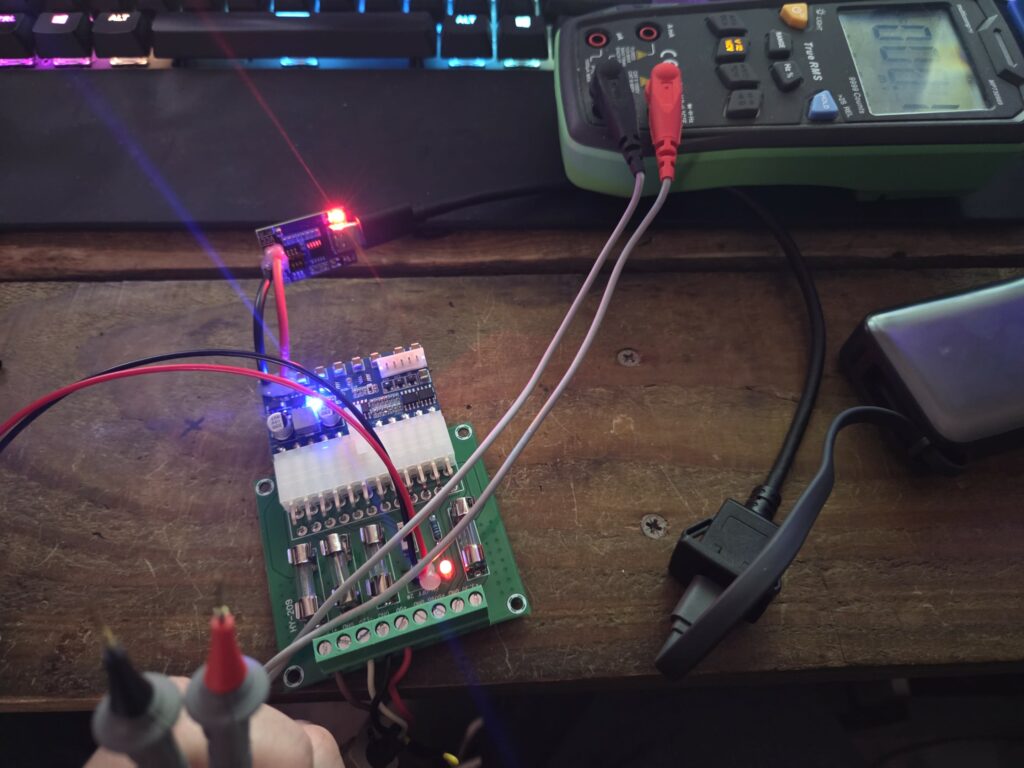
With the cables connected, grab a multimeter and TEST, TEST, TEST! It’s vital to confirm the voltages are correct.
The breakout board is clearly labelled, so check both at the breakout board end and the Amiga connector.
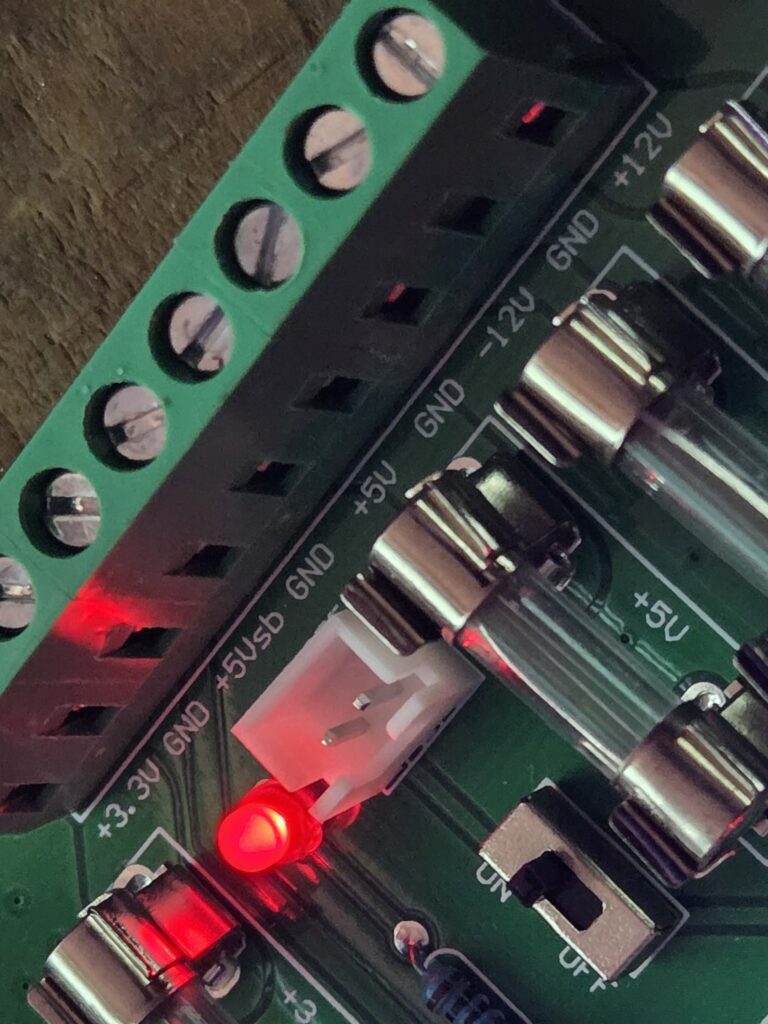
TEST!!!
It wouldn’t be one of our PSU builds without some hot glue, so we secured all our handiwork with a dash of it—better safe than sorry!
Powering Up the Amiga
With the PSU tested thoroughly, we hooked it up to our Amiga 600 golden nugget—and it works!
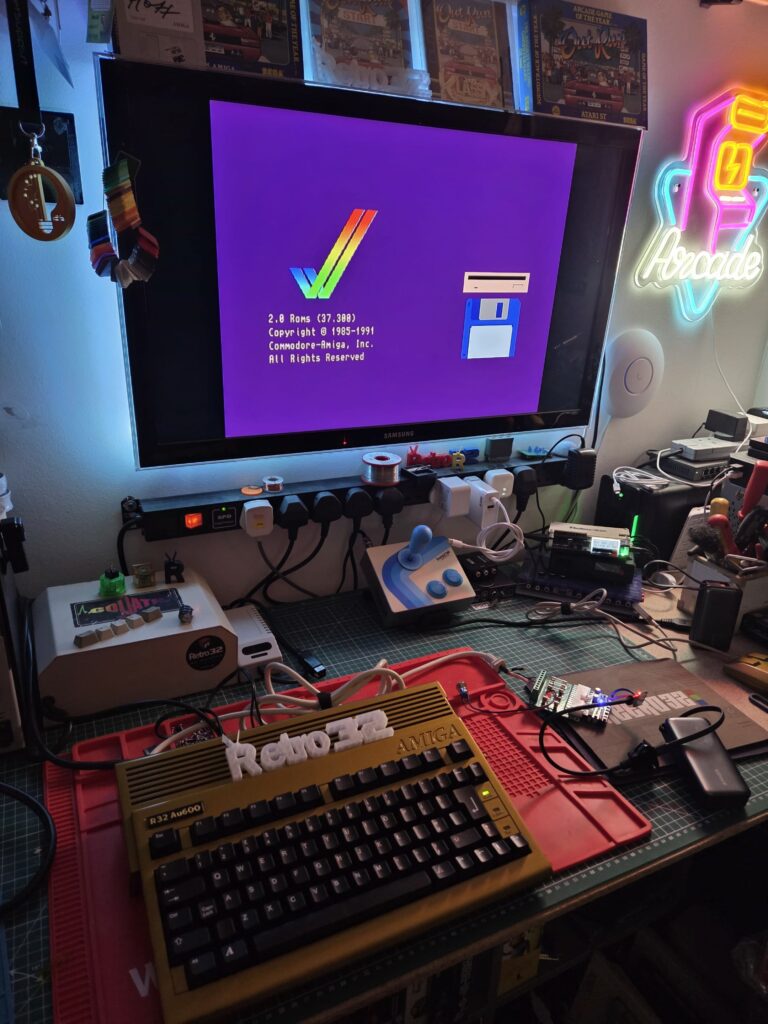
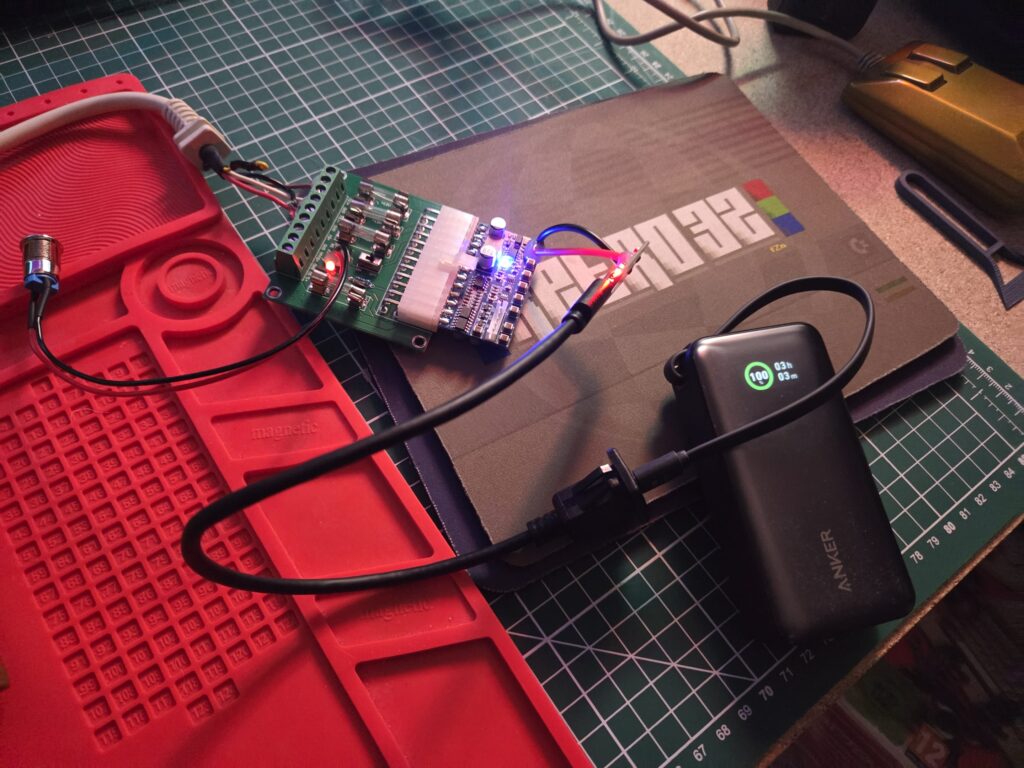
We’re using an Anker Nano power bank (10,000mAh), (https://amzn.to/4o4KoJs) which should provide around three hours of runtime. We’ll do further testing with rolling demos and typical usage, but we expect at least an hour, which is impressive for such a small bank. Note that this power bank is only capable of supplying 30W of power. Many chargers / power banks are capable of much more, so please check the specs.
Why?!
At the end of the day, projects like this remind us why tinkering with retro hardware is so rewarding—it’s not just about the practicality of powering an Amiga, but about the joy of creating something with your own hands. Whether you’re chasing portability, experimenting with modern components, or simply enjoying the process, the AMP Badger proves that a little ingenuity can breathe new life into classic machines. Here’s to keeping the spirit of the Amiga alive, one DIY build at a time.
What’s next?!
We’ve christened this little project the AMP Badger. The next step is to design a neat case in Fusion 360 and print it. We’ll be offering enclosures in our store once they’re ready, but if you’ve got a 3D printer, you should be more than capable of designing one yourself.
Let’s here from you!
Have you built an AMP Badger? What are your thoughts on this PSU? Let us know in the comments below.
Credits
https://www.youtube.com/watch?v=F9m6Bx3e9HM&t=453s – thanks to Hack Build Restore for the video guide!!