We love the A500 Mini so we’ve put together this article to help navigate the minefield that is the A500 Mini. This guide is aimed at helping you help yourself, you DO NOT need to buy a USB stick from ebay. Trust me, you’ll thank me for it.
Many of you may be new to the Amiga scene because of the A500 so we’ve put this article together to help you get the most from the most accessible Amiga currently available. If you have any suggestions for content to additional resources then please leave a comment below or contact [email protected]
Quick Links
This page could turn into a beast so we’ll add some anchor links here so you can jump to the right section.
- A500 Mini Resources
- Where to buy your A500 Mini
- How fast is the A500 Mini
- How many games can the A500 mini hold?
- Which USB Stick?
- Best USB Keyboard for the A500 Mini
- Best USB Joystick for the A500 Mini
- A500 Mini mouse mat
- How to load the Amiberry / UAE User interface
- WHDLoad Tutorial
- Workbench HDF Tutorial
- ADF Tutorial
A500 Mini Resources
See below a list of A500 mini resources and websites you should check out
- WHDLoad – http://whdload.de
- WHDLoad download tool – https://github.com/MrV2K/WHDLoad-Download-Tool – Thanks to Paul Vince for making this epic app!
- Retro32 Amiga 500 USB adapter (use an original USB KB on your A500 mini) – https://www.retro32.com/product/amiga-500-usb-keyboard-adapter-hid
- Retro32 YouTube video of the A500 Maxi (well kind of) – https://www.retro32.com/amiga-resources/140420224043-the-amiga-a500-mini-maxi-what-it-should-have-been-my-thoughts
- A500 Mini/Maxi Users Facebook Group – https://www.facebook.com/groups/571357397366882
- A500 Mini/Maxi Discord – https://discord.gg/rFv8a2CB
- A500 Mini owners registry – (taken from the FB group above) – click here
Where to buy your A500 Mini
You can still pick up an A500 Mini from Amazon. I don’t always agree with their business practices but as a buyer, it means you can return it if you have any issues, no questions asked. If you’ve got Amazon Prime (30 day free trial) you’ll also get free next day delivery.
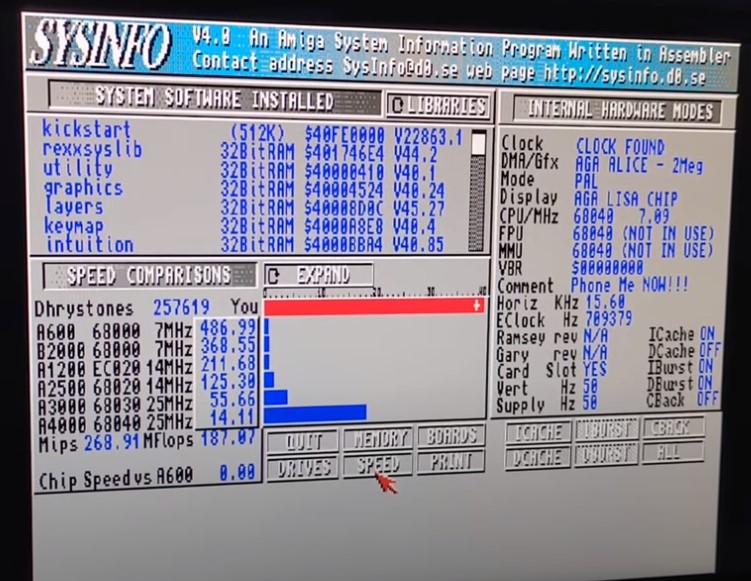
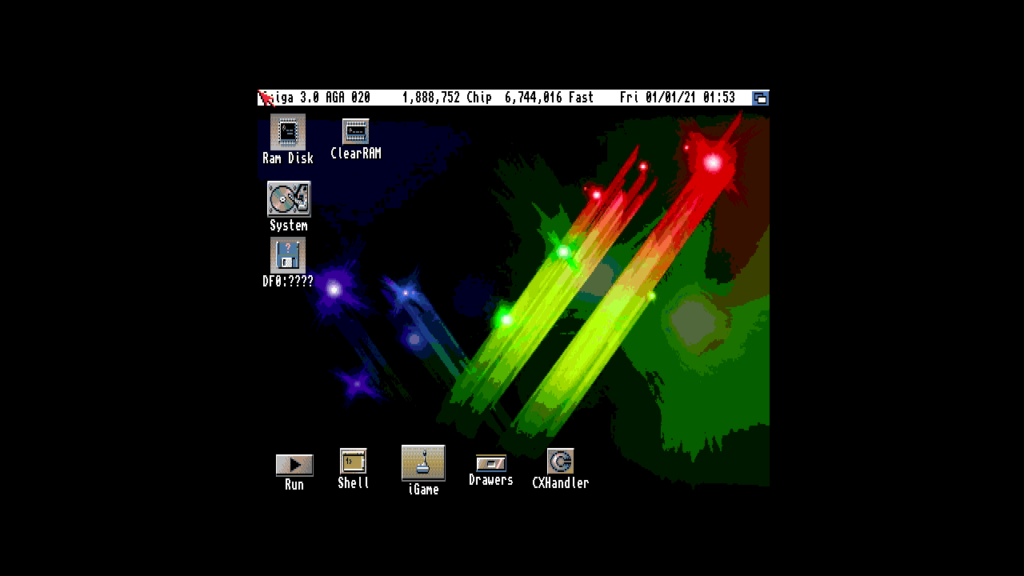
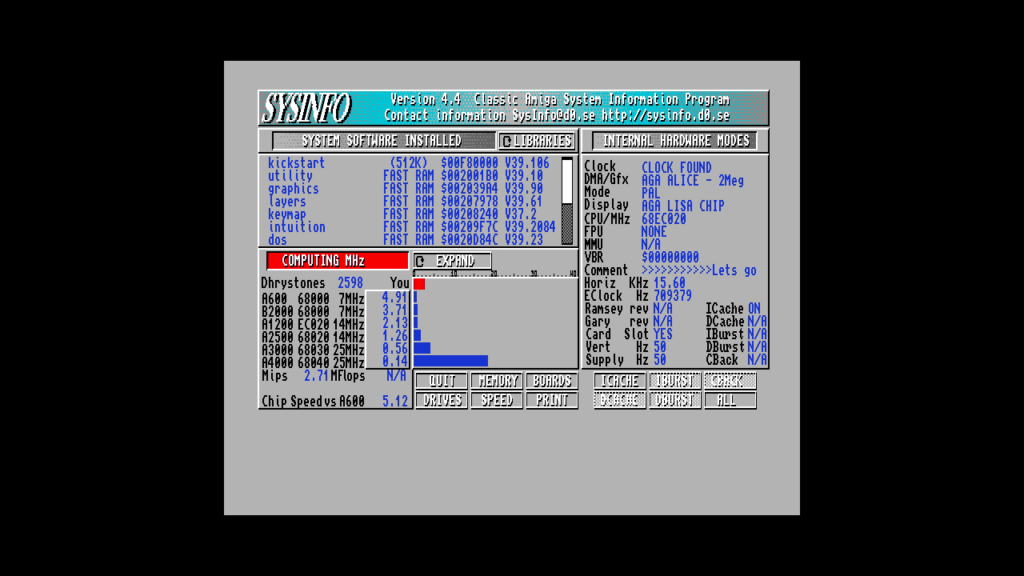
How fast is the A500 Mini
Now that the A500 mini has been “opened” up by the Amiga community we can confirm the speed works out to about to a whopping 486 (niiiice) times faster than a “stock” 7Mhz Amiga 500. The A500 mini uses Amiberry meaning you can configure the performance of the machine for your needs. The screenshot below shows you the best possible performance. It’s not quite the Pi4 running PiMiga 2.0 but it’s damn good. Certainly fast enough to run any Amiga have you can throw at it.
See the SysInfo screen as below (thanks to Jim https://www.youtube.com/watch?v=R77p3HKL1f8)
How many games can the A500 mini hold?
You can not load (at this time) any additional games onto the A500 mini. You can however run games and files from a USB stick.
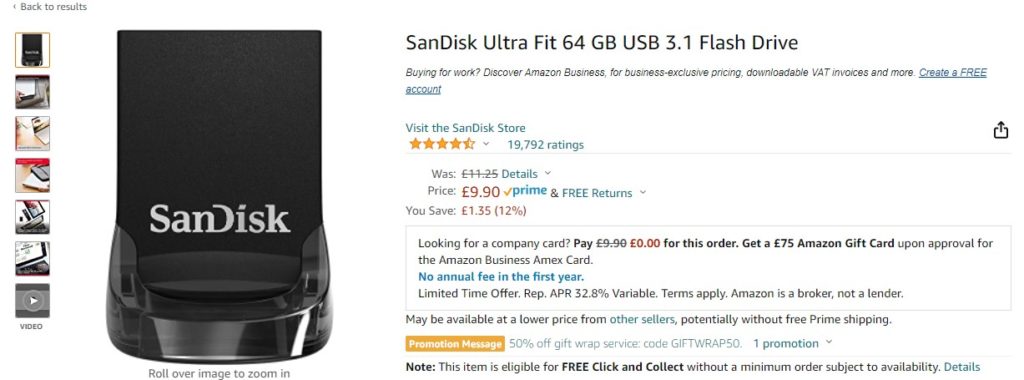
Which USB Stick is best?
We would recommend using a small, fast and high capacity USB stick in the A500 mini. This will allow you to load games from your PC faster (if you have USB3 and also reduce the chance of damaging the A500 or USB stick by bending or twisting the stick in the port. We could suggest using the following stick from Amazon – Click for SanDisk Ultra Fit 64GB
We would suggest using at least a 64GB USB stick to help with containing all the WHDLoad games and more importantly the Amiga HDF files. These can be up to 16GB, especially for large installs of Workbench 3.2 which has large hard drive support baked in.
Best USB Keyboard for the A500 Mini
We would recommend using the Logitech K400 Plus keyboard. It’s small, wireless and includes a mouse which means you don’t have to use a USB hub for additional ports. They are available on Amazon –https://amzn.to/3xFn1zL – Logitech K400 Plus
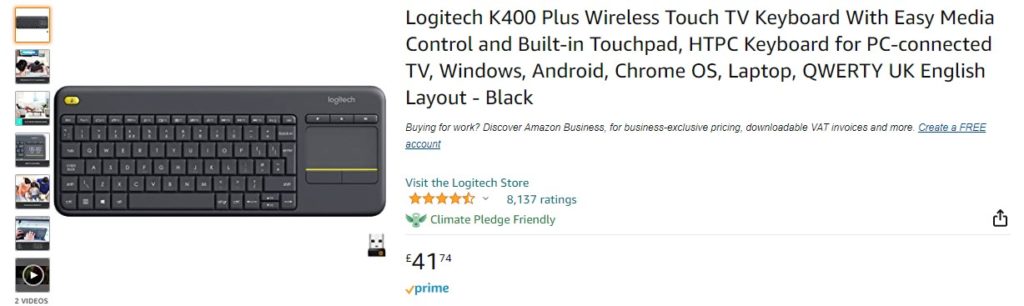
It’s also great for use on other devices like media PCs, servers etc. In fact we have two of these keyboards at R32 HQ.
If you have an old Amiga 500 / 500+ without a motherboard or battery acid damaged one (Thanks Varta!) then why not create your own A500 Maxi using one of our own Amiga 500 USB keyboard adapters. You can watch the video of it in action below
Best USB Joystick for the A500 Mini
We personally love the A500 pad but some people still prefer a joystick for the ultimate retro Amiga experience. We’ve see lots of promising options but they all seem pretty trash. We’ll update this section when we know a little more and have seen some positive feedback.
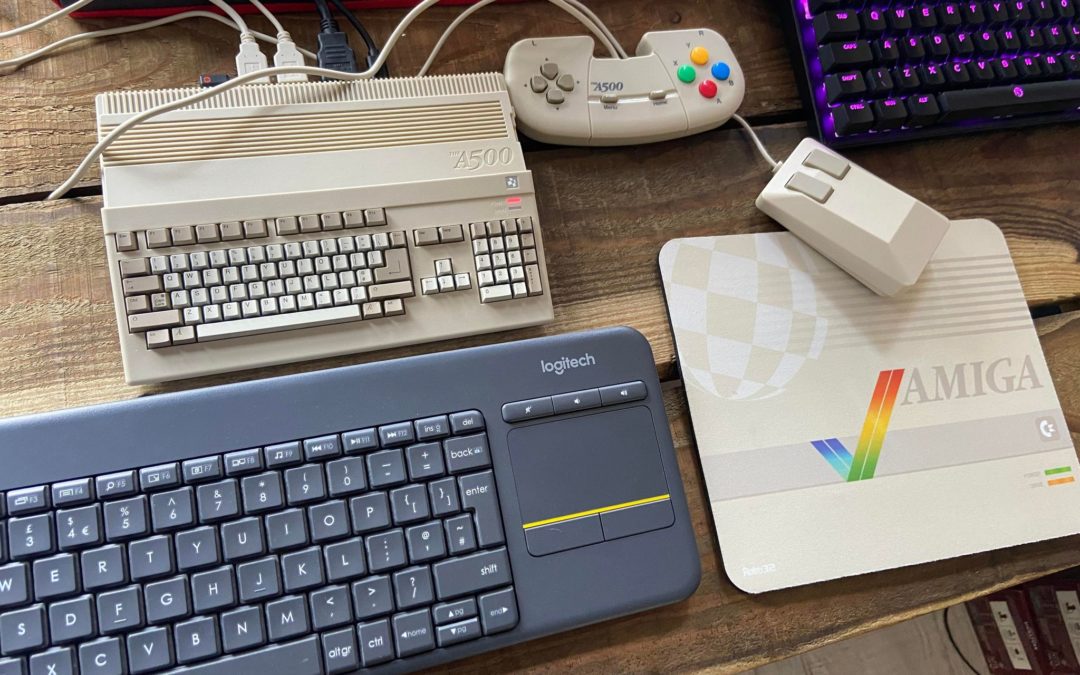
A500 Mini mouse mat
What’s that? You want to complete the A500 Mini setup with an Amiga Mouse mat? We got you!
This is our own mouse mat we’ve produced specifically for the Amiga 500.
A500 mini Modifications
Expect the modifications to come thick and fast as the community gets to grip with the hardware and software.
We’ve also produced some little floppy inserts that complete the look. You can also attach little labels to them for even more nostalgia.
WHDLoad Tutorial
The first thing you need to do is download the latest release of the WHDLoad download tool – https://github.com/MrV2K/WHDLoad-Download-Tool (thanks to Paul Vince for his epic work). Note that you may need to disable your AntiVirus software when running this application, Avast slapped me on the wrist for this and deleted the files. At the time of writing, I was confident that this package was OK.
Here are a few top tips that Paul Vince has provided us for his epic WHDLoad download app
- Make sure to set your firewall to Public when you first run the program.
- Use the filters to make a base list and use the list editor to fine tune it.
- Use the clean files option whenever there is an update to remove out of date files.
- The ‘Make Folder’ button is useful if you have a complete set and want to refine it without re-downloading the archives.
- Donate to the TURRAN FTP! (Use the Donate! button on the app)
Install WHDLoad to the USB Drive
Before we start downloading the games we need to install WHDLoad onto your USB stick. That legend Paul Vince has created an updated package that contains some fixes for you. Download from the link below
https://mega.nz/file/uV1DEDhR#MZwhUb41dc6XIeMhKBg1IFOmpVHkkfNTjvYquuTADB0
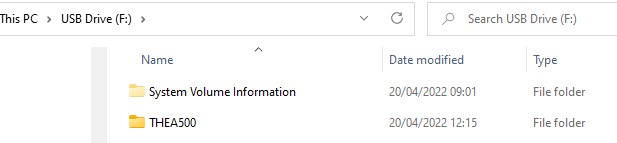
Open the archive and extract the A500 mini folder to the root of the USB stick. It should look a little bit like the one below. Note that you may not see the System Volume Information folder if you are not showing hidden / system files.
With WHDLoad installed let’s go!!!
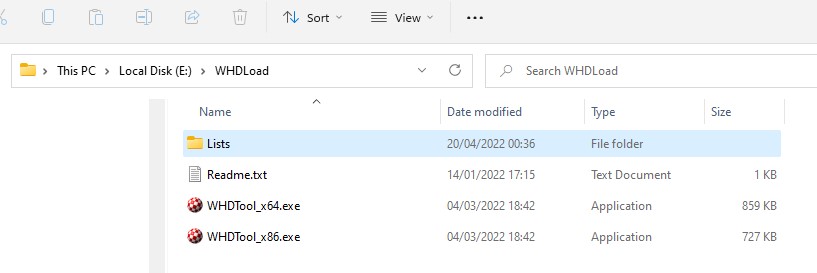
With the WHDLoad download tool downloaded. Open the archive and extract to a local drive. Make sure the drive you are using has enough room to download the games (5+GB). It should look a little like this.
Open the WHDTool executable (most of the time this should be the x64 version) – WHDTool_x64.exe
Click Load Data at the top right

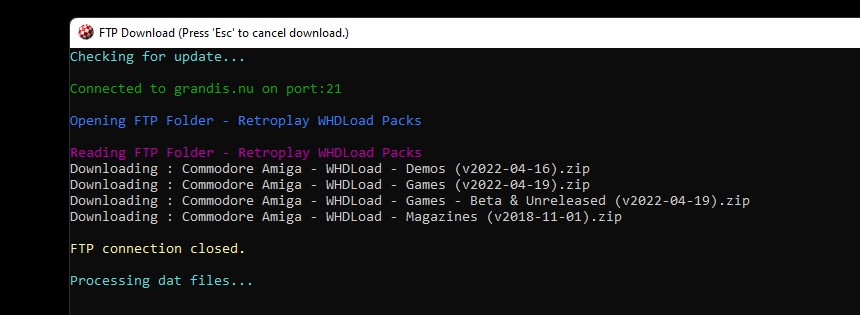
This will get the most up to date version of the WDHLoad games list
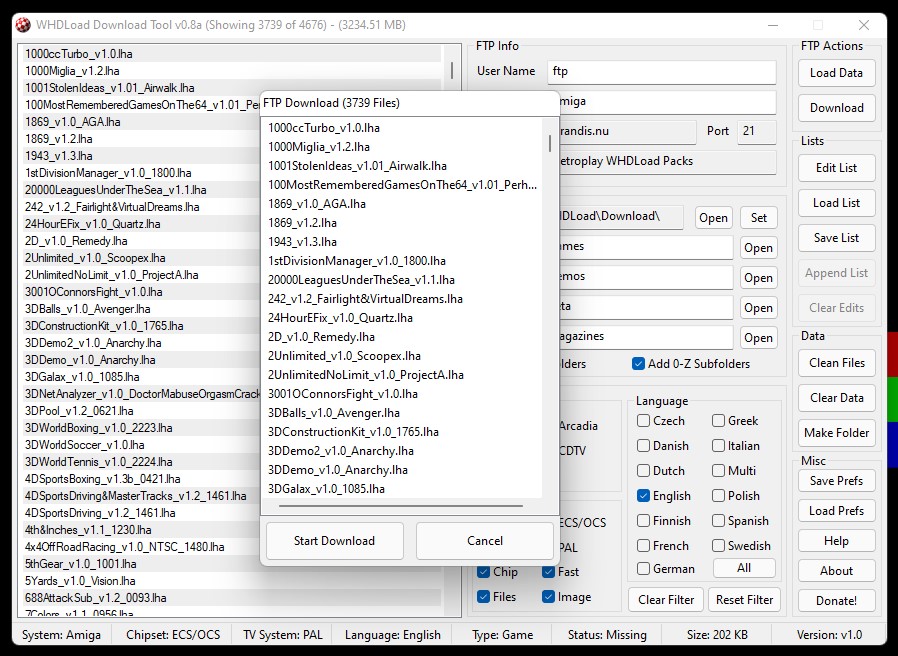
Now you should select the items you wish to download. We would advise you to use the filter and remove anything you don’t want. We chose all Games / Demos marked English / Amiga / with all the extras.
Be sure to check the options for Use Subfolders and Add 0-Z Subfolders. This will create all the sub folders so you don’t have to.
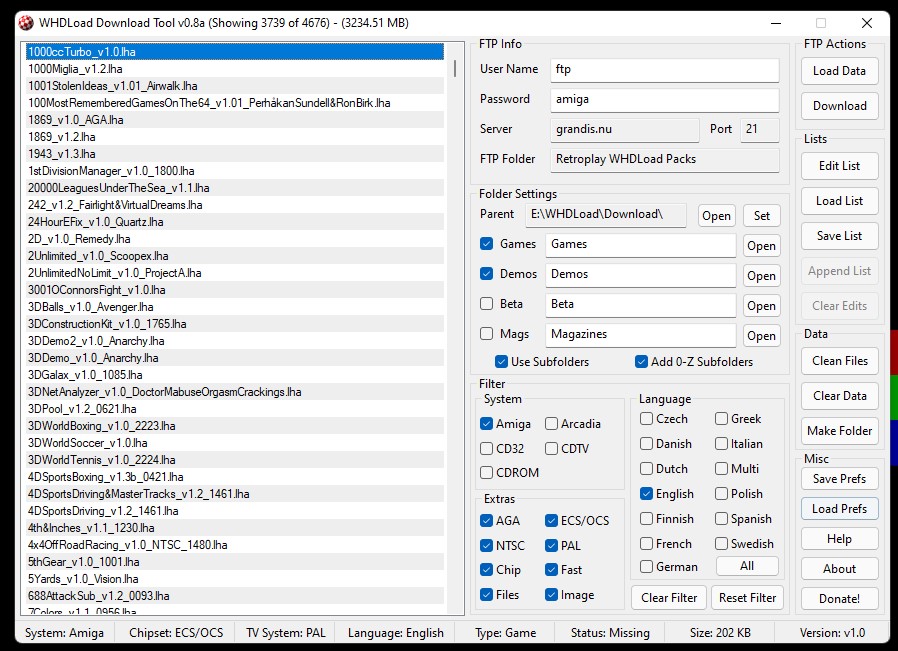
Click Download then Start Download on the next window. It will display the number of files you will be pulling.
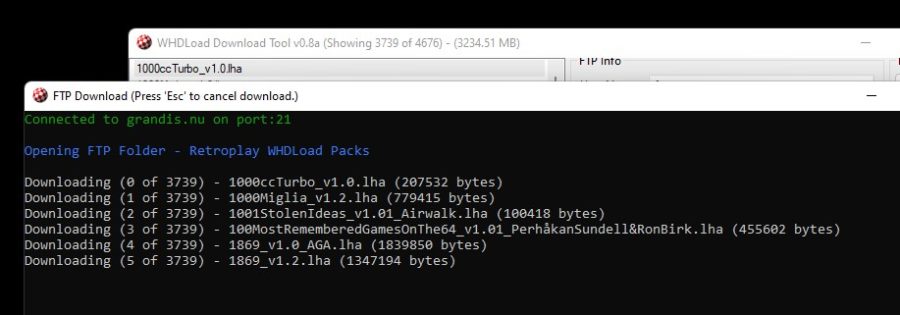
The download will start and will take some time. Note that it will download to the Parent folder as set above. Go make yourself a nice cuppa or enjoy a cold one.
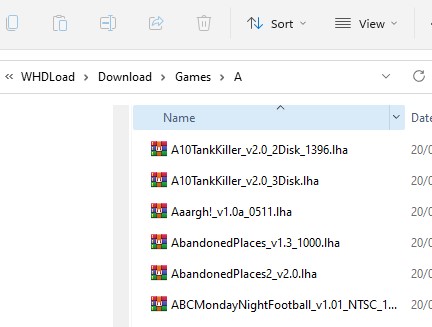
You can see all the files in the Download folder for Games / A. Works bloody lovely doesn’t it!
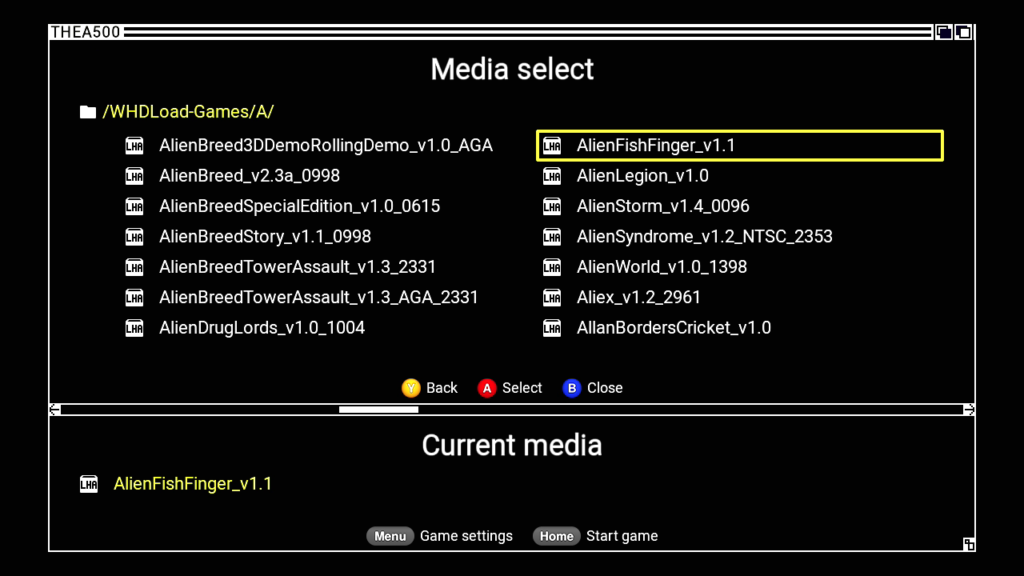
Once the download has been completed these files will need moving to your USB stick. We would advise creating a folder called WHDLoad. Note that the A500 mini can only read up to 256 items per folder so some letter folders may need splitting with two subfolders inside
We would also suggest creating a folder with copies of all your favourite games in the root of the USB stick and calling it Favorite / Best Games or something to make finding your favourites much easier and quicker.
Time to play!
Now you have your USB stick ready you can pop it in your A500 mini. You’ll see a new option for a USB stick as below
Select the USB Media Access Icon
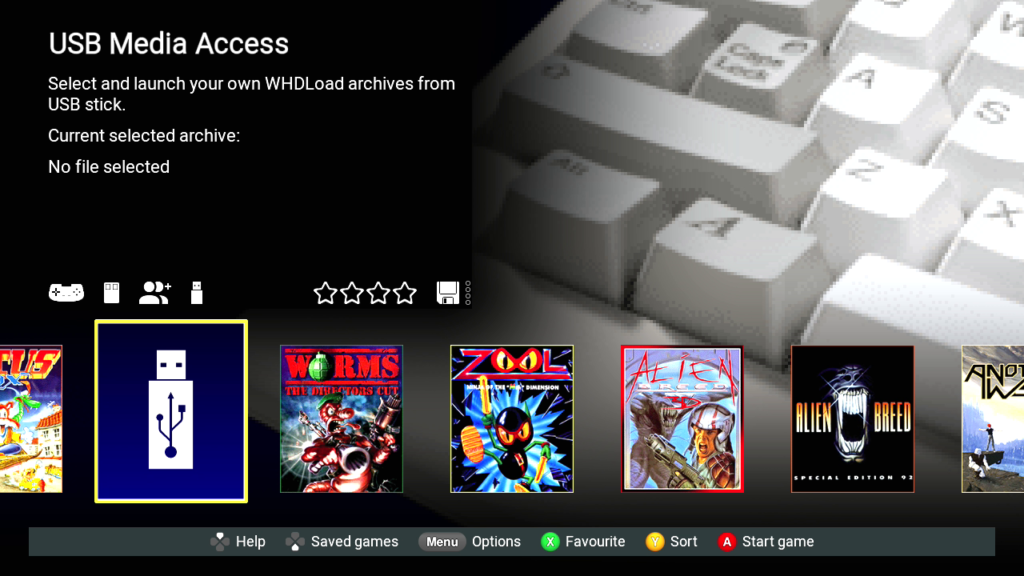
Navigate to your games – Select the game with A and press Home to start the game
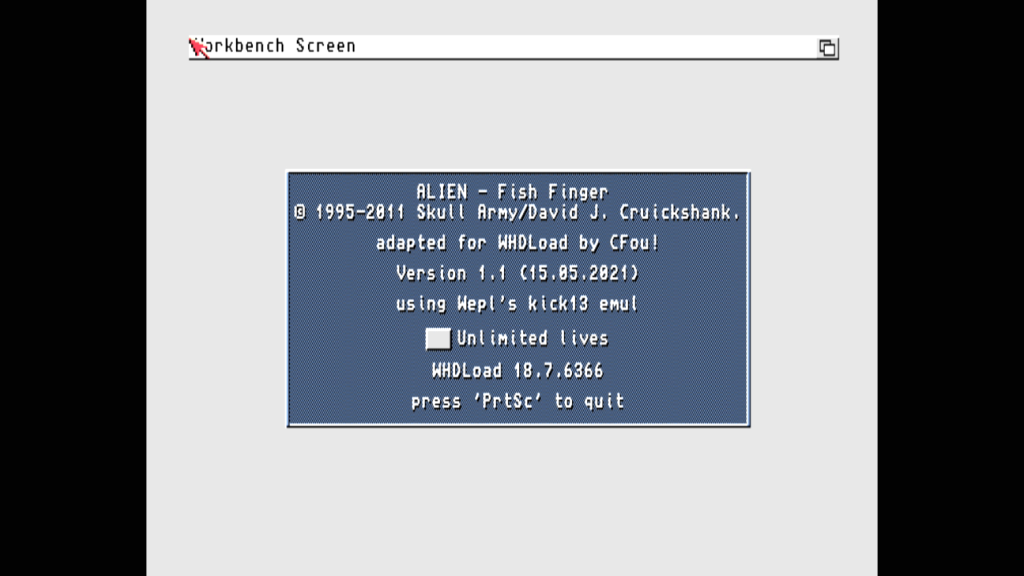
You’ll soon be very familiar with the WHDLoad splash Screens.
How to load the Amiberry User interface
I’ve done the hard work on this one so you don’t have to (well not really).
Simply download the zip file below and extract to the root of your USB stick. It should look a little like this
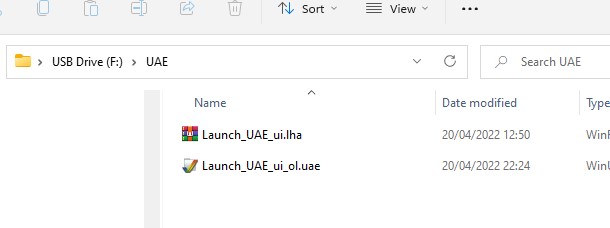
It’s not actually a launcher, it’s just a renamed lha file with a custom UAE config file added. For anyone interested this is the text added
amiberry.open_gui=F12
amiberry.save_state_on_exit=true
amiberry.ignore_gui=false
use_gui=yes
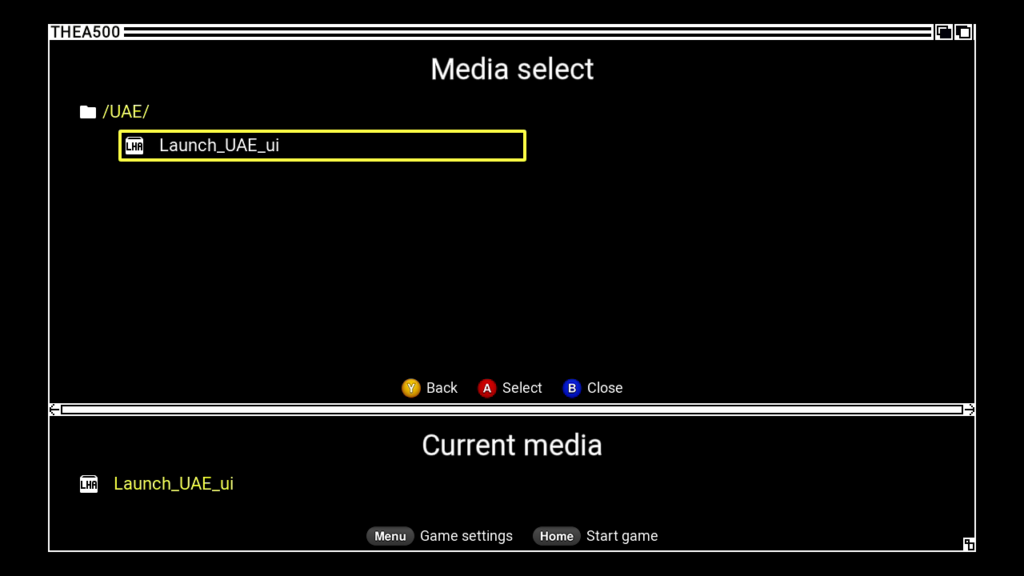
You don’t need to mess about. Just connect the USB stick and start the Launch_UAE_ui as you would any other WHDLoad game, the config file will force the Amiberry UI to display so you can do things like configuring HDF and ADF access. Feel like a hacker yet! xD
You can use F12 at any time to exit to the UAE config panel. Remember to choose the Resume./ Restart buttons wisely. Note that the USB stick contents is “mounted” in the file system under /mnt/ . The A500 is running a version of Linux, I’m sure we’ll find out more about this very soon.
Issues
We’re working on ensuring the configuration location of UAE isn’t overwritten each time you launch it. This will allow multiple configurations to be configured and essentially one click access to your Workbench / ADF setup.
Workbench HDF Tutorial
Now you have access to the UAE config screen, adding a hard file (HDF) is pretty damn easy if you’re used to messing about with WinUAE on your PC. For these steps below we used ClassicWB – we created and tested our HDF file in WinUAE on the PC. We won’t go into that but there are loads of guides out there on how to do it.
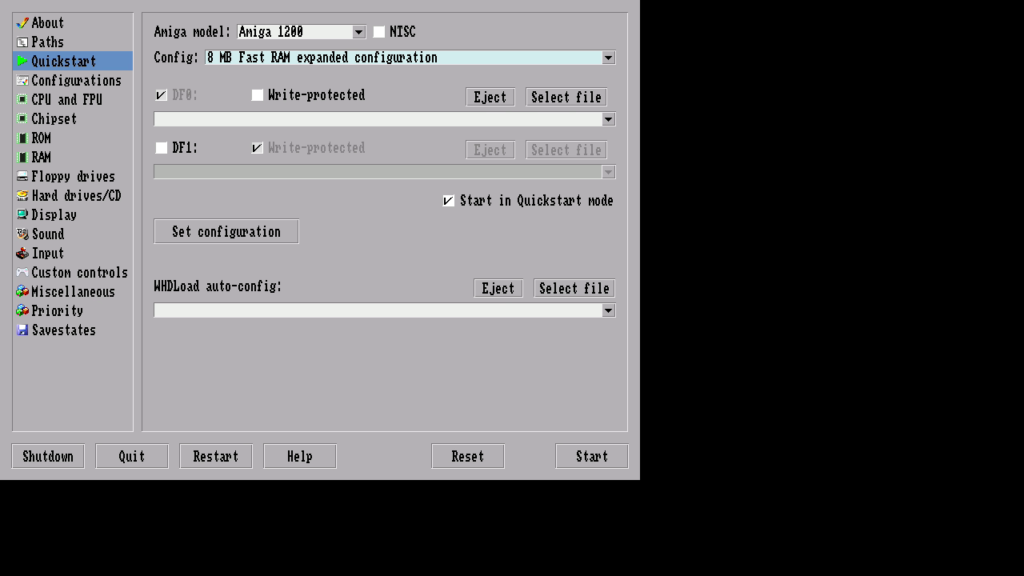
Open the Launch_UAE_ui we created in the last step
Change the Amiga Model to Amiga 1200 and Config to 8MB Fast RAM (8MB is ideal for a HD) – 4MB is the minimum.
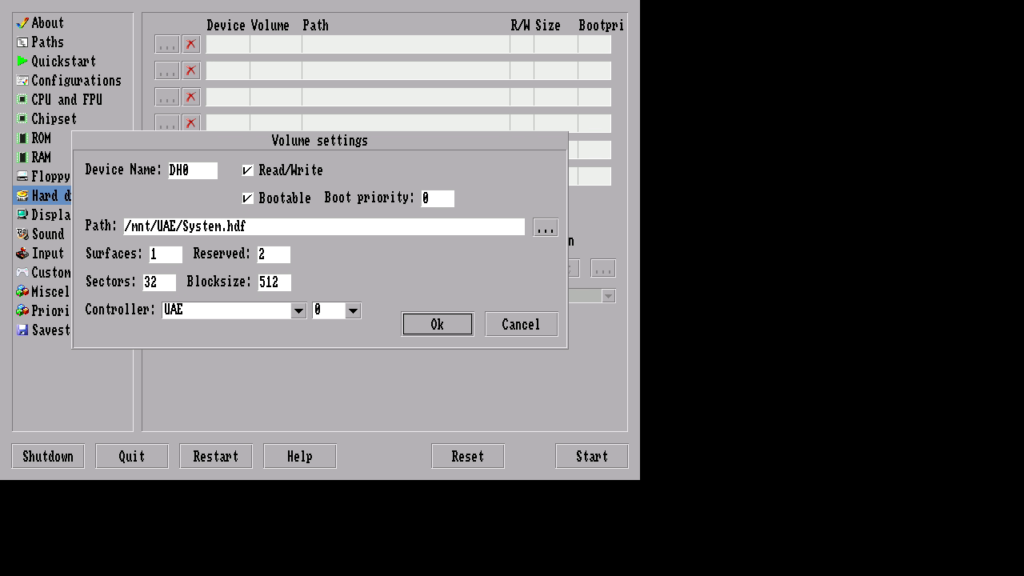
Make sure all device entries are clear. Click Add Hardfile
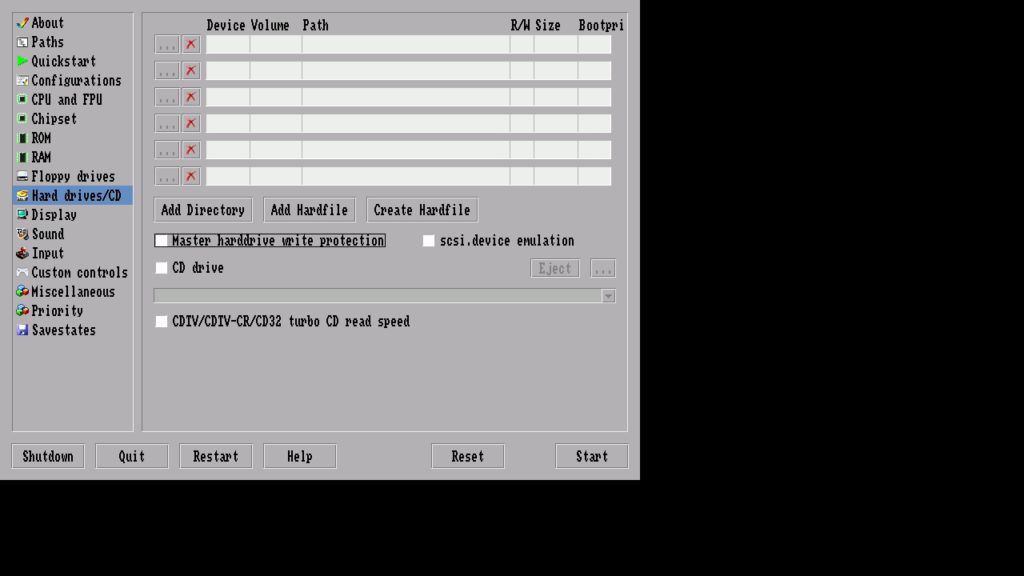
Navigate to the HDF file you have created. Note that the USB drive contents will always show under /mnt/
Change the Device name to DH0
Make sure Read/Write and Bootable are selected
Press OK
Make sure DF0: is unticked
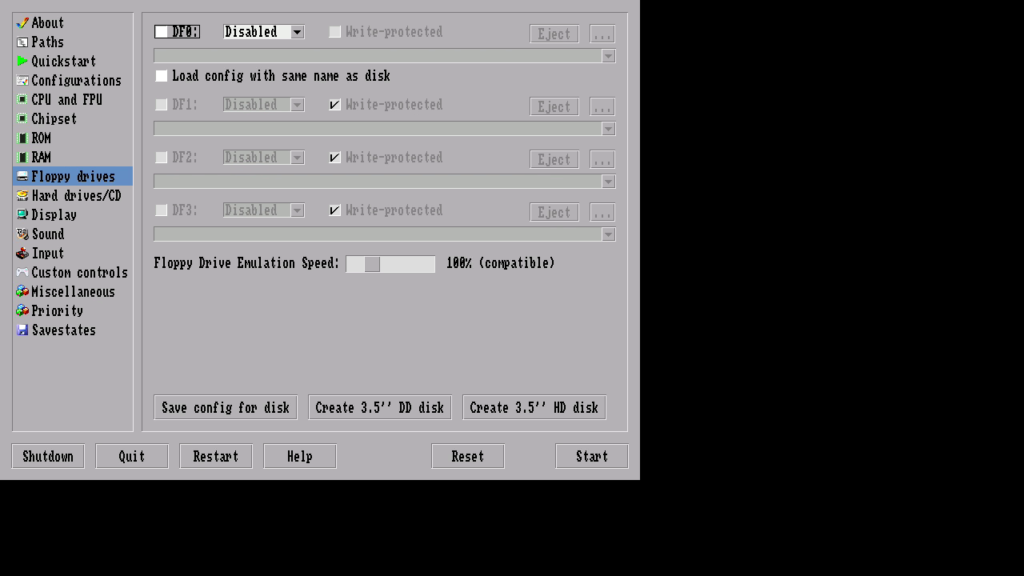
Click Start!
It only bloody works!
ADF Tutorial
An ADF is an Amiga Disk File. Essentially it’s a disk image of a floppy disk. With WHDLoad and HDF files they aren’t really all that useful but we’ll cover it anyway.
Open the Launch_UAE_ui we created in the last step
For this test we will use our trusty Amiga 1200 profile with 8MB of RAM, Spicy!
Under Floppy Disks ensure DF0: is ticked and select the three dots . . .
Locate your ADF file. Note that the USB stick contents is located in /mnt/
Remember that you can use multiple slots and have all the game disks installed. If you need to get back into the UAE config screen again just press F12. Remember to Resume not Reset / Restart
For this test we’ll use SysInfo
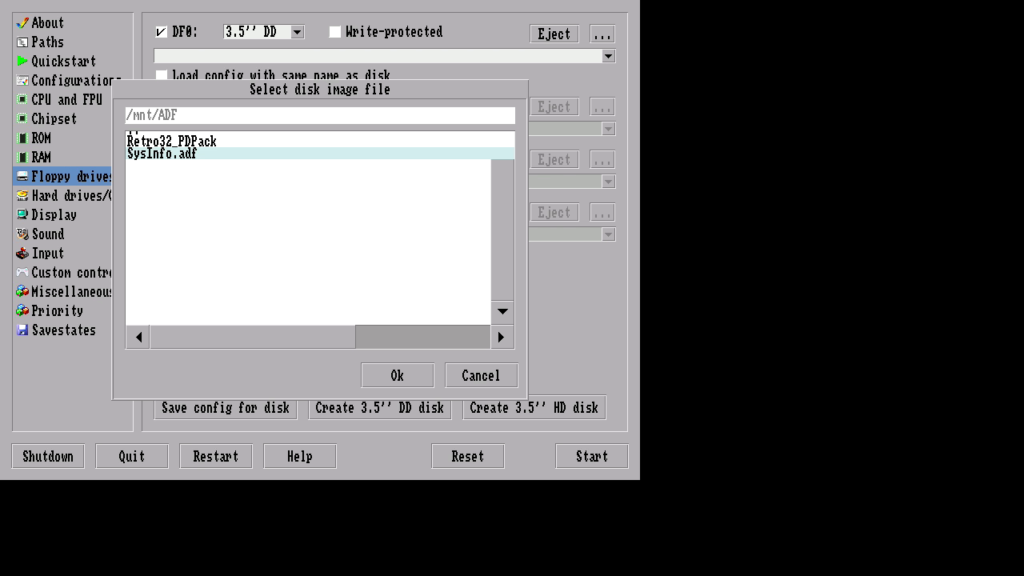
You can now press OK then Start at the bottom Right
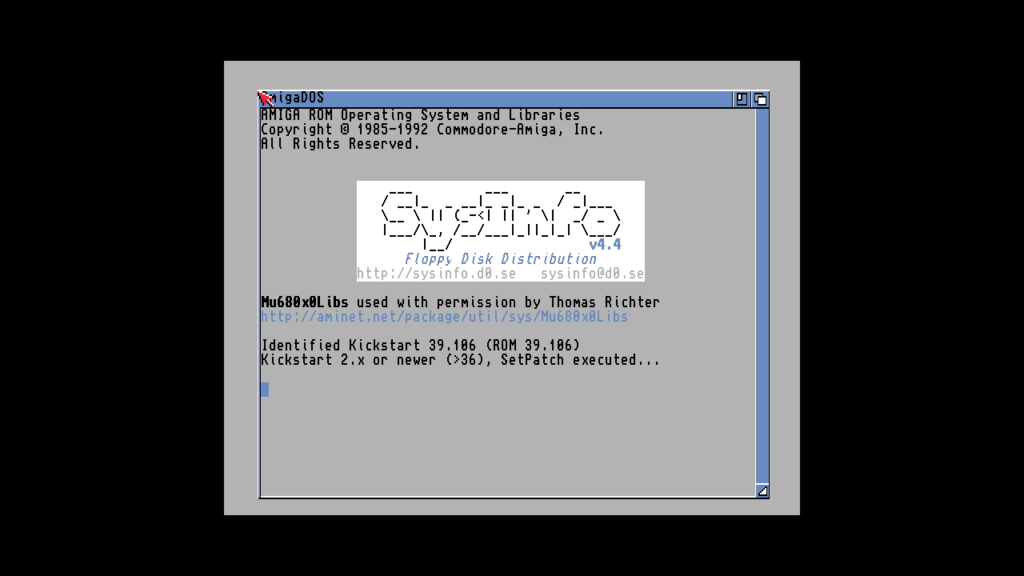
It’s happening! – The SysInfo is loading!
Click speed and watch that baby burn!
Amiga ADF Downloads
Appreciate this article is a couple of years old now so there may not be an answer but I’m currenty in the process of setting up my A500 Mini with the help of this guide and in one of the steps above an improved version of WHDLoad is referenced, but the link seems to be dead now, was wondering if there was an updated location for it? 🙂