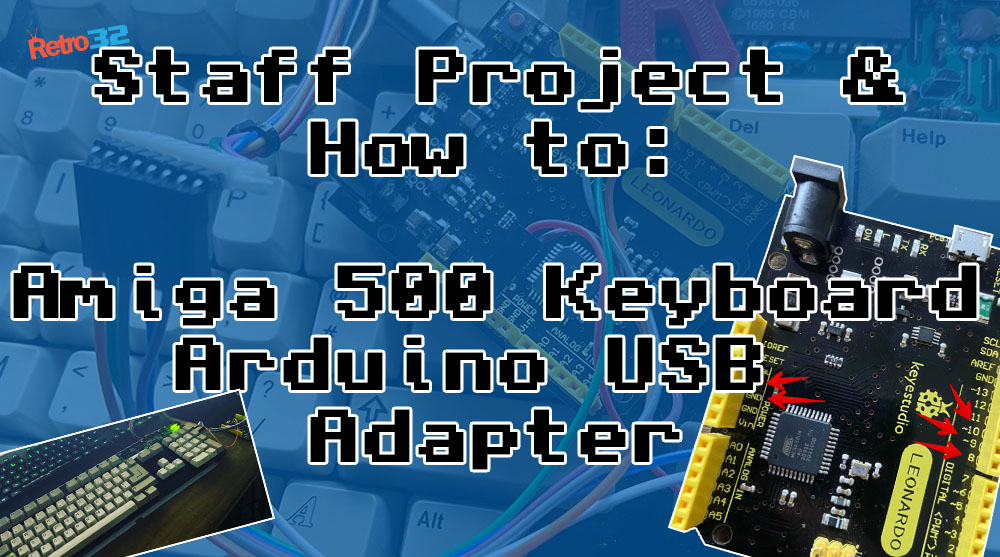
In this article, we will show you how you can turn your humble Amiga keyboard into a USB keyboard for use on your PC or raspberry pi. It’s a very tactile board that outperforms my Logitech keyboard with ease! (We wrote this guide using it! ).
Why?
Being able to repurpose an Amiga case and keyboard for use with Amibian makes the “virtual” Amiga experience just that much more authentic. Whilst solutions such as the Tynemouth Amiga interface board are great, it’s not the cheapest solution (£50). Why not employ some DIY and make your very own Arduino solution for less than £20.
Note ** No “real” Amigas were hurt in this project. The Amiga 500 case and keyboard used were “saved” from a completely dead machine with an unrepairable motherboard.
What you’ll need
- Leonardo R3 ATMEGA32U4-AU from Amazon – £11
- Arduino Amiga Keyboard script/code / Sketch for the board – Free (credit to tkoecker for his code (we have modified this)
- Dupont wires / Dupont cabling & crimp kit
- Optional – soldering iron
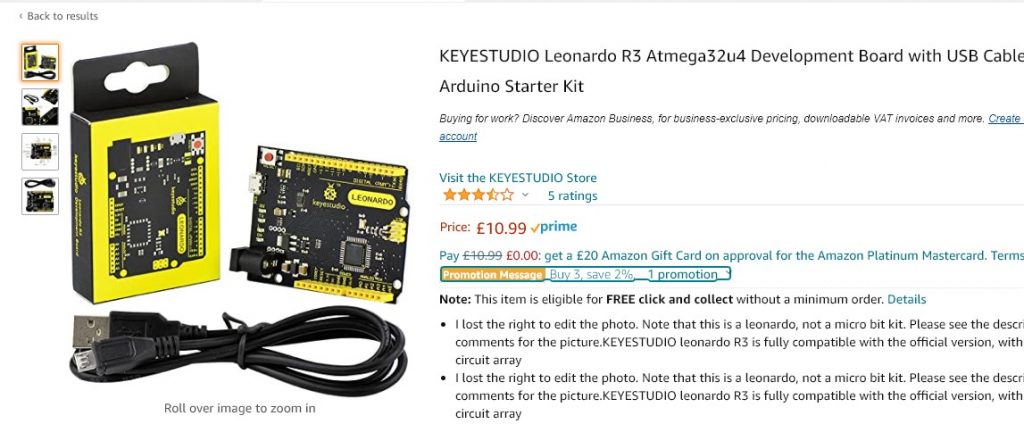
https://amzn.to/3n5VdeR
Technically it doesn’t have to be that exact board but it’s what we used and it works. If you’ve had success with another then please let us know in the comments below
Board Programming
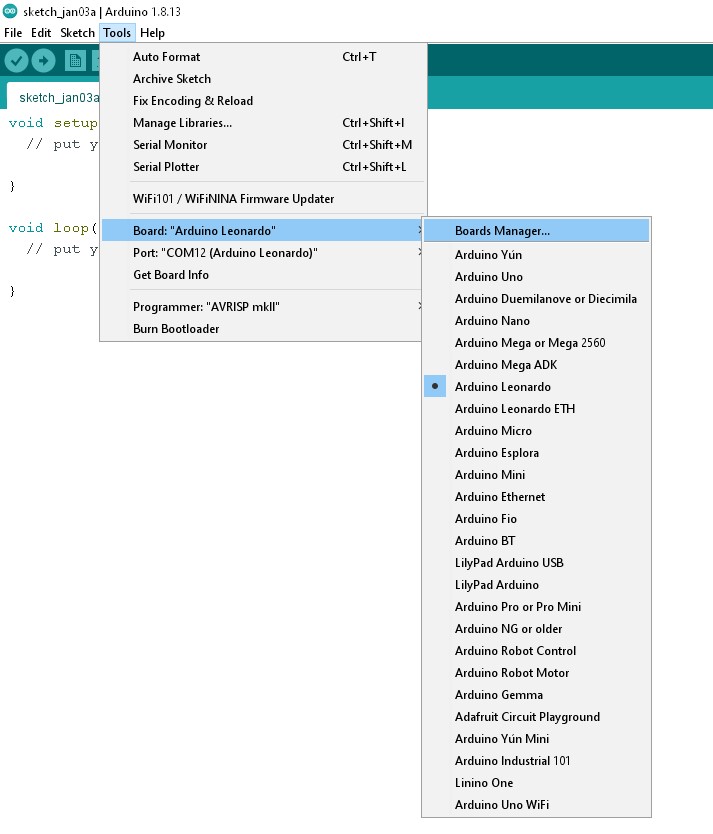
Let’s get the Leonardo R3 programmed. Download and install the Arduino IDE from https://www.arduino.cc/en/Main.Software
Open the software and connect the board via USB. Go to Tools > Board and select Leonardo Arduino (as below)
Next, select Tools > Port and select the port used by the board. In our case, it was COM12
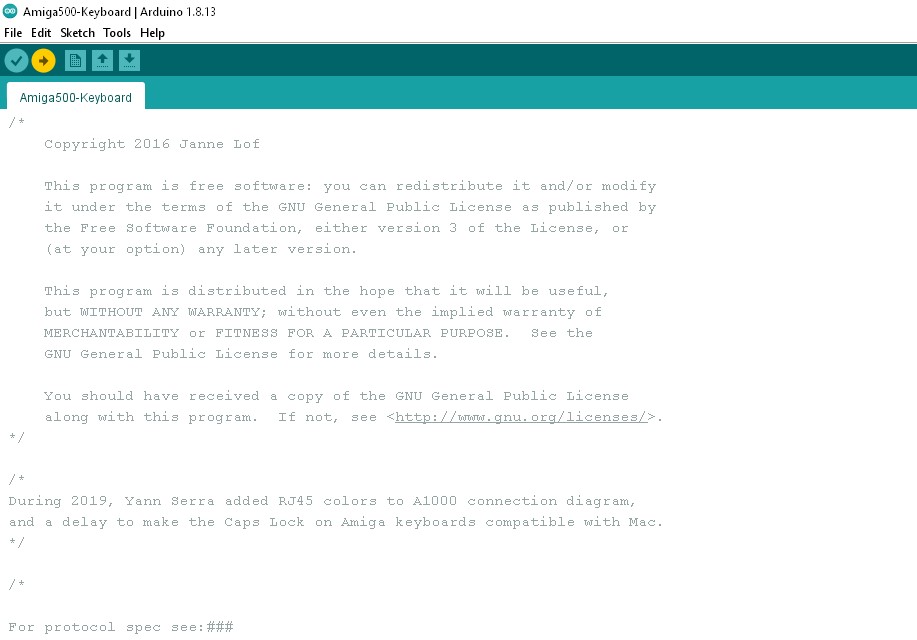
Select File > Open and select the Arduino “sketch” you downloaded above
Click the Upload button. This will compile and upload the sketch to the board. You will see that the “L” LED on the board lights up whilst the upload completes (as below highlighted yellow)
Once complete you it will display Done uploading.

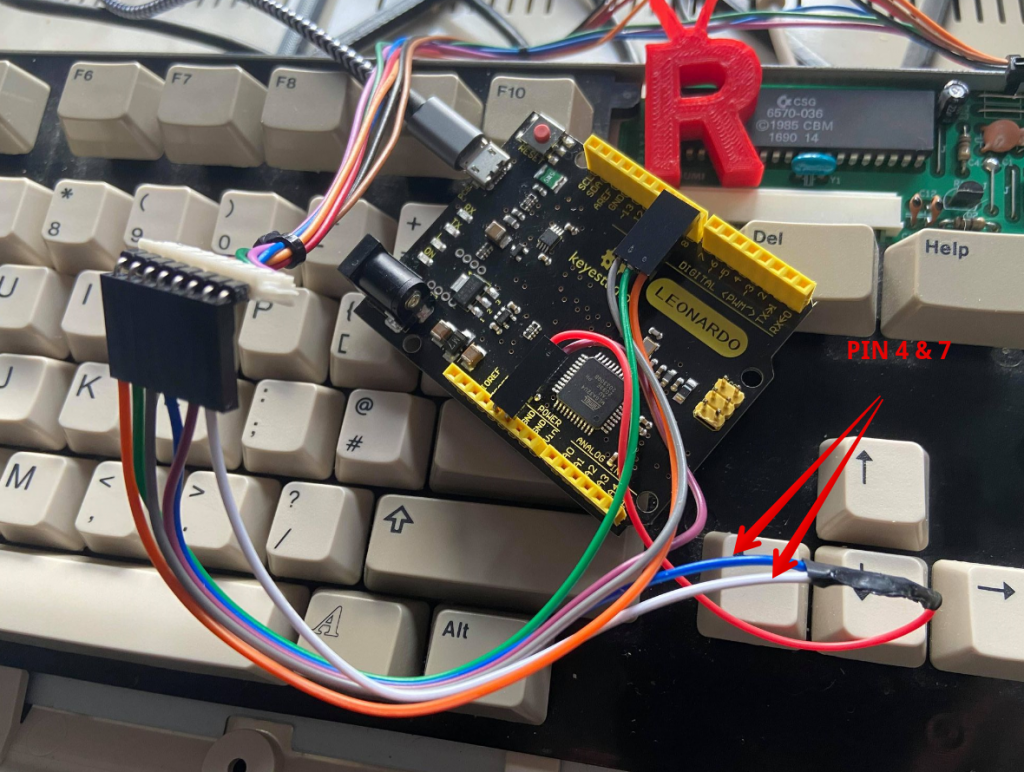
Wiring
With the board programming complete – Let’s wire it up. You might need to be creative depending on what tools / cables you have. If you’re using a Dupont crimp kit please be careful, the connectors can be very sharp and I cut myself a couple of times whilst I was learning how to get a solid crimp. You may opt to buy the cables from Amazon already pre-made – https://amzn.to/38XCo8B
As I like to learn new skills, I opted to make the cables myself. This was probably the most time-consuming part of the project.
Amiga Keyboard Wirecolours / pins
The table below shows the wiring from the Amiga keyboard cable to the corresponding pin on the board.
| Pin KB | Colour | Desc | Board Pin |
|---|---|---|---|
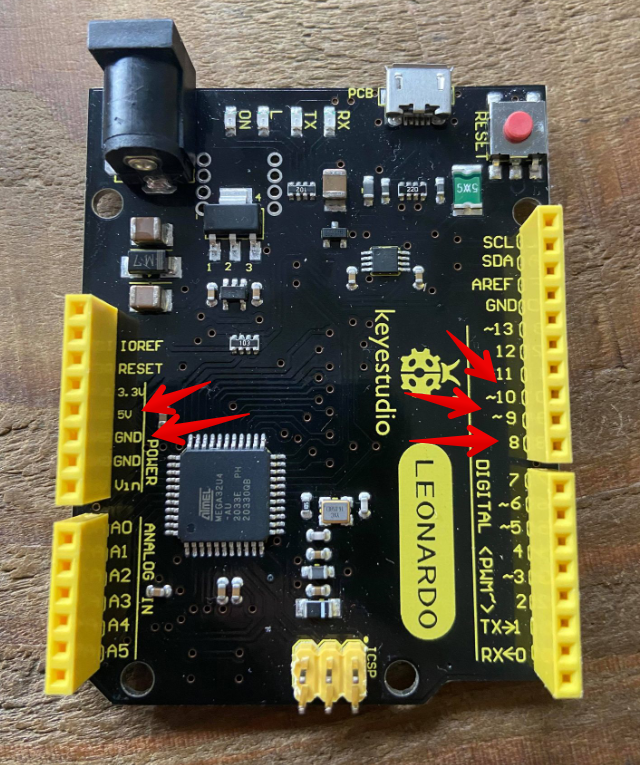
| 1 | Black | KBCLK | 8 |
| 2 | Brown | KBDATA | 9 |
| 3 | Red | KBRST | 10 |
| 4 | Orange | VCC 5v | 5v |
| 5 | n/a | n/a | n/a |
| 6 | Green | GND | GND |
| 7 | Blue | LED | 5v |
| 8 | Purple | n/a | n/a |

See below for the pins on the board
Note that you will need to splice pin 4 & 7 together for the 5v connection – a soldering iron is recommended for this. We used female Dupont connectors and the right-angle pins for both the board and keyboard connector side. I did this so the connectors could be mounted underneath the keyboard as I am in the process of creating a pair of keyboard standoffs so it could be used on a PC and still sit at the required angle.
Capslock Update
We’ve had quite a bit of feedback about the caps lock light acting a bit weird. If you’re experiencing an issue then take a wire from PIN2 on the board to GND (ground). This improves the caps light issue a great deal. In our new ProMicro boards we build this as standard.
The finished article
With the wiring complete this is the finished unit.
Mounting
Rather than have the board lose in the Amiga case I will be making a new Pi-500 bracket for it to replace the Tynemouth unit. The board itself features 4 mounting holes so this should be a very simple process.
Does it work?
Well, of course it does. In Windows, both Amiga keys work as Windows keys and you can still do your CTRL-ALT-DELETE. Please note that the Hash key is on the forward-slash key as the keyboard layout on the Amiga is not the same as a standard UK keyboard. If you wanted to you could change the mapping in the board sketch code.
In the Ambian / Amiberry Raspberry Pi emulator the keyboard works flawlessly, all the keys are mapped correctly and it is VERY responsible with no noticeable lag – even the Ctrl – Amiga / Amiga reboot function works as expected. We’re still yet to work out the drive / disk access light. I will be looking at connecting PIN8 from the keyboard to the raspberry pi disk activity GPIO, I’ll be sure to update this if and when we work it out.
I mapped the ( key on the numpad as F12 in the board sketch / code. This allows the Amiberry GUI to be accessed. For those that have studied the code, it has been written with an alternative keymap when you short pin 4 to ground. This allows F1 and F2 to act as F11 and F12 – we preferred to use the numpad ( as that a duplicate of the shift 9 key.
Want us to make you one?
If you really can’t be arsed to make one yourself then we will be offering this item as a complete kit. Note that we will use the male dupont connectors. Check out our listing here as below.
Let’s hear from you!
Have you made this little project? Have you got any improvements / corrections to this article? We’re always looking for feedback on our many projects – good or bad. Please leave a comment below.
Is there a way to do this with an A600 keyboard? I have looked everywhere for a Keyrah v2b but it is impossible to find.
Thanks.
Sorry – the 600 like the Amiga 1200 uses a keyboard ribbon cable. It’s not compatible.
In the sketch I can’t see anything relating to page down key, only page up. Am I missing something?
I’ve now successfully set this up, and it works great! However, I have to press the caps lock twice to engage or disengage it. The LED goes on and off with each press, but the function doesn’t work unless you press the key twice, which means that sometimes the LED is on/off at the wrong time. I’ve taken then keyboard apart and cleaned it, and tested with original Amiga hardware and it works perfectly. Can you advise please?
Thanks
I am a complete noob when it comes to programming these,
but after reading through the sketch, I saw something would happen with caps lock
if you link pin 2 to ground,
I tested it, and hey presto the caps lock works fine now.
Thanks Chris – I’ll have to try this!
Is there any update to this? I’ve just come back to this project and am still facing the capslock issue. Can you advise anything please?
Try taking a wire from pin 2 to GND. It’s much improved the caps issue.
I’ve moved over to a Pro Micro now so it’s pretty easy as the pins are right beside each other.
Hope that helps Craig
Thanks Retro32UK, can you clarify please, pin2 of the arduino to GND of the arduino? just literally join the 2 together, with no change of code?
Thanks,
Craig
Hi Craig. Yes, just link the pins. The code is all there 🙂
So are you saying if I connect pin 2 of the arduino to GND it will solve the issue in my earlier comment?
Pin2 of the arduino or Pin2 of the amiga cable to GND?
Hat alles einwandfrei funktioniert. Vielen Dank für die Anleitung! 🙂
Everything worked perfectly. Thanks for the tutorial! 🙂
Same here…it works great! Thanks!!
fantastic work, did you ever get the hdd led to work
Hi, i am trying to build it…
I installed the IDE via apt install on my Ubuntu computer.
When uploading (or verifying) from the IDE it says that “keyboard.h” wasn’t found.
Where do i get it from?
i managed to set it up now. It Works. And i am writing this on my Amiga keyboard now.
wow.
But i have a problem. In fsUAE the emulator resets (reboots) whenever i connect the Leonardo to the computer. As if ctrl+leftAmiga+rightAmiga was pressed. It happens only when the Amiga keyboard is connected to the Leonardo. Without the reset isn’t triggered.
In Linux/Windows one wouldn’t know as this combination doesn’t do anything.